Installation - RHD
- Before installing the instrument panel, be certain the (2) instrument panel wire harness connector retaining screws have been removed. The wire bundle should hang between the two connector mounting tabs on the instrument panel (Fig 1).
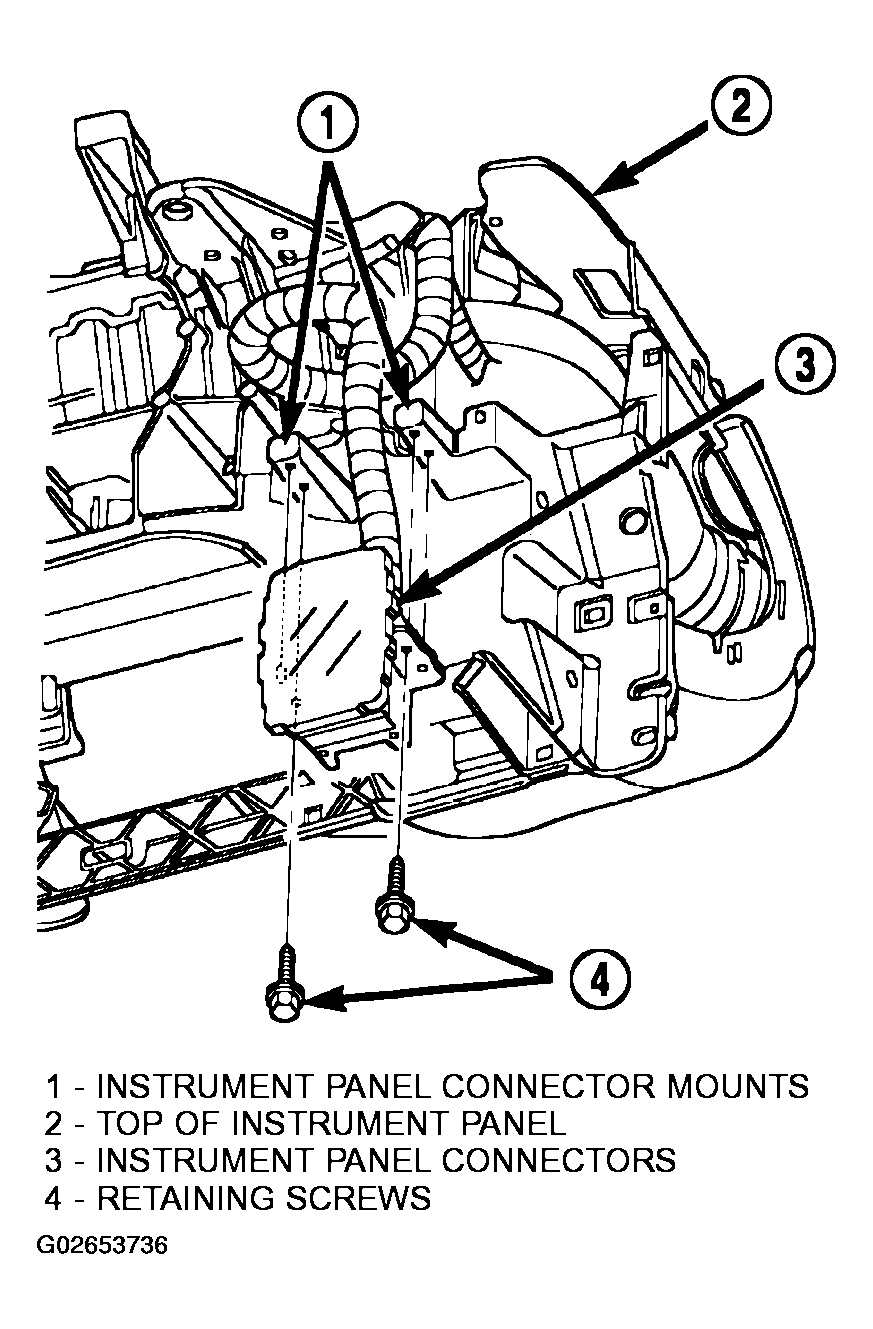 Courtesy of DAIMLERCHRYSLER CORP.
- If replacing the instrument panel, transfer all parts to new instrument panel.
- With the assistance from another person, install the instrument panel into the vehicle. Guide the HVAC control head through the instrument panel opening while installing the assembly.
- Install the (4) instrument panel retaining bolts to the right and left side body side cowls.
- Install the (2) instrument panel retaining bolts which attach the instrument panel to the body at the tunnel bracket.
- Install the (4) instrument panel retaining fasteners to the top of the instrument panel.
- Connect the radio antenna located below the glove compartment.
- Connect the left door wire harness connector.
- Connect the right door wire harness connector.
- Connect the ACM, parking brake, and transmission range indicator lamp wiring connectors if equipped.
- Connect the (3) wire harnesses to the top of the instrument panel.
- Connect the instrument panel wire harness connector. Install the plastic clips to the connector retainer. To connect the harness install the (2) screws retaining the instrument panel connector to the steering column casting. Connect the instrument panel wire harness to the right kick panel.
- Clip the Data Link Connector (DLC) to the right side of the instrument panel reinforcement.
- Pull the control through the instrument panel and rotate the control horizontally to position the assembly through the hole in the instrument panel. Install the (2) HVAC control head retaining screws.
- Install the center bezel. Gently push it to snap the (4) retaining clips.
- Install the (2) screws to the center instrument bezel.
- Install the (4) HVAC control knobs by pushing them straight on the switch shaft by hand.
- Position the A/C outlets over the outlet housing and firmly snap into place. Verify that they pivot properly.
- Install the right and left side lower kick panels and replace the weather-stripping if removed.
- Install the steering column into the vehicle. Install the (4) steering column retaining nuts.
- Connect the upper and lower steering column shafts. Install the steering shaft coupler pinch bolt.
- Install the steering shaft coupler pinch bolt retaining pin.
- Connect the clockspring, wiper/washer, multifunction, ignition and if equipped, the two SKIM module connections and the shift interlock cable on automatic transaxle equipped vehicles.
- Install the (2) screws retaining the steering column shroud and install the shroud on the steering column.
- Install the (2) screws retaining the lower steering column cover.
- Install the instrument cluster bezel. Refer to INSTRUMENT PANEL TOP COVER .
- Install the instrument panel top cover.
- Install the (2) screws retaining the instrument panel top cover. Located in the defroster grille.
- Install the right and left side A-pillar trims. Refer to INTERIOR
article.
- Install the right and left side instrument panel end cover.
- Install the floor console. Refer to
FLOOR CONSOLE - REMOVAL
.
- Disconnect the battery negative cable.