Glove Box Assembly: Removal
- Disconnect and isolate the battery negative cable.
- Remove the cluster bezel from the instrument panel. (Refer to CLUSTER BEZEL - REMOVAL ).
- Remove the lower bezel from the instrument panel. (Refer to LOWER BEZEL - REMOVAL ).
- Remove the screw that secures the inboard side of the glove box module to the instrument panel behind the lower bezel.
- Remove the passenger side end cap from the instrument panel. (Refer to END CAP - REMOVAL - PASSENGER SIDE ).
- Remove the screw that secures the outboard end of the glove box module to the right end of the instrument panel behind the passenger side end cap.
- Remove the four screws that secure the bottom of the glove box module to the instrument panel (Fig 1).
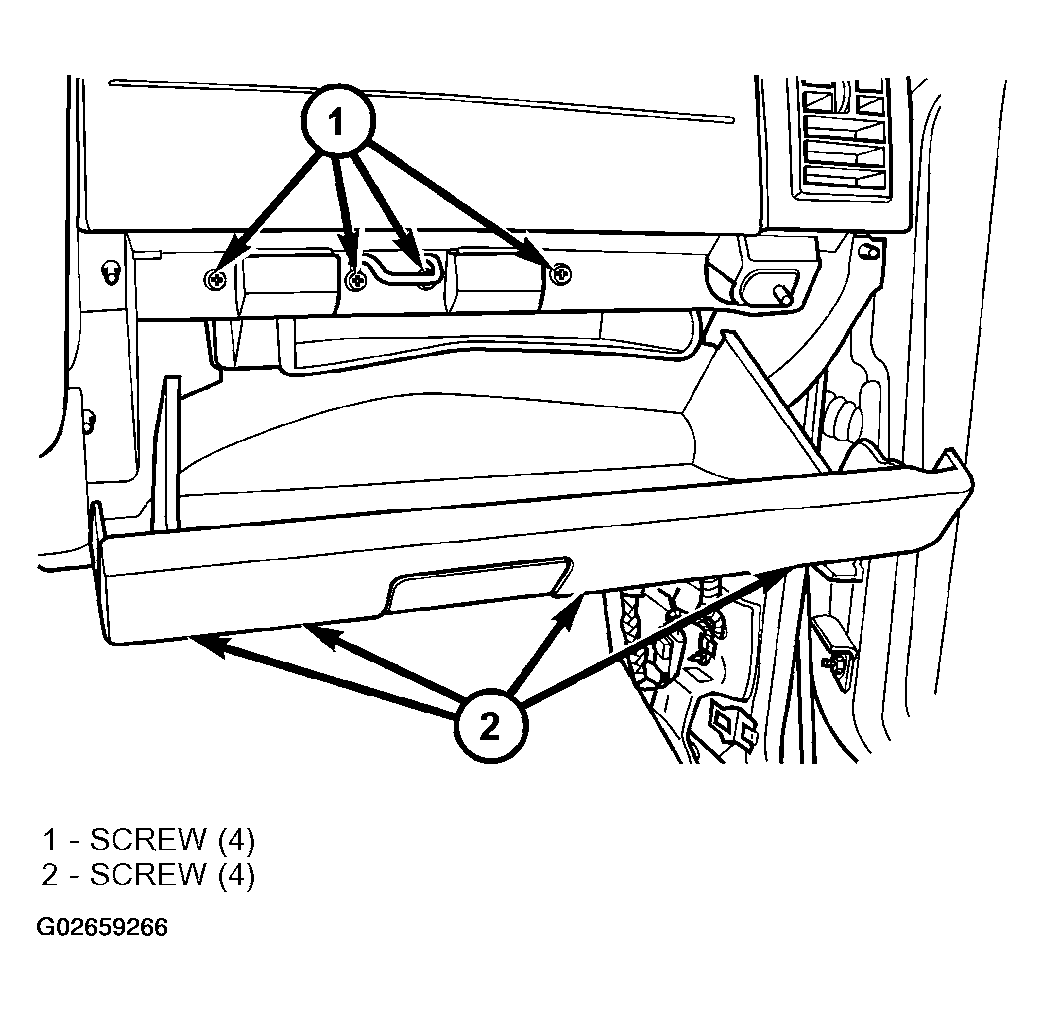 Courtesy of DAIMLERCHRYSLER CORP.
- Unlatch and open the glove box.
- Remove the latch striker from the upper glove box opening reinforcement. (Refer to GLOVE BOX LATCH STRIKER - REMOVAL ).
- Remove the two remaining screws that secure the top of the glove box module to the upper glove box opening reinforcement.
- If the vehicle is equipped with a glove box lamp, pull the glove box module away from the instrument panel far enough to access and disconnect the instrument panel wire harness connector from the glove box lamp and switch connector receptacle (Fig 2).
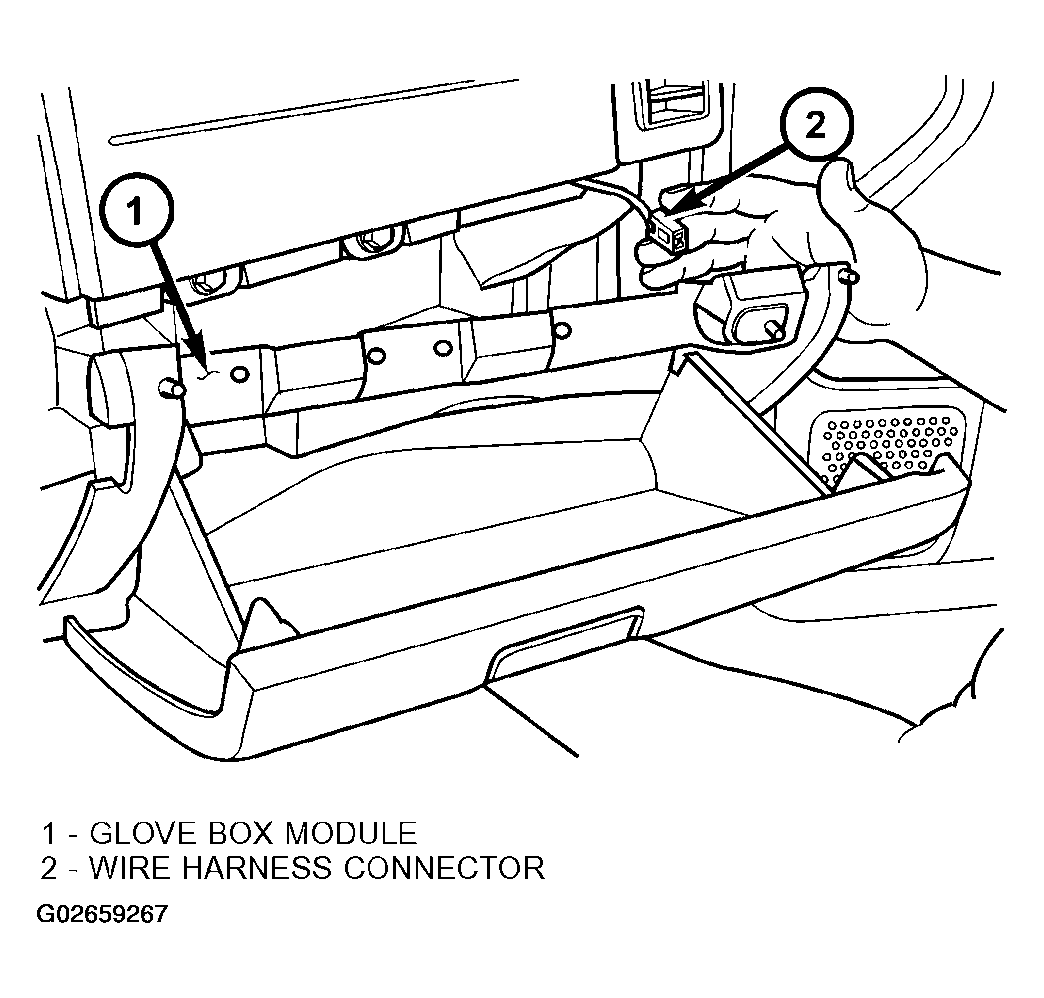 Courtesy of DAIMLERCHRYSLER CORP.
- Remove the glove box module from the instrument panel.