Master Cylinder
- Clamp master cylinder in vise. Install bleed tubes in outlet ports. Fill reservoirs with clean brake fluid. Ensure bleed tubes are below brake fluid level.
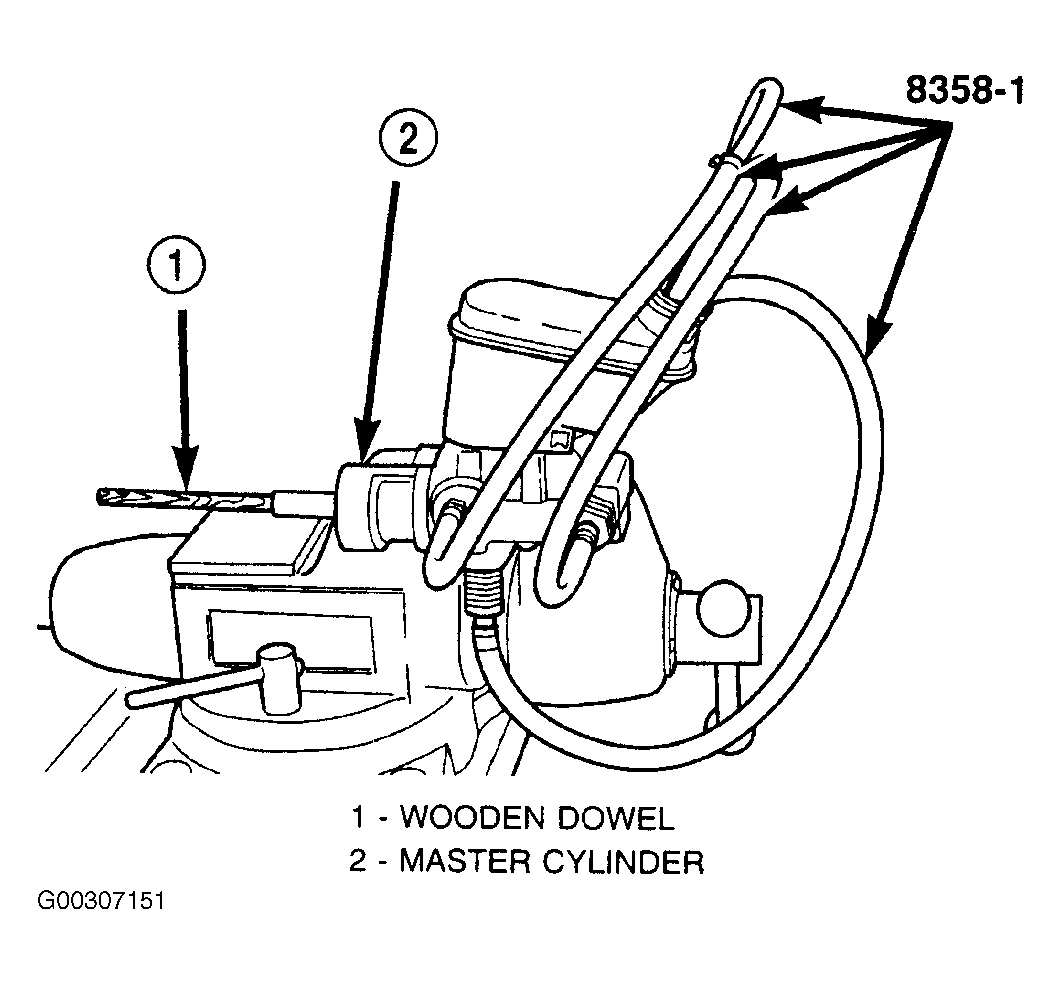
- If equipped with ABS master cylinder, go to next step. If equipped with non-ABS master cylinder, attach 4 Master Cylinder Bleed Tubes (8358-1) to the 4 ports of the master cylinder and tighten each in place. See Fig 1
. The bleed tubes for the ports pertaining to the rear brakes are made to attach to the proportioning valves screwed into the master cylinder. Position the other end of the tubes into the master cylinder reservoir so their outlets are below the surface of the brake fluid in the reservoir when filled.
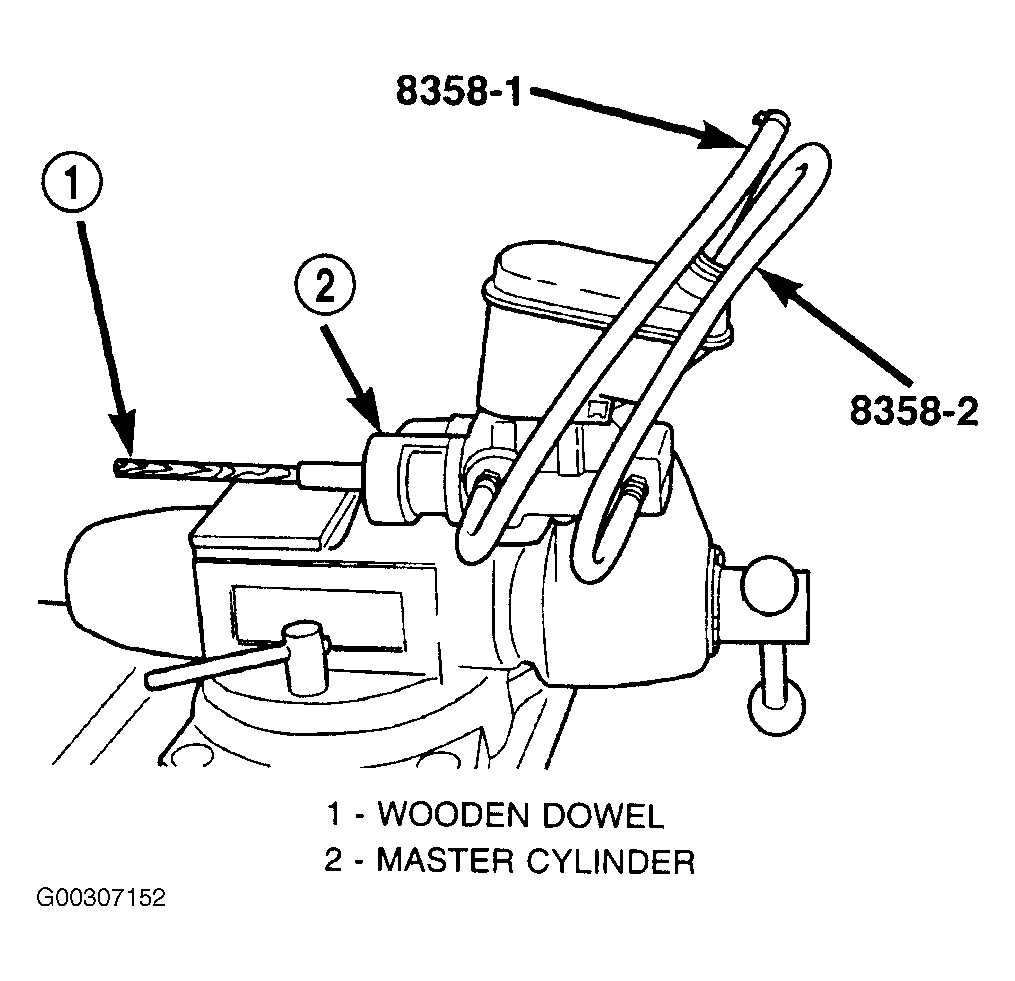
- On models with ABS, attach Master Cylinder Bleed Tube (8358-1) to the primary port of the master cylinder and tighten in place. See Fig 2
. Attach Master Cylinder Bleed Tube (8358-2), to the secondary port of the master cylinder and tighten into place. Position the other end of the tubes into the master cylinder reservoir so their outlets are below the surface of the brake fluid in the reservoir when filled.
- On all models, fill the brake fluid reservoir with fresh Mopar(R) brake fluid, or equivalent conforming to DOT 3 specifications.
- Using a wooden dowel as a push rod, press the pistons inward slowly applying brake pressure, then release the pressure, allowing the pistons to return to the released position. See Fig 1
or Fig 2
. Repeat this several times until all air bubbles are expelled out of the tubes and master cylinder bore.
- Install the fill cap on the reservoir.
- Remove the bleed tubes from the master cylinder and plug the outlet ports.
- Install the fill cap on the reservoir.
- Remove the master cylinder from the vise.
 Courtesy of CHRYSLER CORP.
 Courtesy of CHRYSLER CORP.