Lower Pad
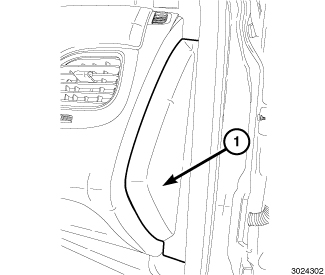 Courtesy of CHRYSLER GROUP, LLC
- Disconnect the negative battery cable.
- Partially remove the weatherstrip along the front door opening.
- Using trim stick (special tool #C-4755, Trim Stick) or equivalent, disengage clips holding the end cap (1) to the instrument panel and remove the end cap. Repeat for the opposite side.
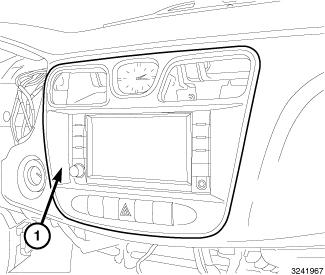 Courtesy of CHRYSLER GROUP, LLC
- Using trim stick (special tool #C-4755, Trim Stick) or equivalent, remove and disconnect the center stack bezel (1).
- Remove the floor console. Refer to CONSOLE, CENTER, REMOVAL .
 Courtesy of CHRYSLER GROUP, LLC
- Remove the glove box assembly (1). Refer to GLOVE BOX, INSTRUMENT PANEL, REMOVAL .
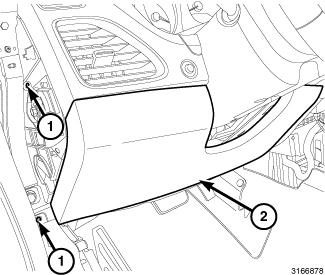 Courtesy of CHRYSLER GROUP, LLC
- Remove the lower steering column opening trim panel (2). Refer to COVER, STEERING COLUMN OPENING, REMOVAL .
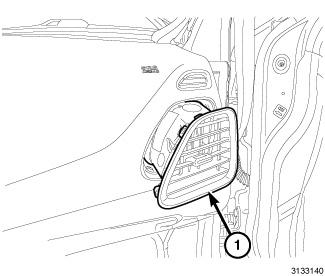 Courtesy of CHRYSLER GROUP, LLC
- Remove the outlet vents (1) on the driver and passenger sides. Refer to OUTLET, AIR, REMOVAL
.
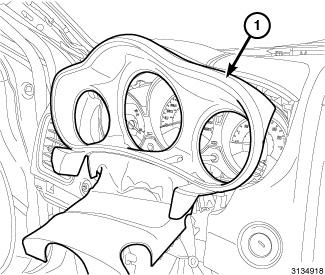 Courtesy of CHRYSLER GROUP, LLC
- Remove the instrument cluster trim bezel (1). Refer to BEZEL, INSTRUMENT CLUSTER, REMOVAL .
- Remove the instrument cluster. Refer to REMOVAL
.
- Using a small pry tool, remove the ignition trim ring.
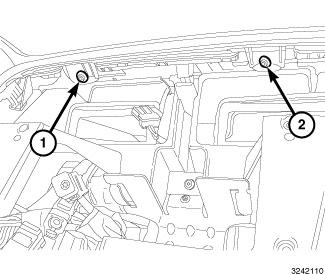 Courtesy of CHRYSLER GROUP, LLC
- Remove the two fasteners (1) securing the lower pad to the I/P located above the center stack cavity.
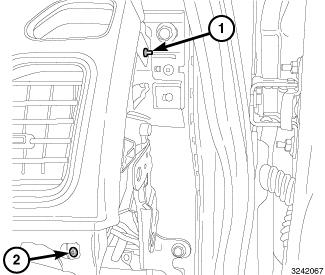 Courtesy of CHRYSLER GROUP, LLC
- Remove the two fasteners (1, 2) securing the lower pad to the I/P located on the passenger side.
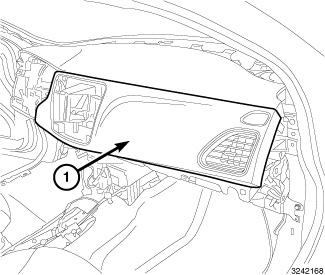 Courtesy of CHRYSLER GROUP, LLC
- Using trim stick (special tool #C-4755, Trim Stick) or equivalent and working across from the passenger to driver side, disengage the lower retaining clips securing the lower I/P pad (1) to the base instrument panel.
- Pull the lower I/P pad (1) rearward to disengage the remaining retaining clips and remove.
 Courtesy of CHRYSLER GROUP, LLC
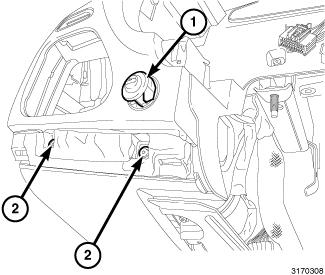
- Remove the two fasteners (2) below the vent and trunk release switch securing the LH lower trim panel to the base instrument panel.
- Remove and disconnect the trunk release switch (1).
- Grasp the LH lower trim panel near the defroster duct and pull rearward to disengage the retaining clips to remove.