Water Leak - Zone B
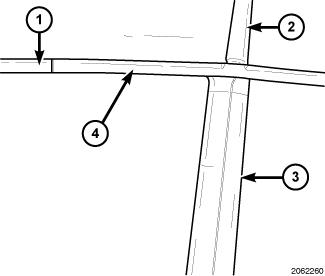 Courtesy of CHRYSLER GROUP, LLC
- Middle rail weatherstrip (4) not installed correctly.
- Adjust the weatherstrip. Refer to WEATHERSTRIP, CONVERTIBLE TOP, ADJUSTMENTS .
- Replace the weatherstrip. Refer to WEATHERSTRIP, CONVERTIBLE TOP, REMOVAL .
- Retest for water leaks. Refer to CONVERTIBLE TOP, CST AND RHT COMMON COMPONENTS, STANDARD PROCEDURE .
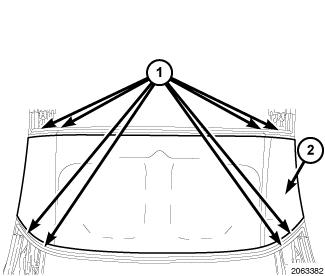 Courtesy of CHRYSLER GROUP, LLC
- Mid panel (2) weatherstrip not installed correctly.
- Firmly seat the weatherstrip into place.
- Faulty mid panel weatherstrip, replace the weatherstrip. Refer to WEATHERSTRIP, CONVERTIBLE TOP, REMOVAL .
- Retest for water leaks. Refer to CONVERTIBLE TOP, CST AND RHT COMMON COMPONENTS, STANDARD PROCEDURE .
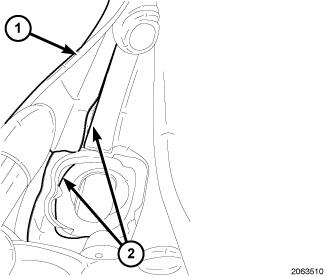 Courtesy of CHRYSLER GROUP, LLC
- Mid panel weatherstrip (1) delaminated (2).
- Faulty mid panel weatherstrip. Replace the weatherstrip. Refer to WEATHERSTRIP, CONVERTIBLE TOP, REMOVAL .
- Retest for water leaks. Refer to CONVERTIBLE TOP, CST AND RHT COMMON COMPONENTS, STANDARD PROCEDURE .
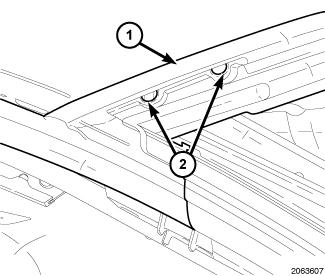 Courtesy of CHRYSLER GROUP, LLC
- Mid panel weatherstrip (1) attachment screws (2) missing or installed incorrectly.
- Install the missing or incorrect screws to the mid panel weatherstrip.
- Faulty mid panel weatherstrip, replace the weatherstrip. Refer to WEATHERSTRIP, CONVERTIBLE TOP, REMOVAL .
- Retest for water leaks. Refer to CONVERTIBLE TOP, CST AND RHT COMMON COMPONENTS, STANDARD PROCEDURE .
 Courtesy of CHRYSLER GROUP, LLC
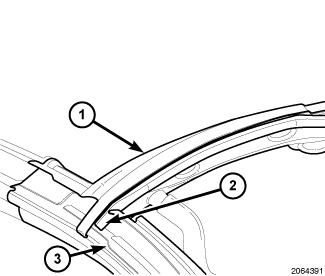
- Foam (2) short or not attached to mid panel weatherstrip (1).
- Faulty foam, replace the foam on the mid panel weatherstrip.
- Faulty mid panel weatherstrip. Replace the weatherstrip. Refer to WEATHERSTRIP, CONVERTIBLE TOP, REMOVAL .
- Retest for water leaks. Refer to CONVERTIBLE TOP, CST AND RHT COMMON COMPONENTS, STANDARD PROCEDURE .
 Courtesy of CHRYSLER GROUP, LLC
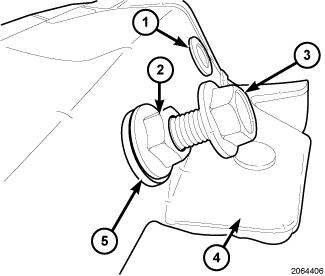
- Riv-nuts (1) not installed correctly.
- If the riv-nut is loose, find a screw (3) that threads into riv-nut.
- Place a nut (2) on the screw and then put a washer (5) on and screw into the riv-nut.
- Install the riv-nut into the mid panel (4) hole.
- Using wrench hold screw end and drive nut toward panel, this will flare the riv-nut.
- Remove screw/nut/washer and verify no movement of riv-nut to panel.
- Retest for water leaks. Refer to CONVERTIBLE TOP, CST AND RHT COMMON COMPONENTS, STANDARD PROCEDURE .
 Courtesy of CHRYSLER GROUP, LLC
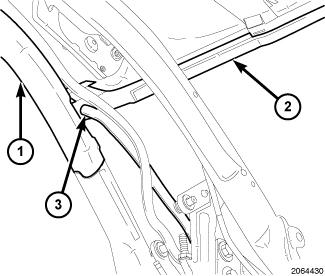
- Drain tubes (3) not installed correctly.
- Adjust the routing of the drain tubes.
- Faulty drain tubes, replace the drain tubes.
- Retest for water leaks. Refer to CONVERTIBLE TOP, CST AND RHT COMMON COMPONENTS, STANDARD PROCEDURE .
 Courtesy of CHRYSLER GROUP, LLC
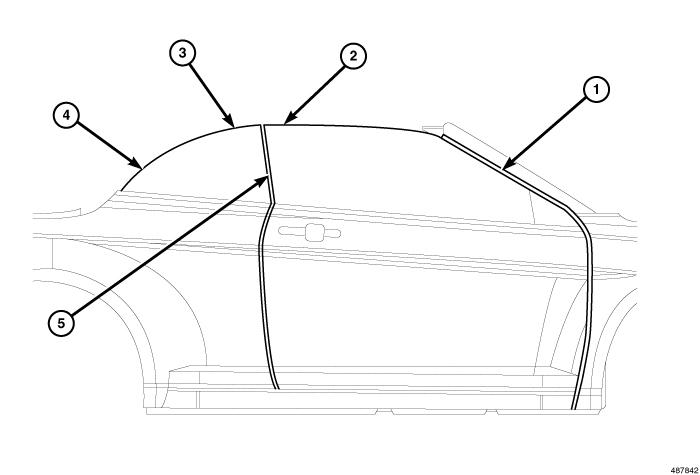
- Door and quarter glass not adjusted properly.
- Adjust door glass. Refer to GLASS, ADJUSTMENTS .
- Retest for water leaks. Refer to CONVERTIBLE TOP, CST AND RHT COMMON COMPONENTS, STANDARD PROCEDURE .