Removal - I/P Base Panel
 Courtesy of CHRYSLER GROUP, LLC
- Remove the instrument panel from the vehicle. Refer to PANEL, INSTRUMENT, REMOVAL .
- Remove the instrument panel top pad. Refer to PAD, INSTRUMENT PANEL, REMOVAL .
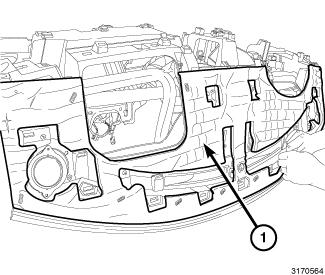
- Remove the insulator (1) from the top of the instrument panel.
- Remove the sun sensor and wiring harness. Refer to SENSOR, INFRARED TEMPERATURE, REMOVAL
.
- Remove the compass transducer module, antenna and wiring harness. Refer to ANTENNA, NAVIGATION, REMOVAL
and MODULE, HANDS FREE (HFM), REMOVAL
.
- If equipped, remove the remote start antenna and harness. Refer to ANTENNA, REMOTE START, REMOVAL
.
- Remove the speakers. Refer to SPEAKER, REMOVAL
.
- Remove the four fasteners securing the I/P base panel to the structure/reinforcement located in the top middle area of the I/P.
 Courtesy of CHRYSLER GROUP, LLC
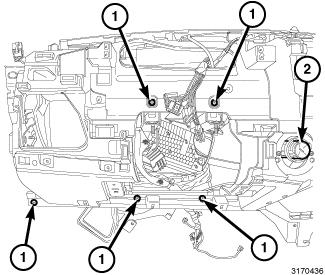
- Remove and disconnect the ignition switch (2).
- Remove the five fasteners (1) securing the LH I/P base panel to the I/P structure/reinforcement.
 Courtesy of CHRYSLER GROUP, LLC
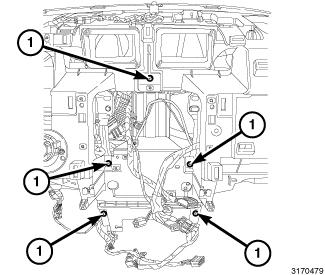
- Remove the five fasteners (1) securing the center stack area to the I/P structure/reinforcement.
 Courtesy of CHRYSLER GROUP, LLC
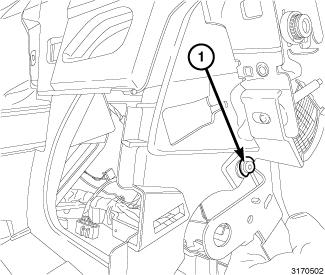
- Remove the fastener (1) located on the side. Repeat for the opposite side.
- Remove the two glove box striker fasteners.
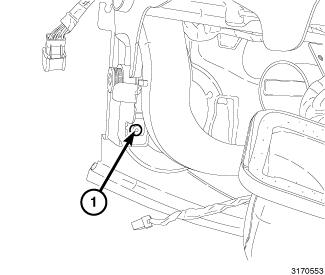 Courtesy of CHRYSLER GROUP, LLC
- Looking from underneath, remove the fastener near the outboard duct. Repeat for the opposite side.
- Remove the I/P base panel from the structure.
- If necessary, separate the ductwork from the I/P base panel.