- Lower the front door and quarter glass halfway down.
- Using masking tape or equivalent, place tape as shown (1 and 2).
- On the front window (2), measure and mark two lines, one at 7mm and another at 11mm from the top of the window.
- Raise the windows to the full up position and close the doors with top fully closed.
- The top lines on the tape should not be visible whereas the bottom line should be visible.
- If adjustment of the front door window is required, remove the front door trim panel. See Body/Door - Front/PANEL, Door Trim - Removal .
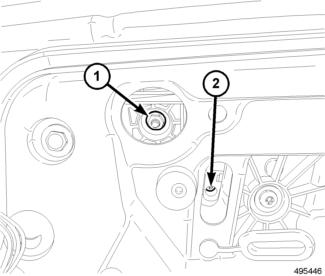
- Remove the two access plug covers on the door module to gain access to the adjustment screws.
 Courtesy of CHRYSLER LLC
- If the top line is visible, the window(s) must be adjusted up. If the bottom line is not visible the window must be adjusted down.
- If the front of the glass must be adjusted, go to 10. If the rear of the glass must be adjusted, go to 11.
NOTE:
One revolution of the adjustment screw equals 1mm.
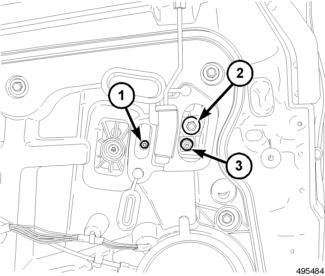
- At the front of the door, rotate the adjustment screw (2) clockwise (CW) to raise the glass. Rotate the adjustment screw counterclockwise (CCW) to lower the glass.
 Courtesy of CHRYSLER LLC
NOTE:
One revolution of the adjustment screw equals 1mm.
- At the rear of the door, rotate the adjustment screw (1) CW to raise the glass. Rotate the adjustment screw CCW to lower the glass.
- After adjustments have been made, close the door and verify that the top line on the tape is not visible and the bottom line is. Repeat 10 and 11 as necessary.
- Install the two access plug covers.
- Install the front door trim panel. See Body/Door - Front/PANEL, Door Trim - Installation .