UNIT, Headlamp: Removal: Removal
 Courtesy of CHRYSLER LLC
- Raise vehicle on a hoist.
- Remove wheel and tire.
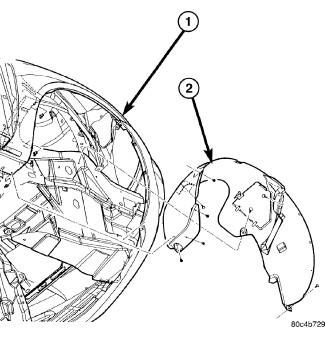
- Remove splash shield (2) as necessary to access headlamp housing.
 Courtesy of CHRYSLER LLC
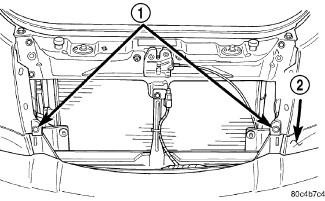
- Remove grille.
- Remove the two fascia bolts (1) from behind the grille.
 Courtesy of CHRYSLER LLC
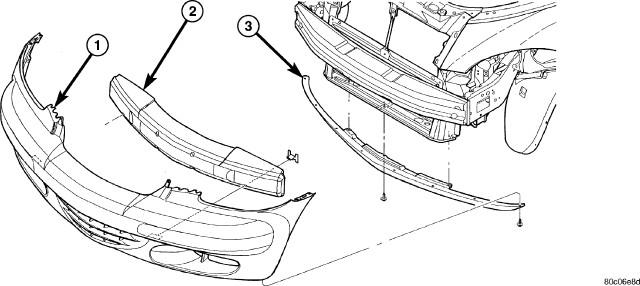
- Remove fasteners attaching fender to fascia on the side being worked on.
- Remove the three fasteners holding the lower fascia (3) to the lower radiator crossmember.
 Courtesy of CHRYSLER LLC
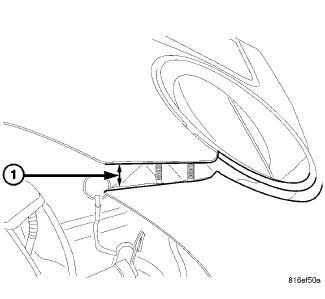
- Make sure there is a slight gap (1) between the fender and fascia.
 Courtesy of CHRYSLER LLC
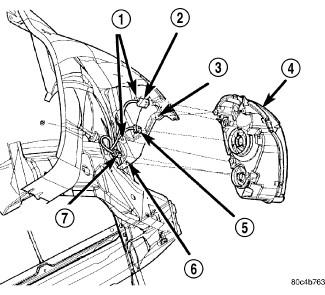
- Disconnect wire connectors (2, 5, and 7).
- Remove four nuts (1, 3, and 6) attaching headlamp housing (4).
 Courtesy of CHRYSLER LLC
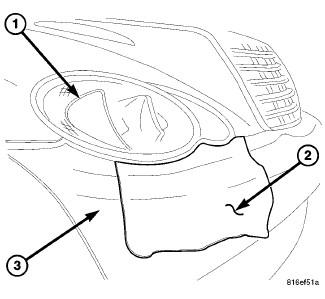
- Once the fascia (3) is loosened on the appropriate side and there is a gap between the fascia and the headlamp unit (1), place a shop towel underneath the headlamp unit (2) on the fascia (3) to protect it from scratches and marring.
 Courtesy of CHRYSLER LLC
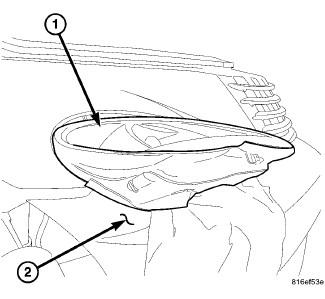
- Tilt the bottom of the headlamp unit (1) forward and then pull straight out of fender/fascia opening, taking care not to damage headlamp unit, fender, or fascia (2).