- Lubricate the camshaft bearing journals with clean engine oil.
- Install the camshaft (5) with the camshaft sprocket alignment pin in the 12 o'clock position.
- Install the camshaft bearing caps (6) in their proper position. See Fig 1.
WARNING:
Prior to installing the rocker shafts (3,7) , ensure the camshaft sprocket alignment pin on the camshaft is in the 12 o'clock position. Failure to position the camshaft may result in damage to the valvetrain and pistons.
- Lubricate the roller portion of the rocker arms (1,4) with clean engine oil.
- Install the rocker arm shaft (3,7) assemblies on the camshaft bearing caps (6), camshaft (5), and valve stems.
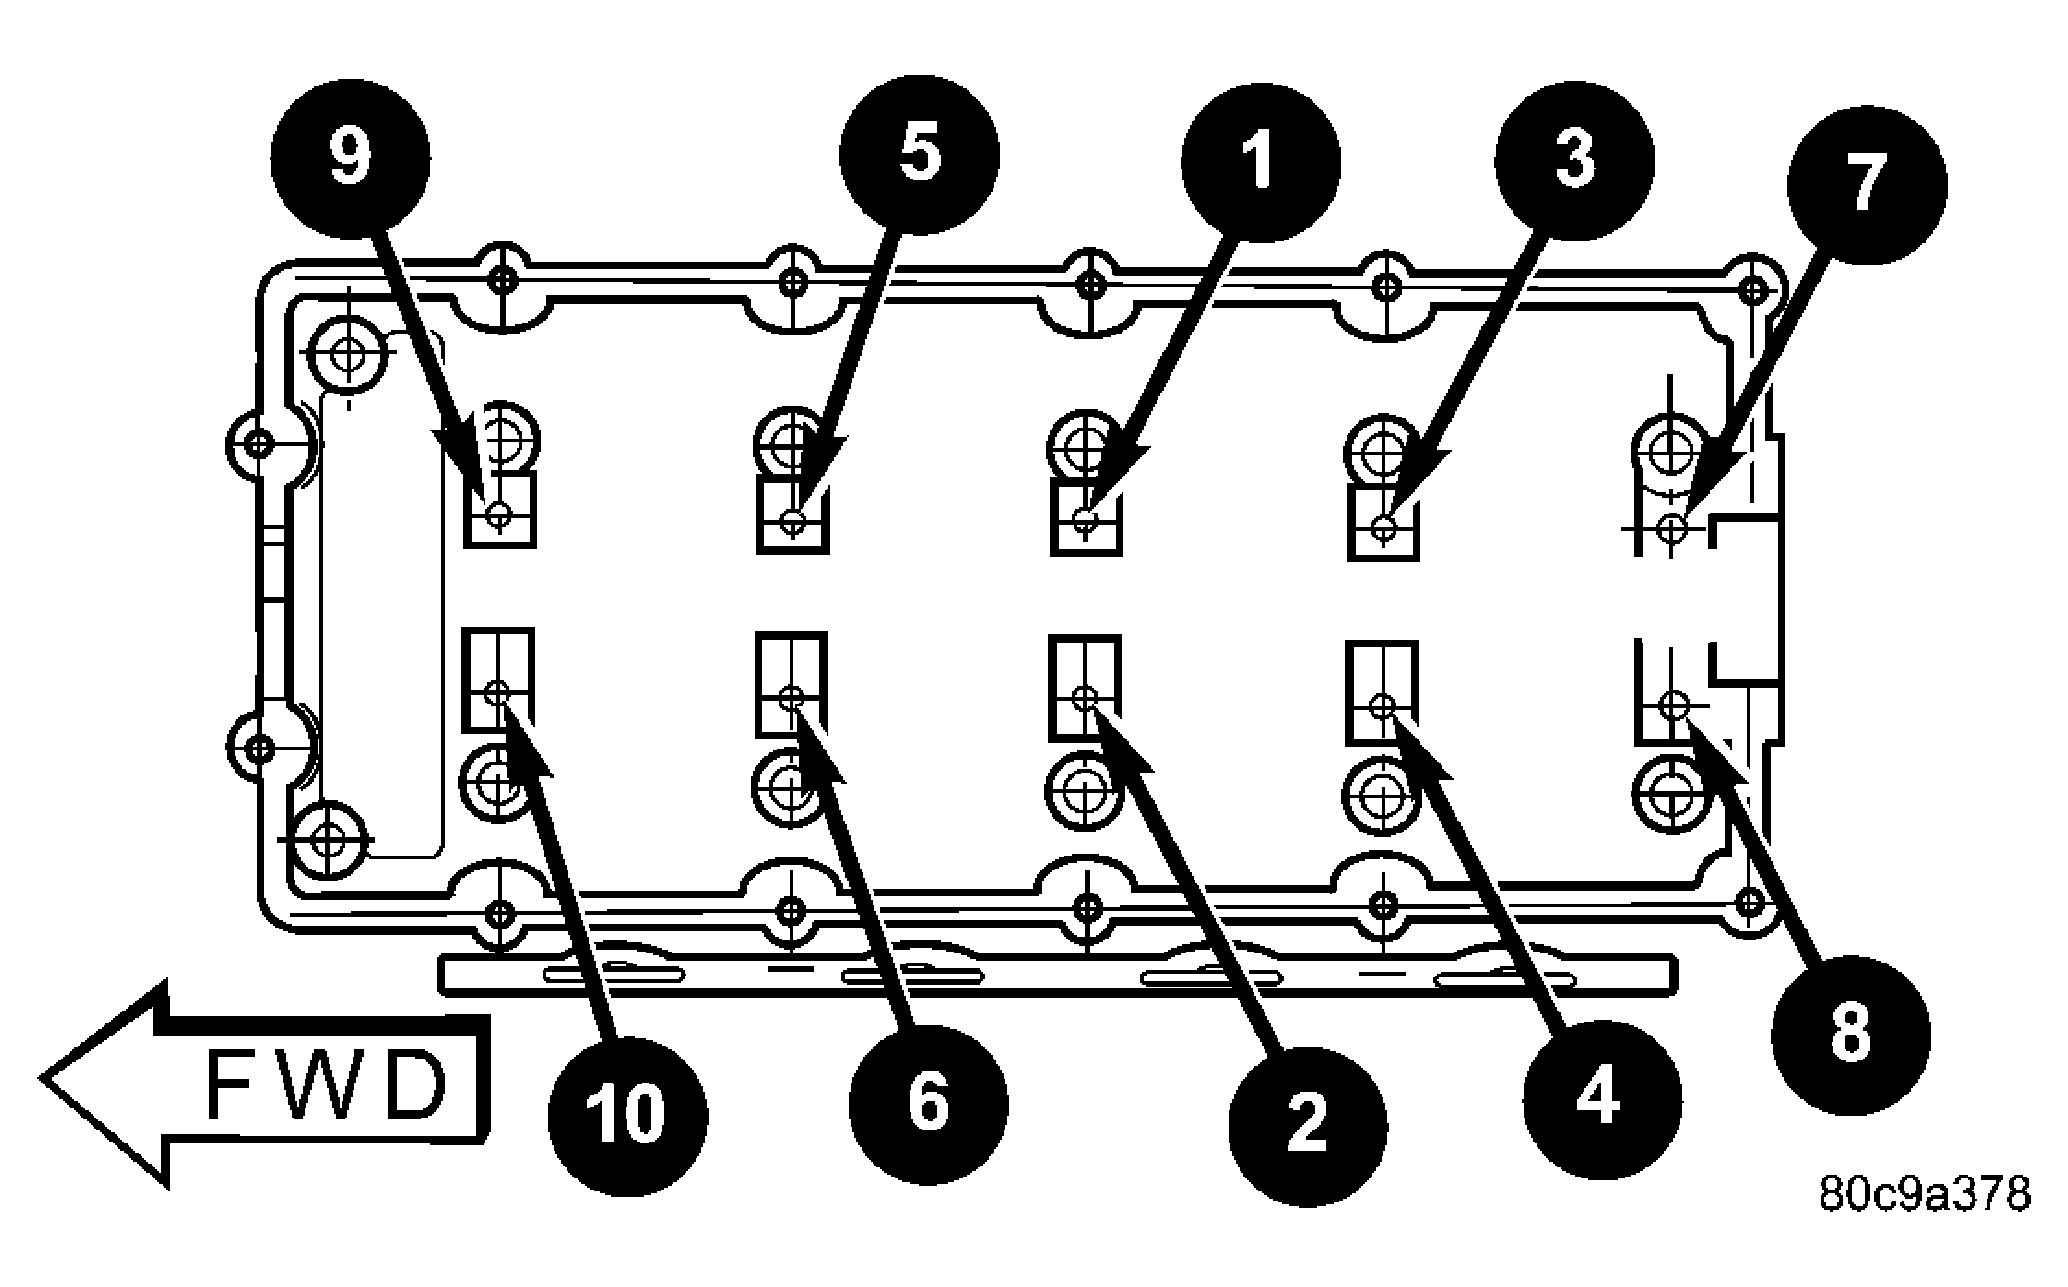
- Hand start rocker arm shaft/camshaft bearing cap bolts.
 Courtesy of DAIMLERCHRYSLER CORP.
NOTE:
When tightening the rocker arm shaft/camshaft bearing cap bolts, ensure the camshaft bearing caps are fully seated and the roller rocker arms remain seated in their proper position.
- Tighten the rocker arm shaft/camshaft bearing cap bolts gradually in the sequence shown. See Fig 2. Final torque all bolts to 25 N.m (225 in. lbs.).
NOTE:
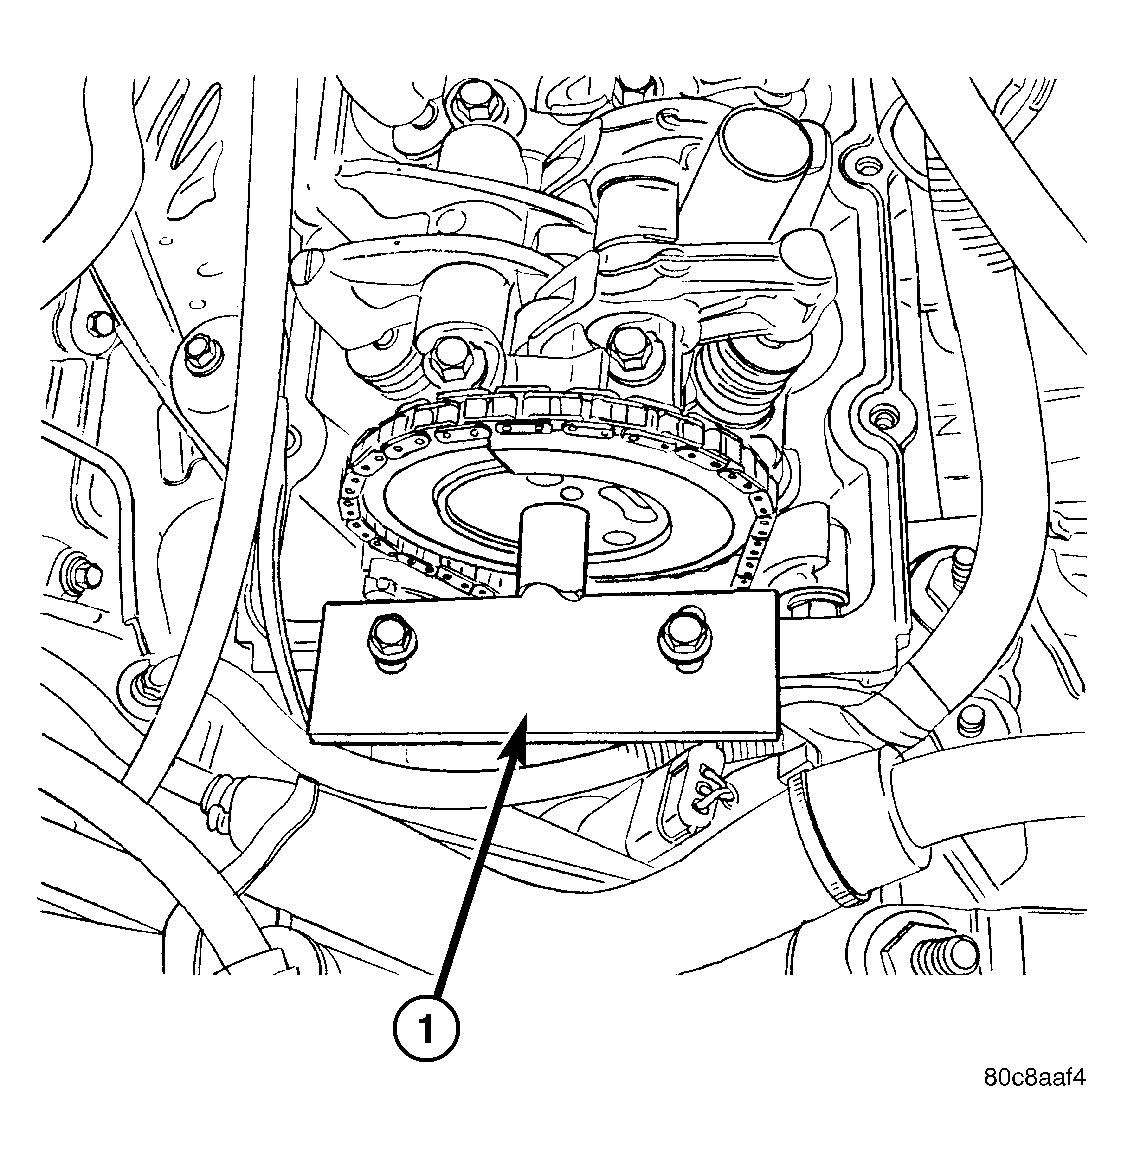
It may be necessary to use the flats on the front of the camshaft to slightly rotate camshaft for camshaft sprocket installation.
 Courtesy of DAIMLERCHRYSLER CORP.
- Slide camshaft sprocket off Special Tool 8446 (1) and into it's mounting position. Remove Special Tool 8446 (1) from cylinder head. See Fig 3.
 Courtesy of DAIMLERCHRYSLER CORP.
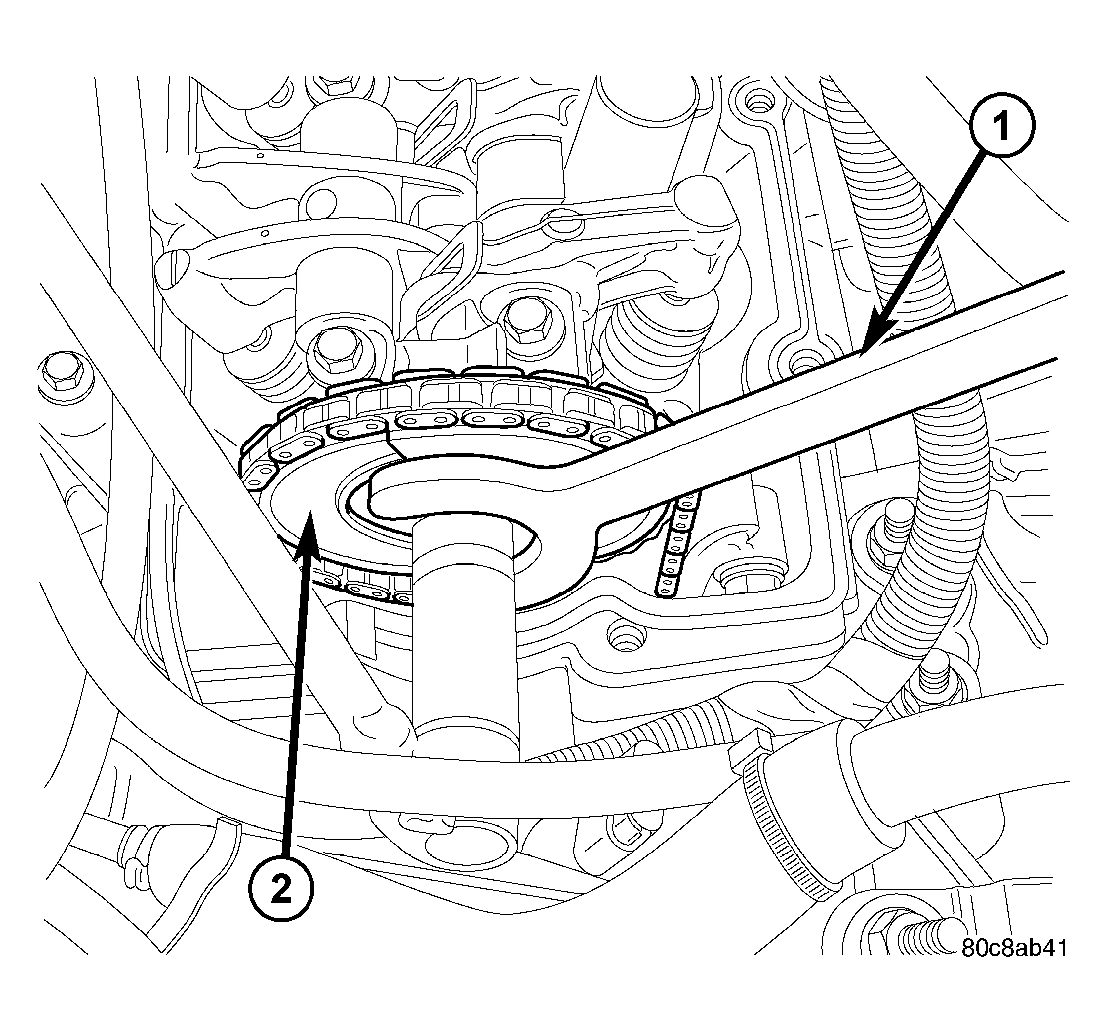
| 1 - CAMSHAFT SPROCKET HOLDING WRENCH 8435 |
| 2 - CAMSHAFT |
CAUTION:
Do Not use an impact wrench for tightening the camshaft sprocket bolt. Damage to the camshaft timing pin can result. Use a hand wrench only.
- Install camshaft sprocket bolt. While holding the camshaft sprocket (2) with Special Tool 8435 (1), torque bolt to 115 N.m (85 ft. lbs.). See Fig 4.
- Install camshaft position sensor. Torque fastener to 10 N.m (85 in. lbs.). Reconnect connector.
- Install cylinder head cover
(Refer to ENGINE/CYLINDER HEAD/CYLINDER HEAD COVER - INSTALLATION)
.
- Connect negative battery cable.