Clutch Assembly: Installation
- Ensure clutch coil mounting surface is clean. Install clutch coil. Ensure electrical connection is correctly positioned. Position Coil Replacer (T91L-19623-CH) onto coil and Coil Pressing Adapter (T89P-19623-EH) onto coil replacer.
- Install 2-jaw puller (D80L-1002-L) on compressor and coil replacer. Engage puller jaws with compressor front mounts. Carefully tighten puller until clutch coil bottoms completely against compressor. DO NOT use air-powered tools when installing clutch coil.
- Carefully install pulley assembly onto compressor, ensuring that it is properly aligned. Install pulley assembly snap ring, with beveled side out. Install shim(s) and clutch plate. Install a NEW clutch plate bolt, and tighten to 98-123 INCH lbs. (11-14 N.m).
- Using a feeler gauge, measure air gap between clutch plate and pulley assembly mating surfaces in 3 places. Air gap should be 0.014-0.030" (0.36-0.75 mm). If air gap is not as specified, add or remove shims as necessary.
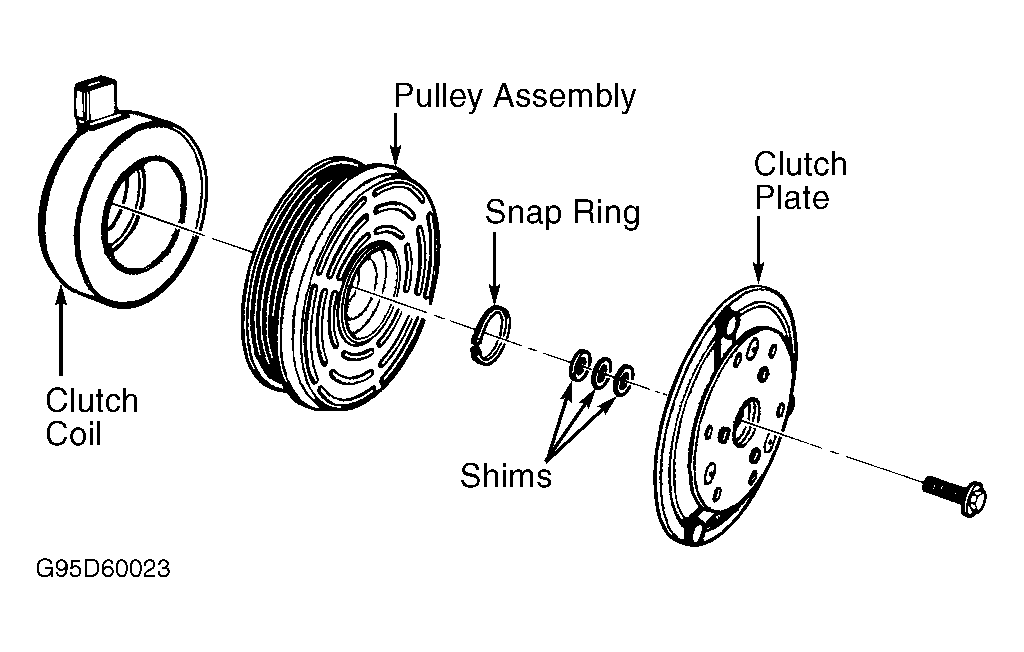 Courtesy of FORD MOTOR CO.