Coolant Temperature Gauge
- Disconnect coolant temperature sending unit connector located on left side of engine compartment near intake duct bellows. Connect test light between harness connector terminal and ground. See Fig 1
. Turn ignition switch on. Monitor condition of test light and coolant temperature gauge needle. If test light comes on and gauge needle moves, test coolant temperature sending unit. See COOLANT TEMPERATURE SENDING UNIT TEST
under COMPONENT TESTS. If sending unit tests okay, go to next step. If test light does not come on and gauge needle does not move, check for open in Red/Yellow wire between instrument cluster and coolant temperature sending unit. See WIRING DIAGRAMS
. If test light comes on and gauge needle does not move, replace coolant temperature gauge. See INSTRUMENT CLUSTER GAUGES
under REMOVAL & INSTALLATION.
- Remove instrument cluster to gain access to gauge. See INSTRUMENT CLUSTER GAUGES
under REMOVAL & INSTALLATION. Measure resistance between specified gauge terminals. See COOLANT TEMPERATURE GAUGE RESISTANCE
table. Replace gauge if readings are not as specified.
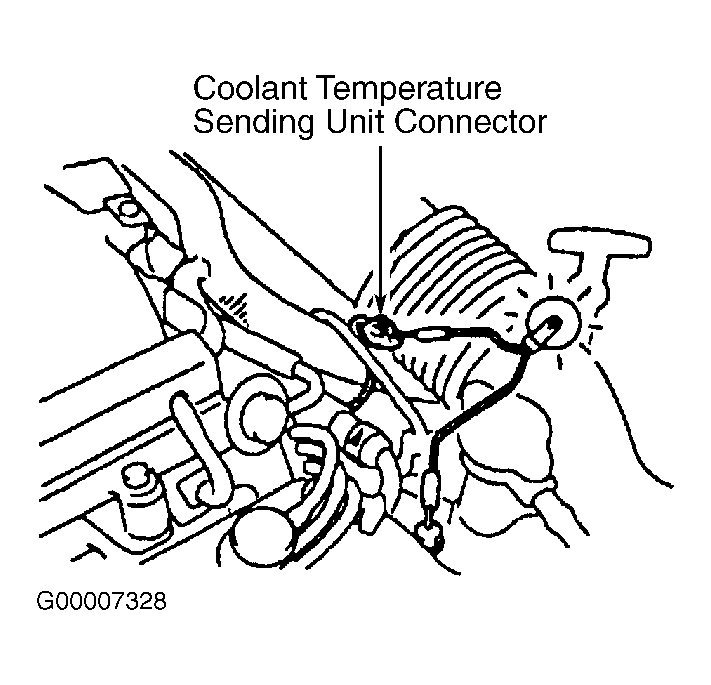 Courtesy of DAIMLERCHRYSLER CORP.
 COOLANT TEMPERATURE GAUGE RESISTANCE
| Terminals |
Resistance (Ohms) |
| A & B |
161-197 |
| A & C |
51.3-56.7 |
| B & C |
210-256 |
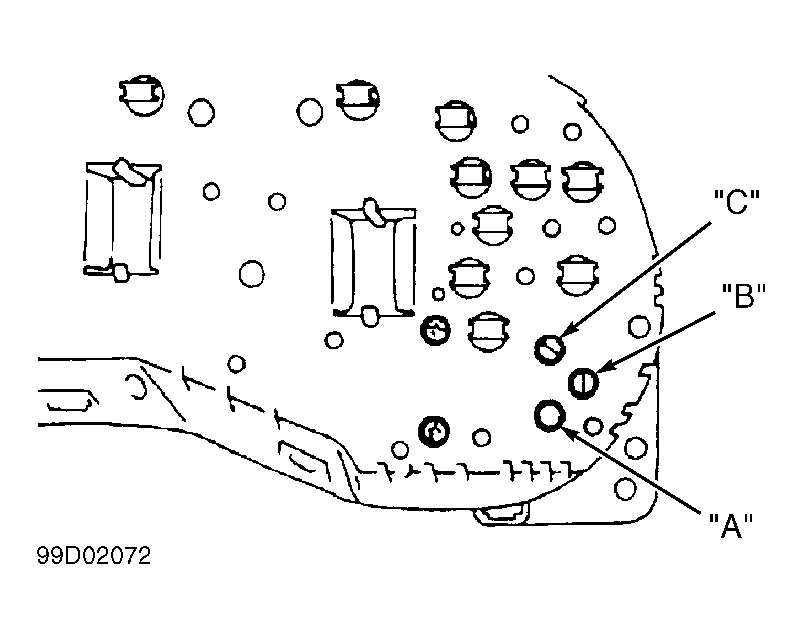 Courtesy of CHRYSLER CORP.