| 1 |
Verify that the customer's concern is present.
Does the vehicle operate normally? |
System OK |
Go to Step 2 |
| 2 |
Did you verify if any related service bulletins exist for the concern and perform the necessary inspections? |
Go to Step 3 |
Search for any bulletins related to your issue. Review and perform any applicable tasks as outlined by the bulletin. |
| 3 |
Did you review the Power Folding Seat Malfunction (2nd Row) diagnostic and perform the necessary inspections? |
Go to Step 4 |
Go to Power Folding Seat Malfunction (2nd Row)
, or Power Folding Seat Malfunction (3rd Row) |
| 4 |
With the vehicle powered ON, does the seat function with any of the power fold buttons? |
System OK |
Go to Step 5 |
| 5 |
Does the seat release from upright position when functioned manually with the fold handle? |
Go to Step 6 |
Go to Step 7 |
| 6 |
- Remove the rear seat recliner outer finish cover - outboard. Rear Seat Recliner Outer Finish Cover Replacement - Outboard
- With the rear seat recliner outer finish cover - outboard removed, function the folding seat with any of the power buttons.
- If the seat releases, it can be from a pinching condition of the latch cable with the outer finish cover. Ensure correct routing of the cable and repair as necessary. Rear Seat Back Latch Cable Replacement - Outboard (40 Percent, Bucket) , or Rear Seat Back Latch Cable Replacement - Outboard (60 Percent)
 Courtesy of GENERAL MOTORS COMPANY Courtesy of GENERAL MOTORS COMPANY
|
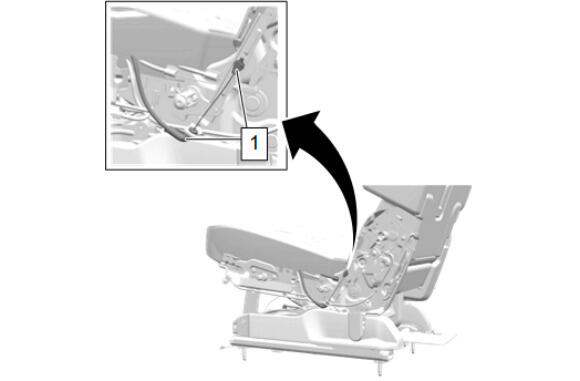
If the seat did not release, check the latch cable is fully installed at both connection points (1). If not, push the snap-fitting and ensure it clicks in place.
- Reinstall components as necessary.
- Did you find and correct the concern?
|
System OK |
Go to Step 3 |
| 7 |
 Courtesy of GENERAL MOTORS COMPANY Courtesy of GENERAL MOTORS COMPANY
|
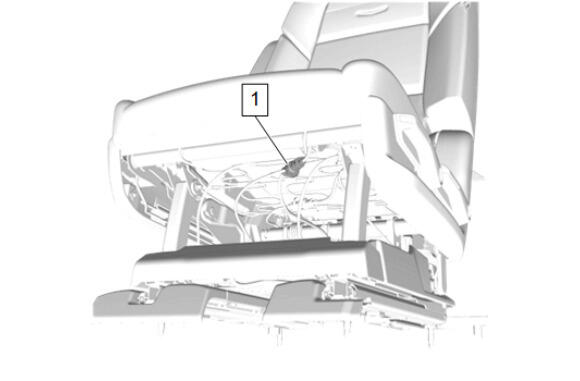
Locate the adjuster on the recliner sync cable (1).
 Courtesy of GENERAL MOTORS COMPANY Courtesy of GENERAL MOTORS COMPANY
|
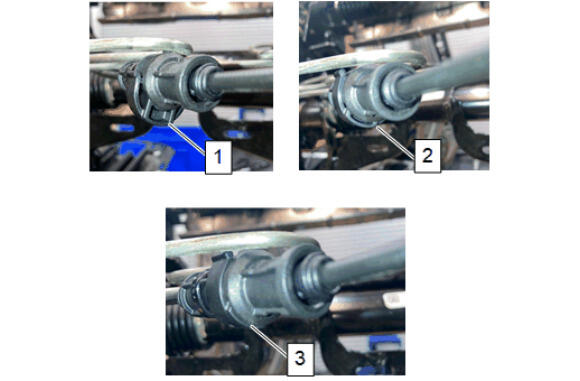
Verify if the position of the adjuster is in either the open (1), partially open (2) or closed (3) state.
 Courtesy of GENERAL MOTORS COMPANY Courtesy of GENERAL MOTORS COMPANY
|
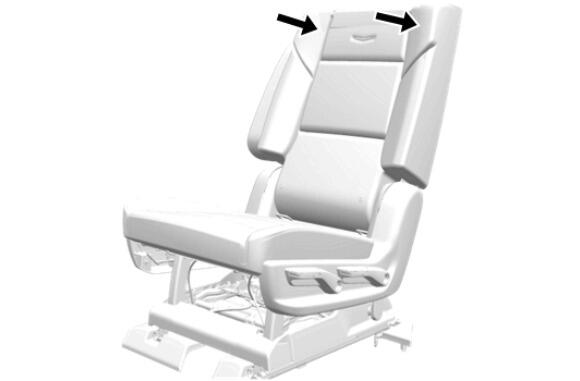
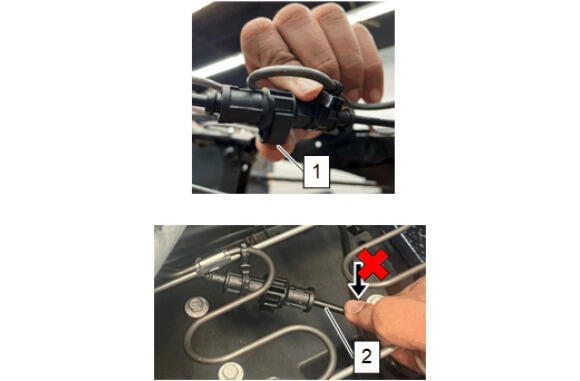
If found in either open or partially open; make sure the seat back is completely locked before closing the adjuster. Apply a rearward load on the top of the seat back by pushing on both sides.
 Courtesy of GENERAL MOTORS COMPANY Courtesy of GENERAL MOTORS COMPANY
|
Close the adjuster by pushing on the omega clip (1). Do not push or pull on the conduit of the cable (2) while closing the adjuster.
- Did you find and correct the concern?
|
System OK |
Go to Step 8 |
| 8 |
Courtesy of GENERAL MOTORS COMPANY
|
Locate the adjuster on the recliner sync cable (1).
- Open the omega clip.
Courtesy of GENERAL MOTORS COMPANY
|
Apply a rearward load on the top of the seat back by pushing on both sides to ensure the seat back is fully latched.
Courtesy of GENERAL MOTORS COMPANY
|
Close the adjuster by pushing on the omega clip. Do not push or pull on the conduit of the cable while closing the adjuster.
- Did you correct the concern?
|
System OK |
Go to Step 9 |
| 9 |
- Remove the rear seat recliner outer finish cover-outboard. Rear Seat Recliner Outer Finish Cover Replacement - Outboard
- Remove the rear seat recliner outer finish cover-inboard. Rear Seat Recliner Outer Finish Cover Replacement - Inboard (Bucket) , or Rear Seat Recliner Outer Finish Cover Replacement - Inboard (Bench)
 Courtesy of GENERAL MOTORS COMPANY Courtesy of GENERAL MOTORS COMPANY
|
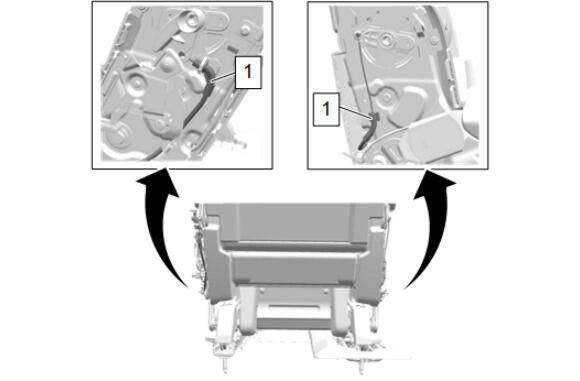
Check for any disconnected cable fittings (1). The barrel end fittings must be fully installed into their plastic housings. Snap fittings are fully installed into the holes in the stamping. Rear Seat Inner Recliner Cable Replacement (40 Percent, Bucket) , or Rear Seat Inner Recliner Cable Replacement (60 Percent)
- Reinstall components as necessary.
- Did you find and correct the concern?
|
System OK |
Go to Step 3 |