Hood Insulator Replacement (Thermal Isolator)
WARNING: This page is about a different car, the 2019 Chevrolet Malibu. However, it is still accessible from the selected car via links, so may be relevant.
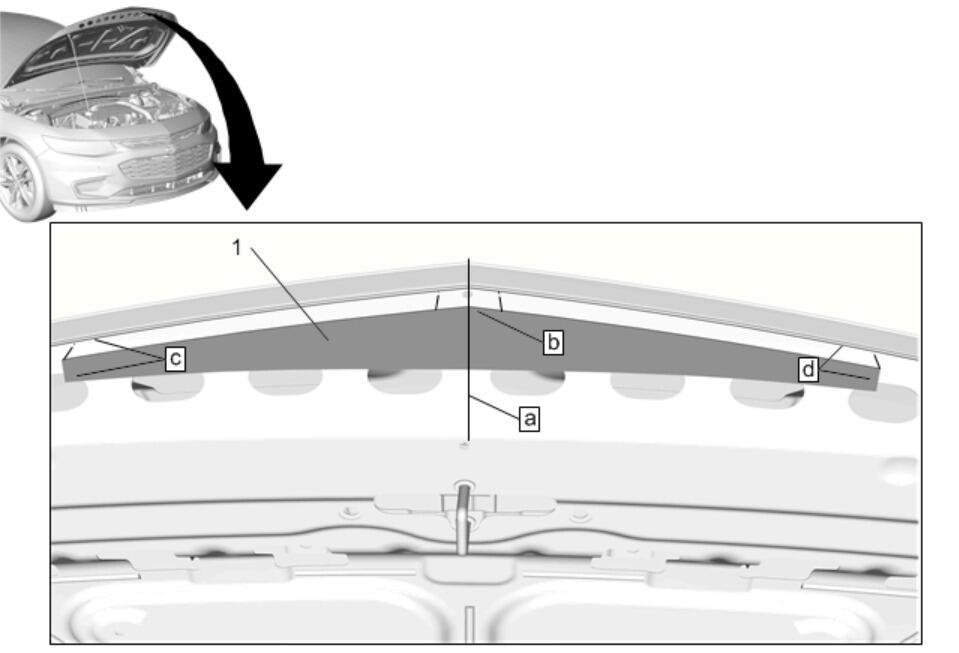 Courtesy of GENERAL MOTORS COMPANY Courtesy of GENERAL MOTORS COMPANY
|
| Callout |
Component Name |
| 1 |
Hood Insulator Procedure
- Clean the area with a 50/50 mixture by volume of isopropyl alcohol and clean drinkable water to remove any left over adhesive residue.
- Peel backing off foam hood thermal isolator.
- Line center peak of foam hood thermal isolator up with peak on center line of hood (a).
- Press front, middle section (b) of foam hood thermal isolator to hood ensuring the front edge is behind sealer bead.
- Press far left wing of foam hood thermal isolator to hood making sure the whole front edge of foam is still behind sealer bead (c).
- Press far right wing of foam hood thermal isolator to hood making sure the whole front edge of foam is still behind sealer bead (d).
- Press/roll out the entire hood thermal isolator to ensure part is completely adhered to the hood.
|