Removal Procedure
- Battery Tray Replacement
»Remove
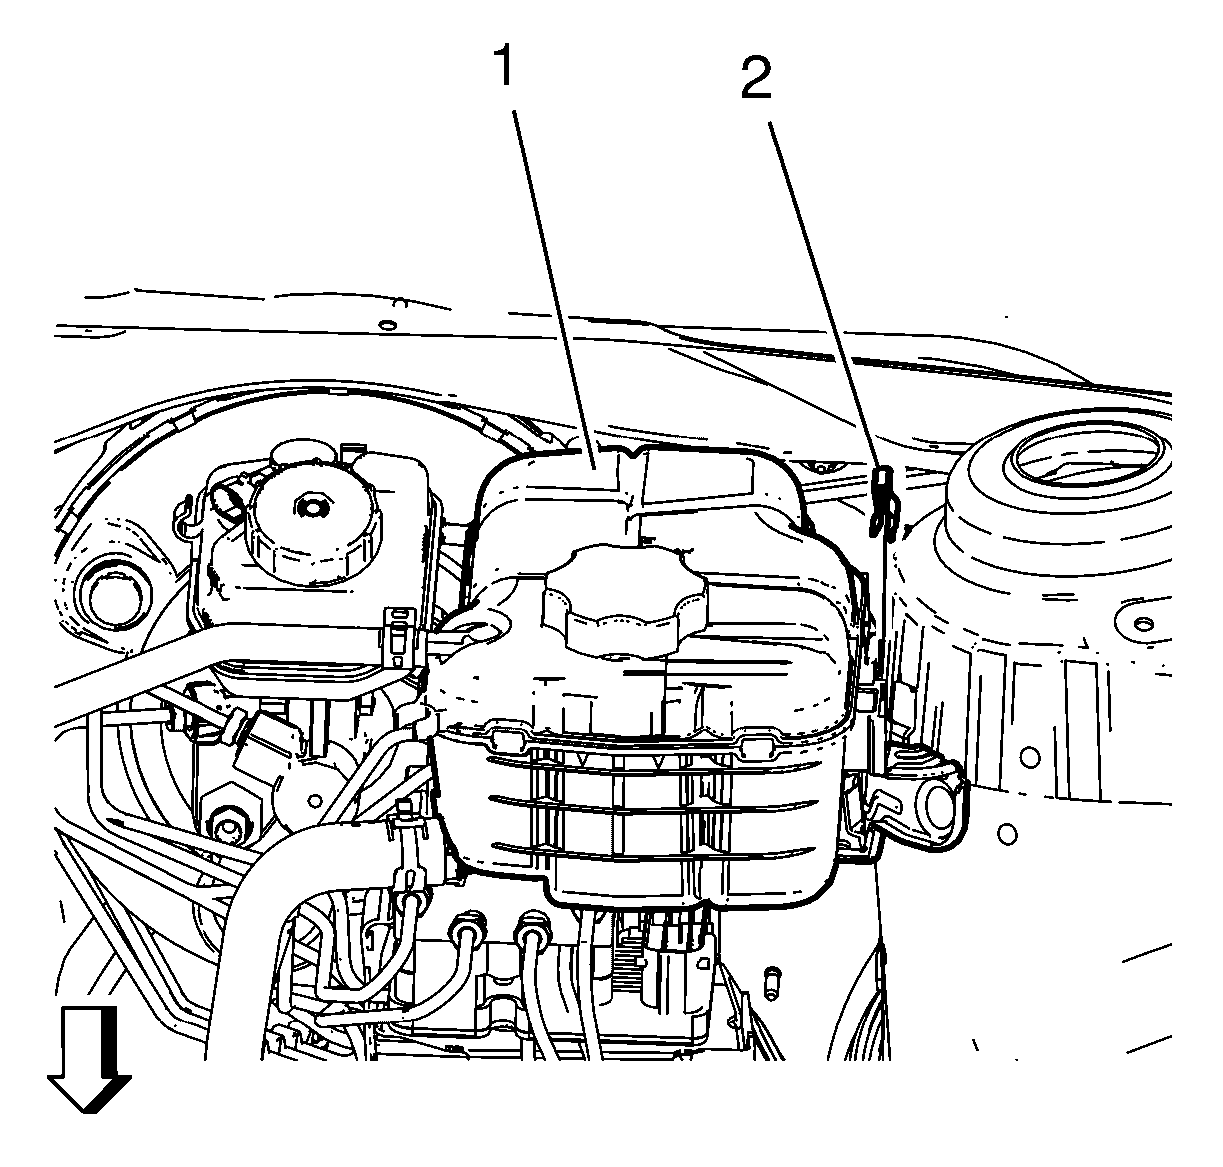
- Radiator Surge Tank Clip (2) »Remove
 Courtesy of GENERAL MOTORS COMPANY
- Remove the radiator surge tank (1) and lay aside.
- Place a drain pan under the vehicle.
- Extract as much brake fluid out of the brake fluid reservoir as possible.
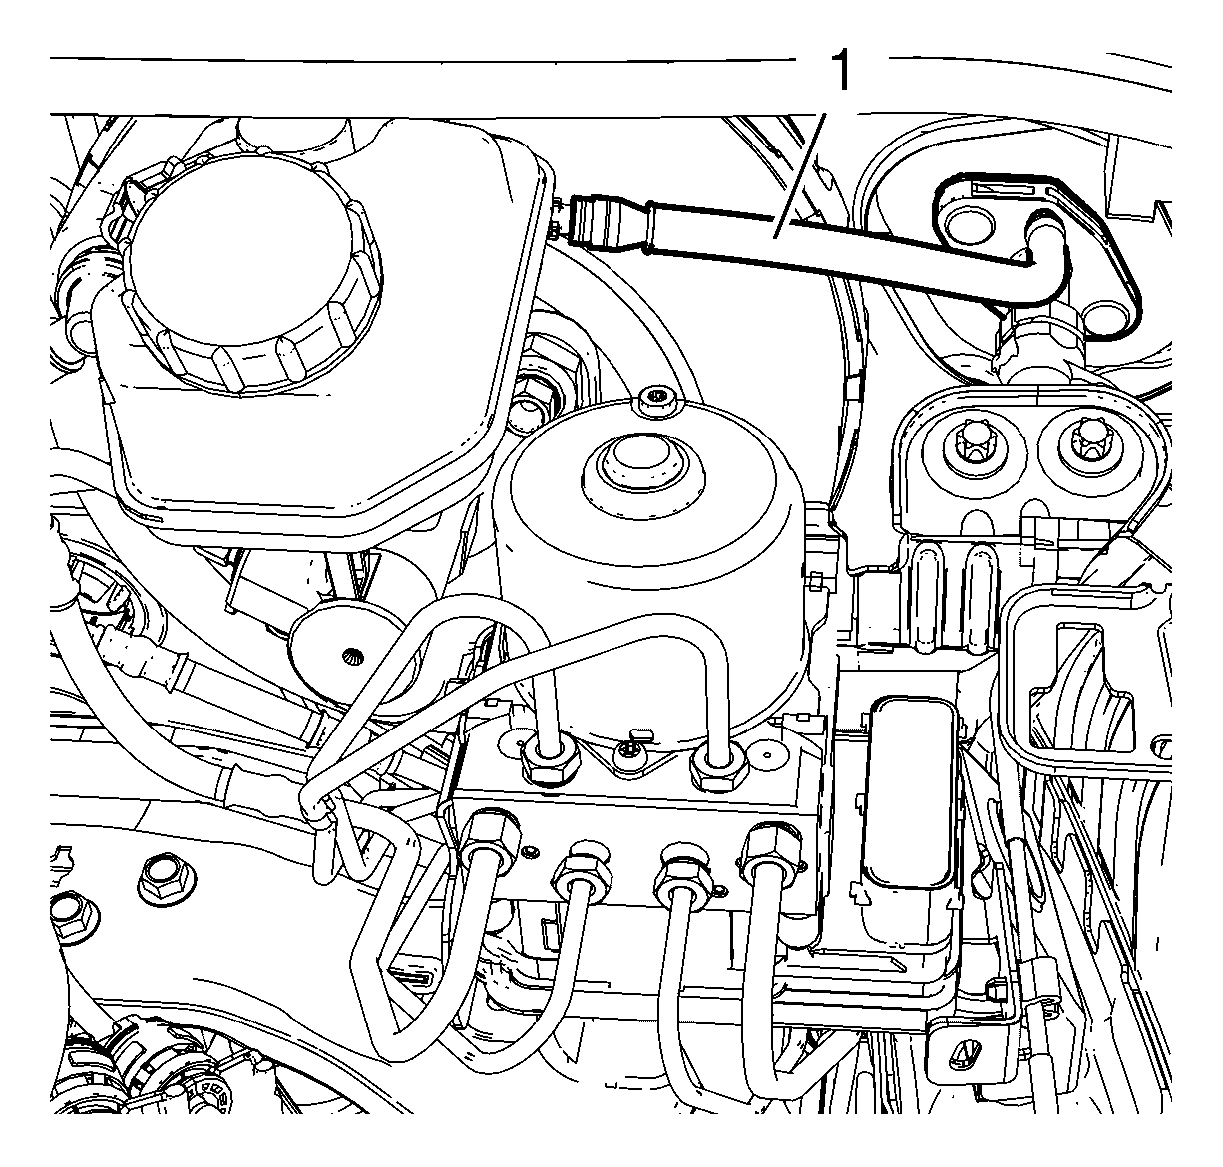
- Clutch Master Cylinder Reservoir Hose (1) @ Clutch Master Cylinder »Remove
 Courtesy of GENERAL MOTORS COMPANY
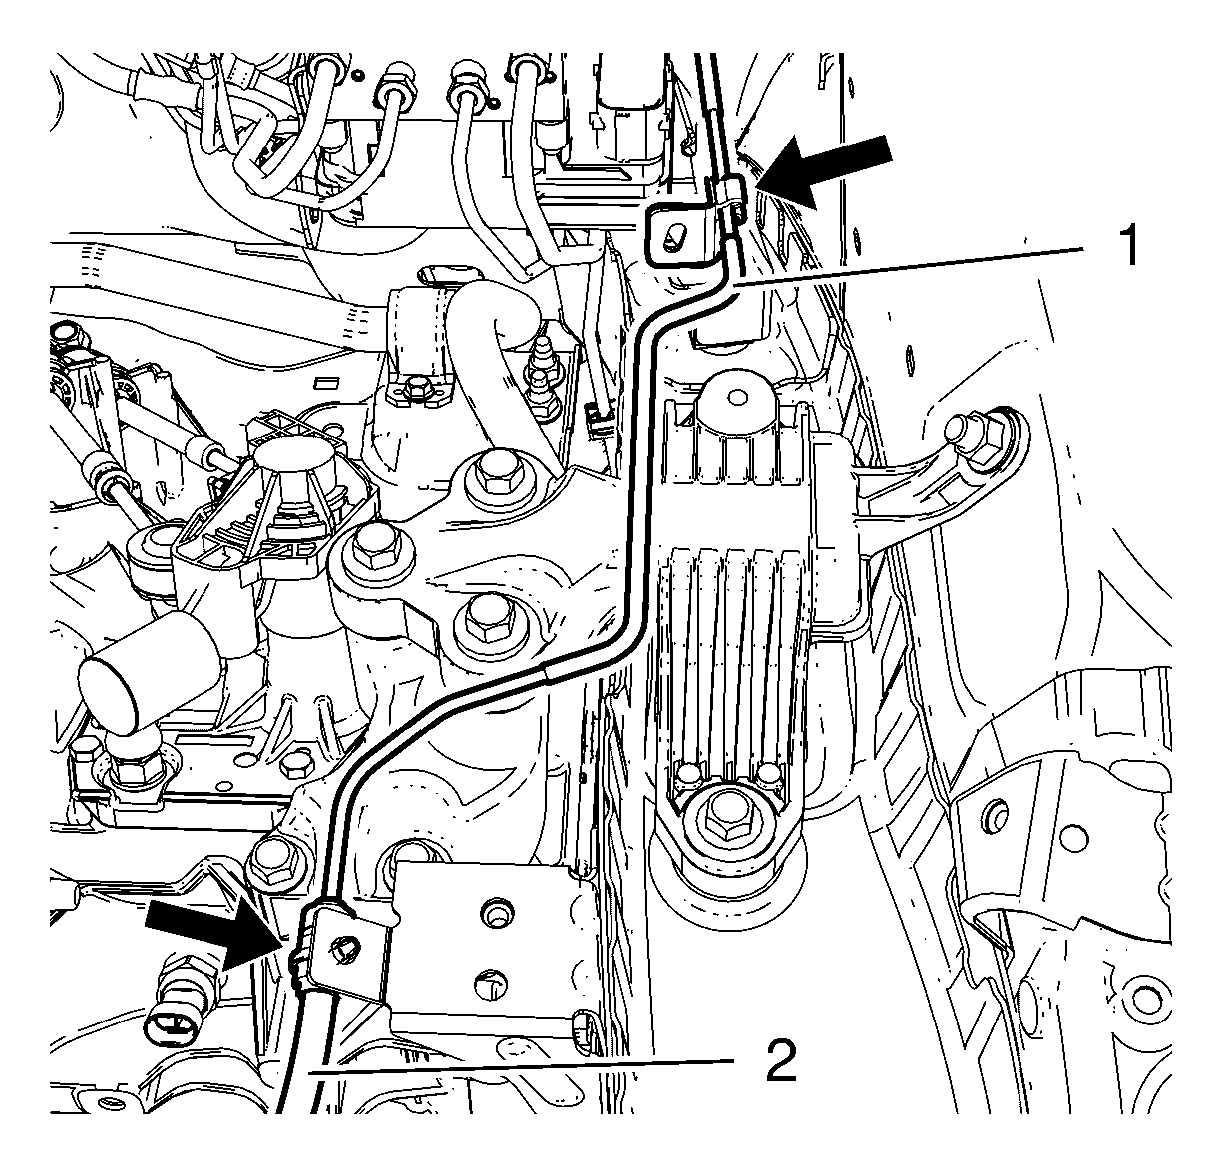
- Clutch Actuator Cylinder Front Pipe (1) @ Retainer (arrows) »Remove [2x]
 Courtesy of GENERAL MOTORS COMPANY
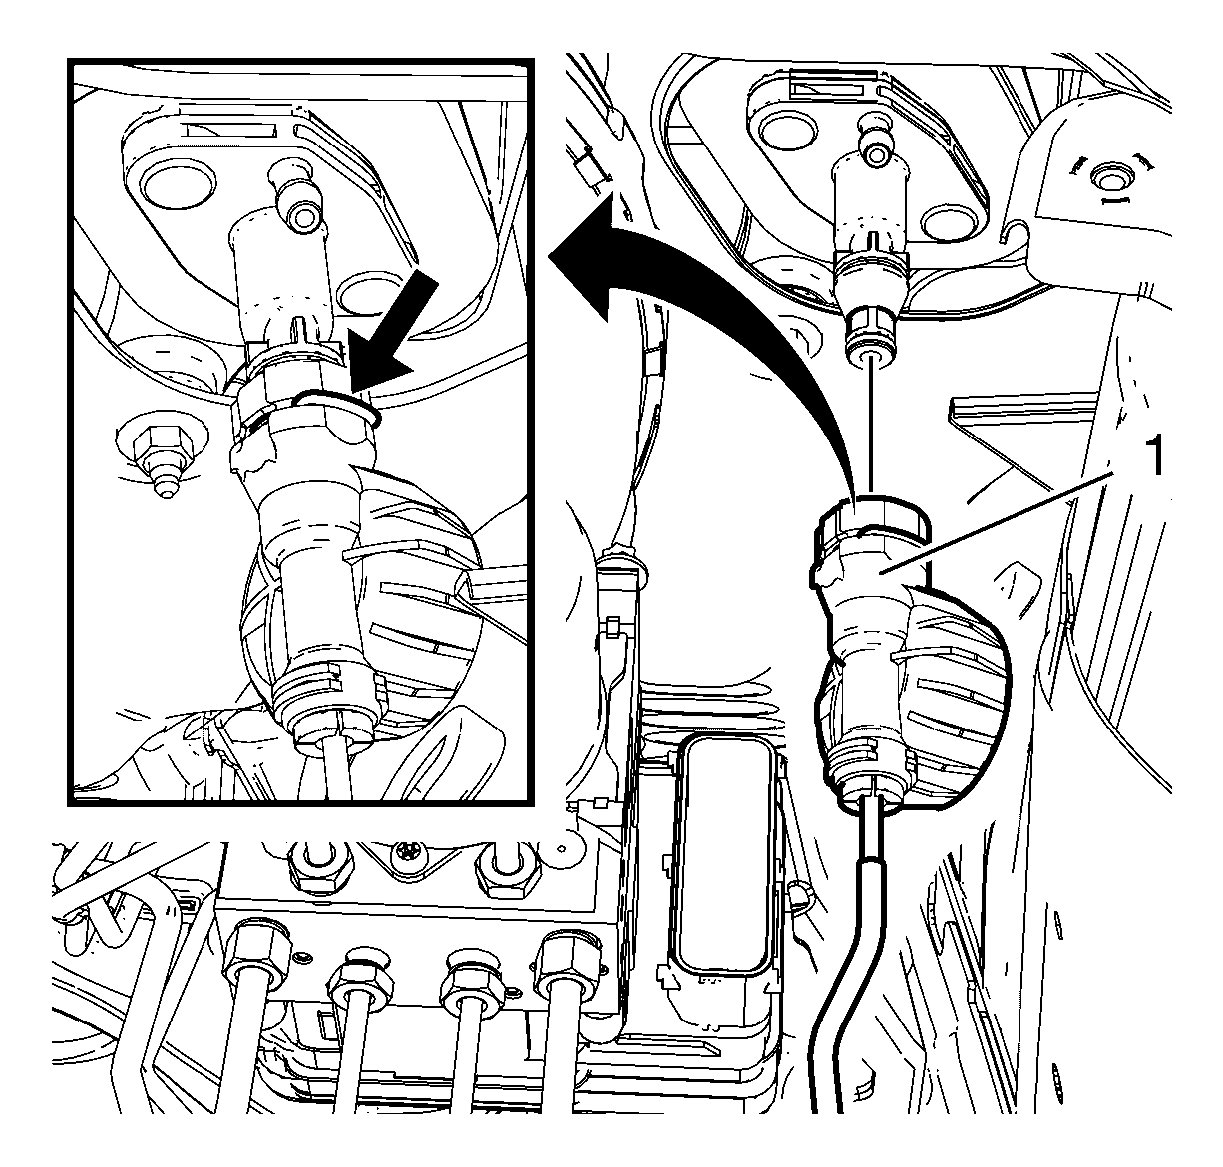
- Open the retaining clip (arrow).
 Courtesy of GENERAL MOTORS COMPANY
- Clutch Actuator Cylinder Front Pipe (1) @ Clutch Master Cylinder »Disconnect
- Disconnect the clutch master cylinder push rod from the clutch pedal (3), using the DT-6202-B
pliers (1) along with the DT-50894
remover (2)
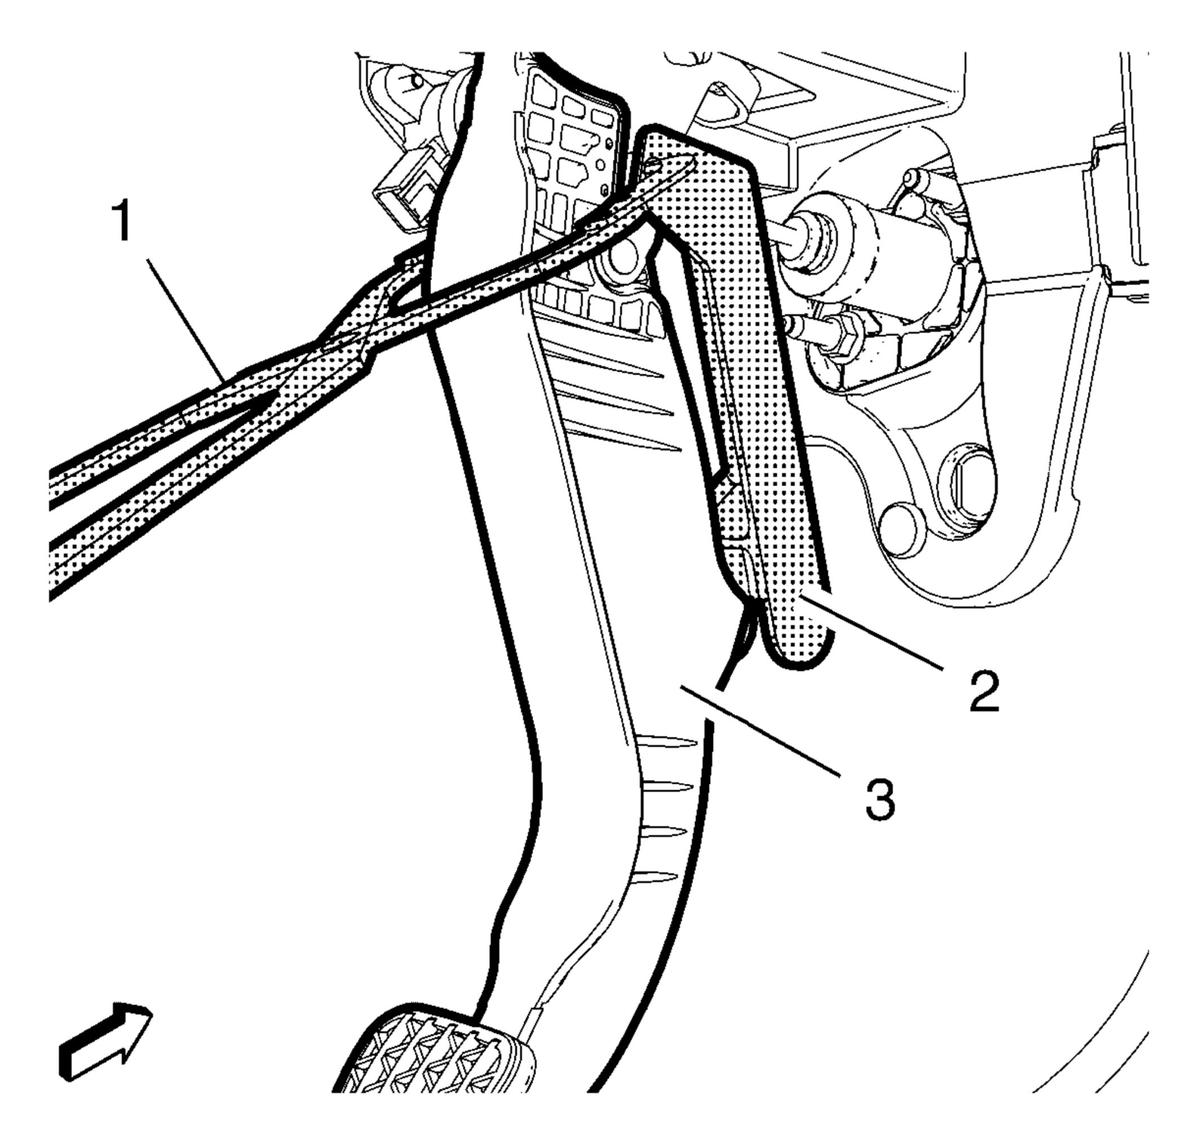 Courtesy of GENERAL MOTORS COMPANY
- Clutch Master Cylinder Nut (1) »Remove [2x]
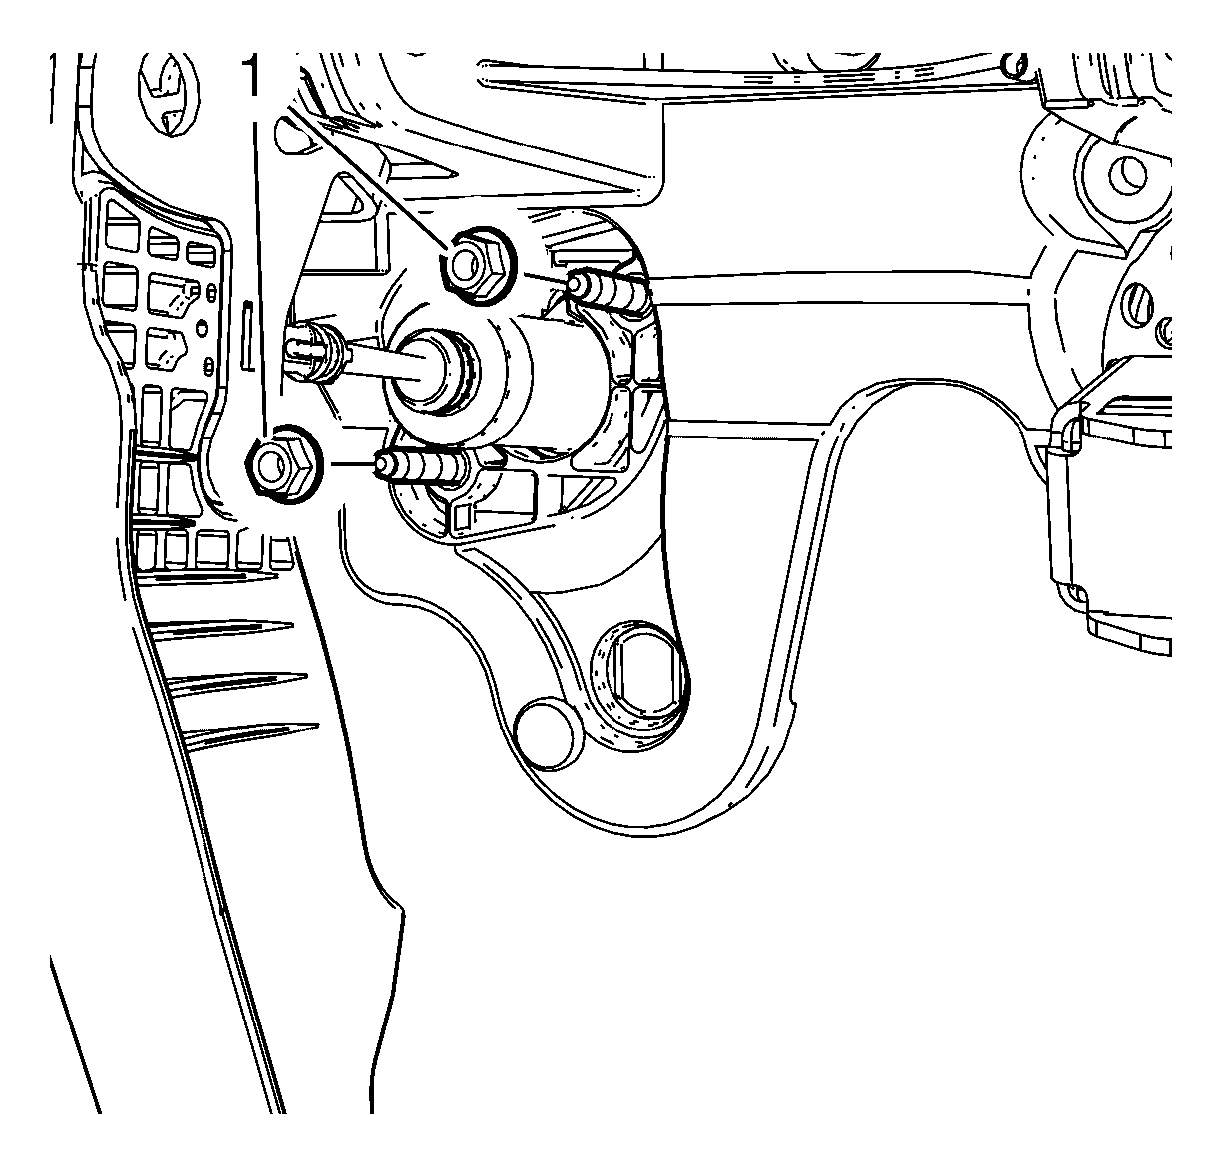 Courtesy of GENERAL MOTORS COMPANY
- Clutch Master Cylinder (1) »Remove
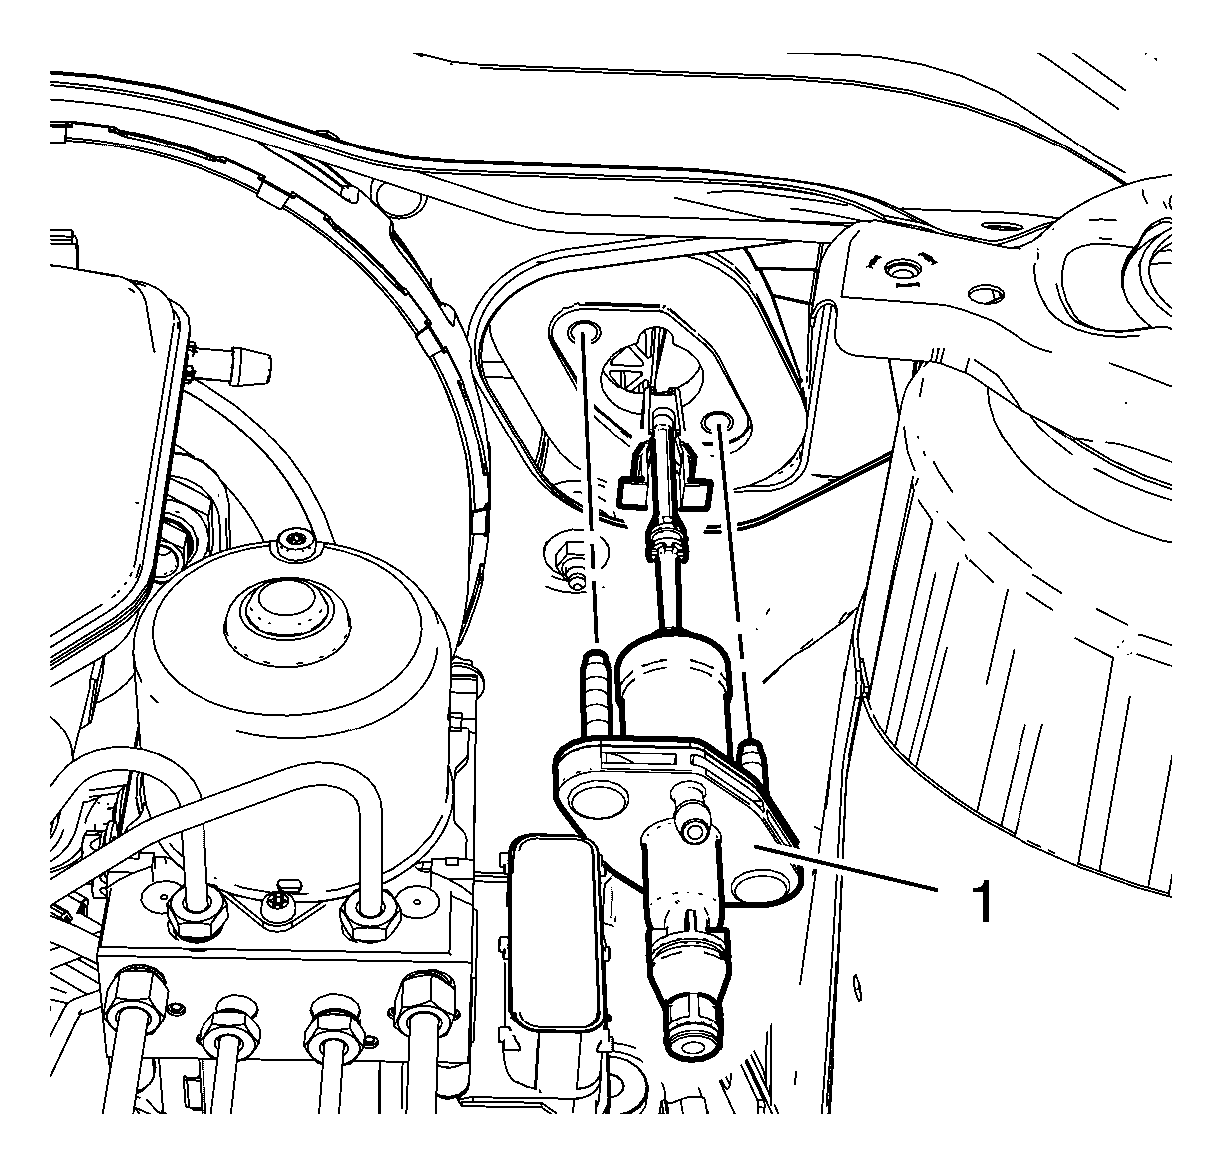 Courtesy of GENERAL MOTORS COMPANY