- Clean the sealing surface of the crankshaft bearing cap tie plate and the groove in the engine front cover from old gasket material, oil, dirt and grease.
- If the oil pan is being reused, refer to Oil Pan Cleaning and Inspection .
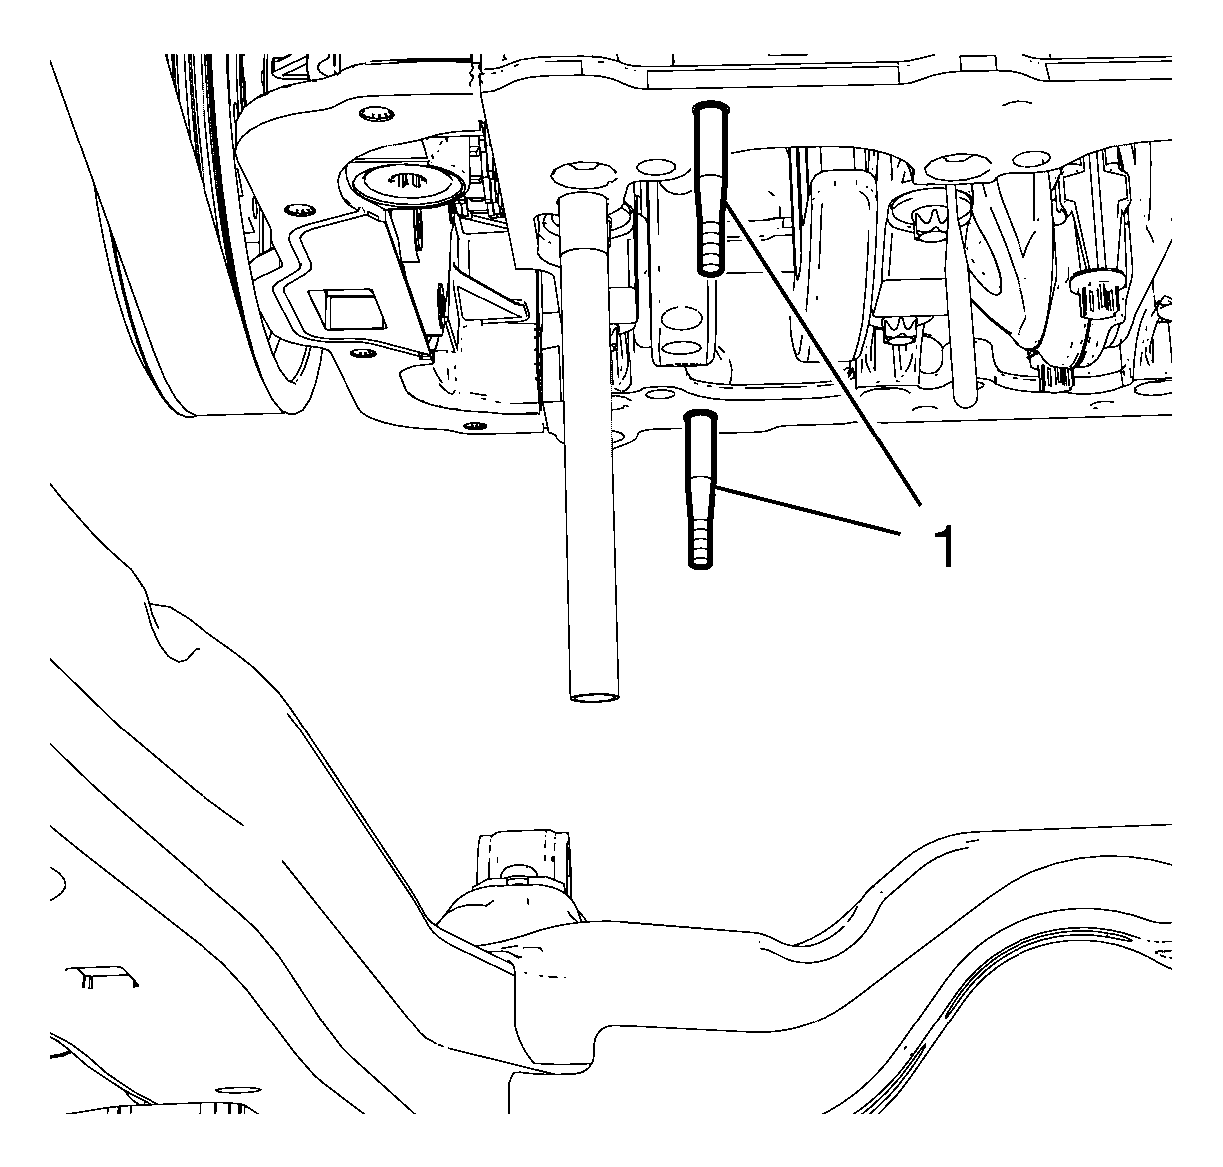
- Install the 2 EN-49980
pins (1) to the shown oil pan screw bores.
 Courtesy of GENERAL MOTORS COMPANY
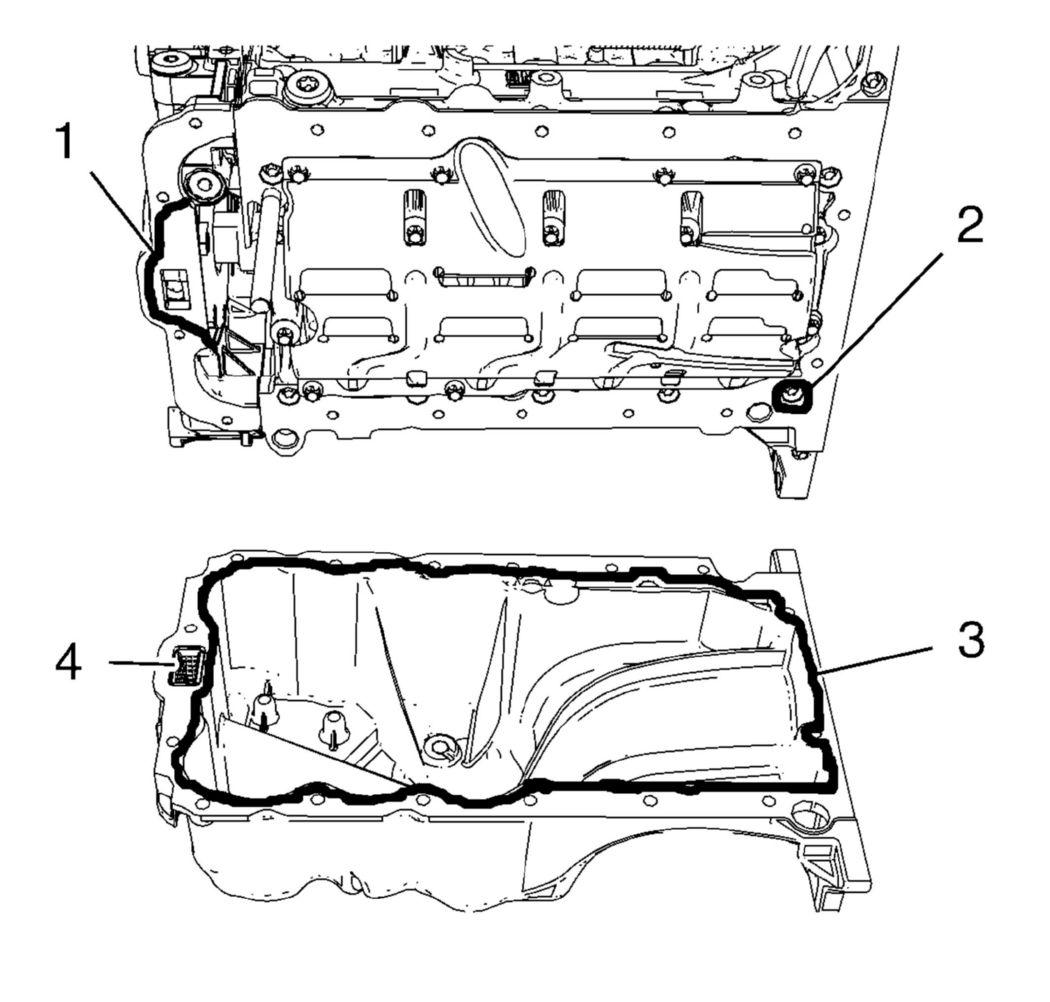
- Apply sealing compound to the oil pan. Refer to Adhesives, Fluids, Lubricants and Sealers .
 Courtesy of GENERAL MOTORS COMPANY
NOTE:
The sealing bead should be applied close to the inner edge of the oil pan. Take care that the oil suction gallery (4) will not get contaminated with sealing compound or dirt. The thickness of the sealing bead (3) should be 2 mm (0.0787 in).
- Apply sealing compound to the groove of the engine front cover (1).
- Apply sealing compound around the screw bore (2) of the crankshaft bearing cap tie plate.
NOTE:
The complete installation procedure of the oil pan should not take longer than 10 minutes.
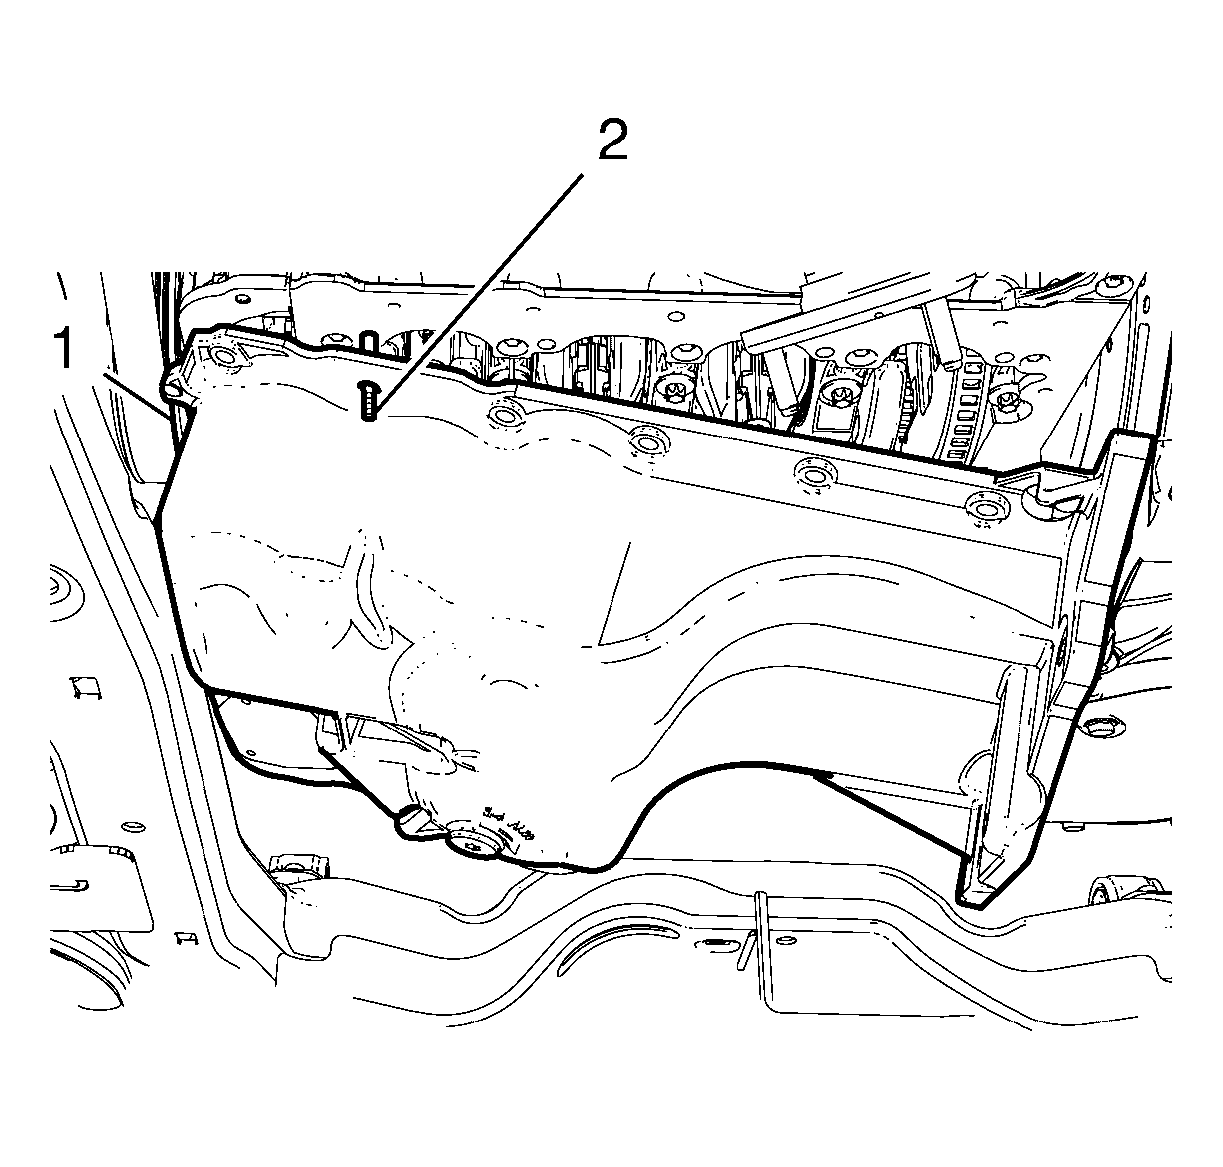
- Carefully install the oil pan. Use the following procedure:
 Courtesy of GENERAL MOTORS COMPANY
CAUTION:
Use care when installing the oil pan to prevent disruption of the sealing bead. The sealing bead should remain consistent until the oil pan is mated with the engine. An inconsistent sealing bead can cause an insufficient seal and result in engine damage.
- Lay the oil pan on drive train and front suspension frame.
- Hang in the oil pan to crankshaft balancer (1).
- Guide the oil pan with the 2 EN-49980
pins (2) and the equivalent screw bores to the engine.
- Secure the oil pan with 4 oil pan bolts.
- Remove the 2 EN-49980
pins.
- Install the remaining 12 oil pan bolts and hand tighten to approximately 2 N.m (18 lb in).
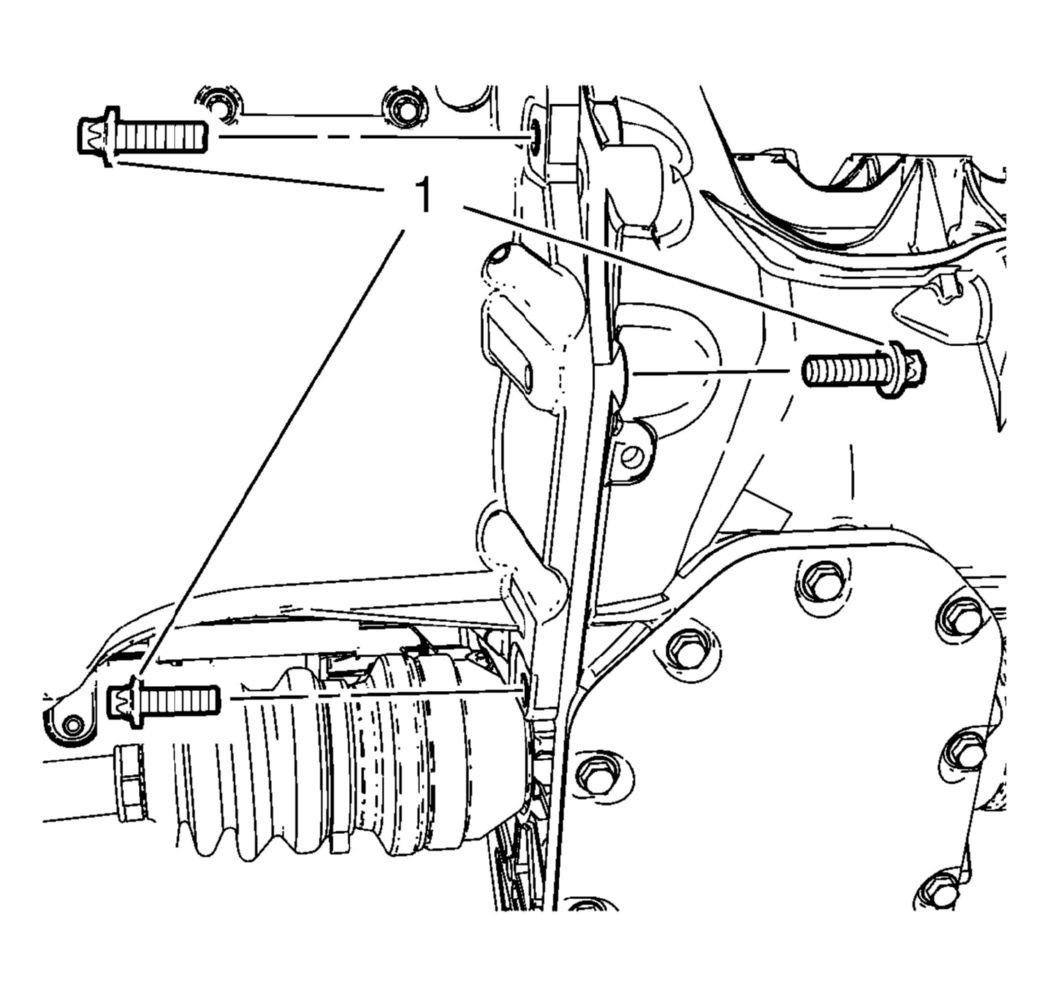
- Install the transmission to oil pan bolts (1).
 Courtesy of GENERAL MOTORS COMPANY
- For vehicles with manual transmission tighten 3 bolts to 40 N.m (30 lb ft).
- For vehicles with automatic transmission tighten 2 bolts to 58 N.m (43 lb ft).
- Tighten the 16 oil pan bolts to 10 N.m (89 lb in).
- Install the engine oil heater, if equipped. Refer to Engine Oil Heater Replacement .
- Install the warm up three way catalytic converter. Refer to Warm Up Three-Way Catalytic Converter Replacement
.
- Install the catalytic converter. Refer to Catalytic Converter Replacement (1.4L LUV)
.
- Lower the vehicle.
- Fill engine oil. Refer to Engine Oil and Oil Filter Replacement .