- Install the intake and exhaust camshaft position sensors to the engine front cover. Refer to Engine Front Cover and Oil Pump Assemble .
- Clean the engine front cover sealing surfaces on engine block and cylinder head.
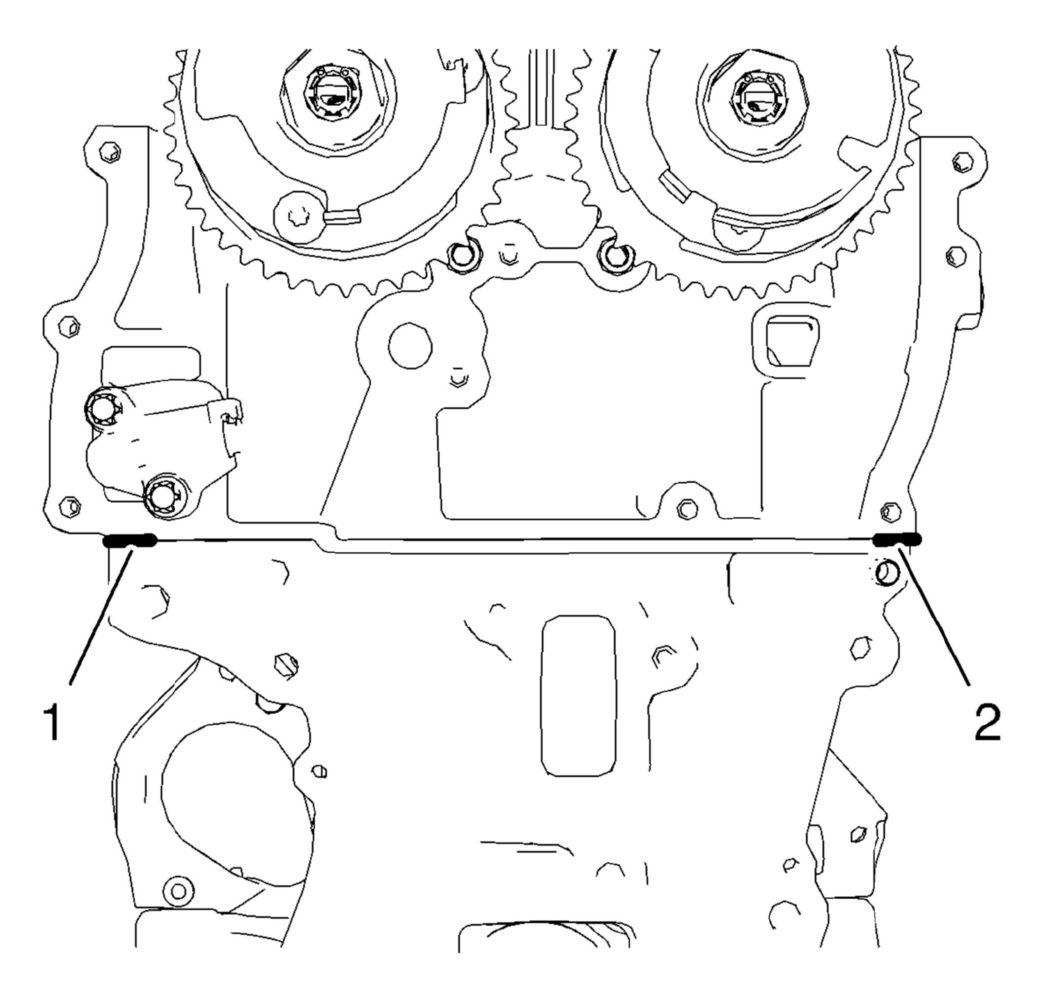
- Apply sealing compound to the shown areas (1) and (2). Refer to Adhesives, Fluids, Lubricants and Sealers .
 Courtesy of GENERAL MOTORS COMPANY
NOTE:
The thickness of the sealing bead should be 2 mm (0.0787 in).
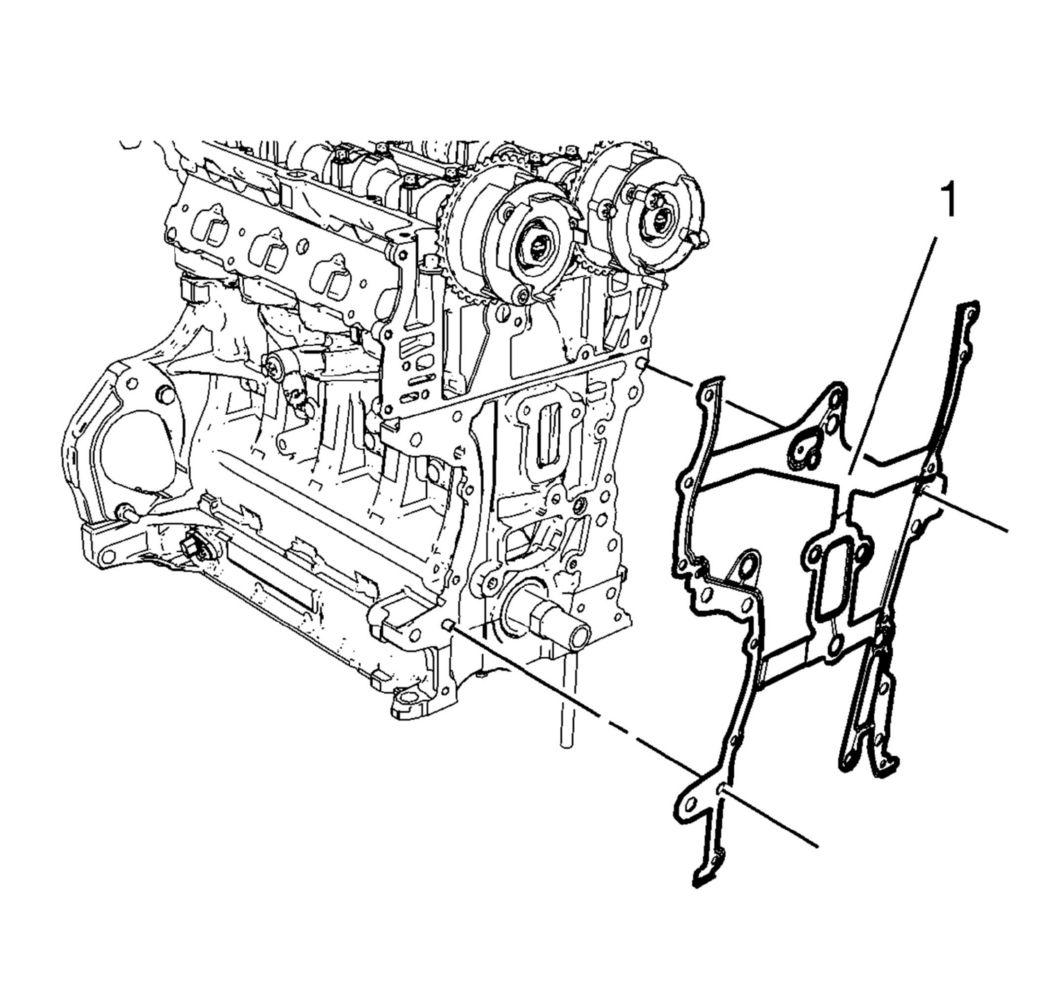
- Install a NEW engine front cover gasket (1).
 Courtesy of GENERAL MOTORS COMPANY
NOTE:
Mind the guide sleeves.
- Install the timing chain. Refer to Camshaft Timing Chain Replacement .
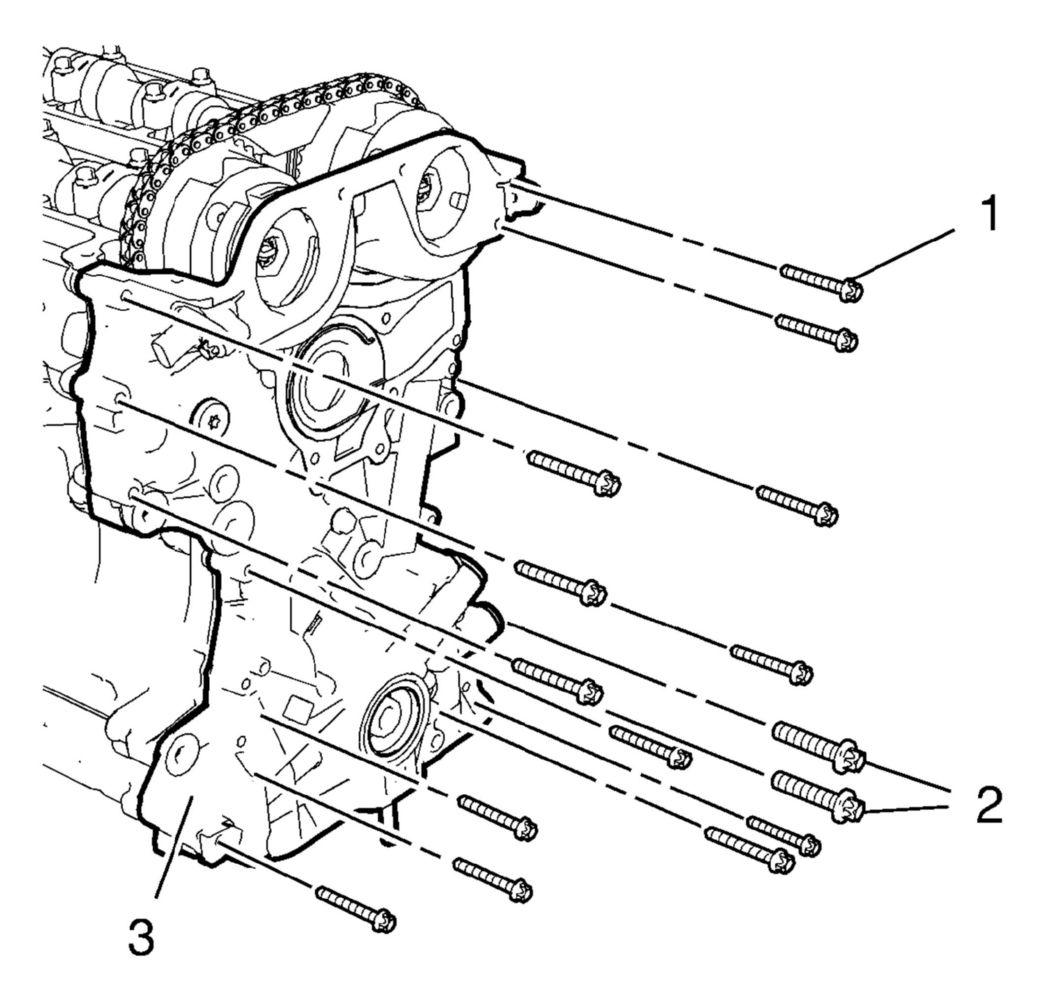
- Install the engine front cover (3).
 Courtesy of GENERAL MOTORS COMPANY
NOTE:
Mind the guide sleeves when installing the engine front cover. The complete installation procedure of the engine front cover should not take longer than 10 minutes.
- Install the 13 engine front cover bolts M6 (1).
- Install the 2 engine front cover bolts M10 (2).
- Tighten the 13 engine front cover bolts M6 to 8 N.m (71 lb in).
- Tighten the 2 engine front cover bolts M10 to 35 N.m (26 lb ft).
- Tighten the camshaft sprockets, install the upper timing chain guide and remove all special tools. Refer to Camshaft Timing Chain Adjustment .
NOTE:
Engine should be adjusted and fixed in TDC position.
- Install the camshaft position sensors. Refer to Camshaft Position Sensor Replacement
.
- Install the 2 camshaft position actuator solenoid valves and connect electrical connectors. Refer to Camshaft Position Actuator Solenoid Valve Replacement
.
- Install the water pump and the water pump pulley. Refer to Water Pump Replacement (1.4L LUV)
.
- Install the generator from above. Refer to Generator Replacement (1.4L LUV)
.
- Install the drive belt tensioner. Refer to Drive Belt Tensioner Replacement .
- Install the engine mount bracket. Refer to Engine Mount Bracket Replacement - Right Side .
- Loosely install the drive belt to water pump pulley and generator pulley.
- Install the engine mount. Refer to Engine Mount Replacement - Right Side .
- Remove engine lifter from engine lift bracket.
- Install the camshaft cover. Refer to Camshaft Cover Replacement .
- Install the air cleaner assembly. Refer to Air Cleaner Assembly Replacement
.
- Raise the vehicle.
- Install the crankshaft balancer. Refer to Crankshaft Balancer Replacement .
- Install the oil pan. Refer to Oil Pan Replacement .
- Install the air conditioning compressor bracket. Refer to Air Conditioning Compressor Bracket Replacement .
- Install the drive belt to crankshaft balancer, drive belt tensioner and air conditioning compressor. Refer to Drive Belt Replacement .
- Connect all electrical connectors to the generator. Refer to Generator Replacement (1.4L LUV)
.
- Install the right front wheelhouse liner. Refer to Front Wheelhouse Liner Replacement
.
- Install the front compartment insulator. Refer to Front Compartment Insulator Replacement
.
- Lower the vehicle
- Connect the battery negative cable. Refer to Battery Negative Cable Disconnection and Connection
.
- Fill up engine oil. Refer to Engine Oil and Oil Filter Replacement .
- Close the hood.