Turbocharger Assemble
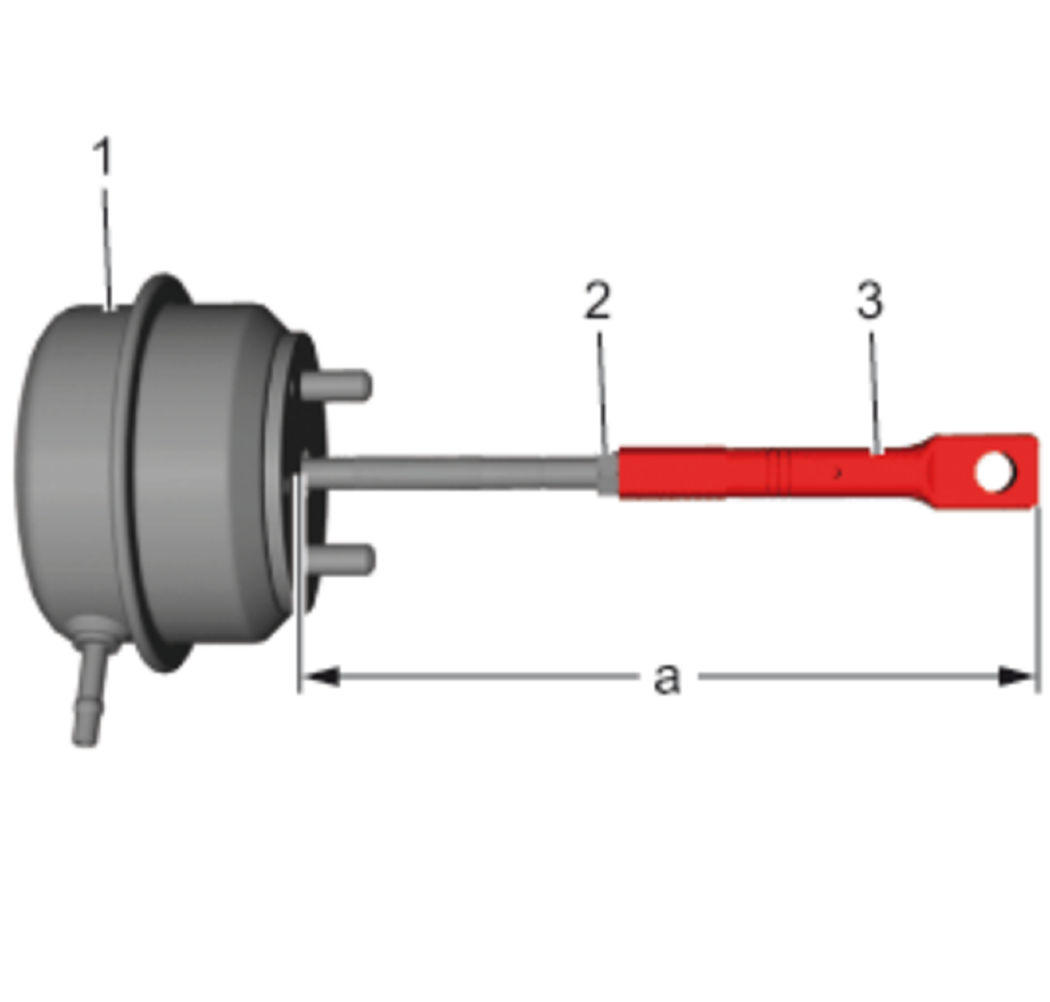
- Nut (2) @ Turbocharger Wastegate Actuator (1) Loosen
 Courtesy of GENERAL MOTORS COMPANY
- Transfer the measured value (a) from the OLD turbocharger wastegate actuator to the NEW by turning the rod (3).
- Tighten the nut (2) to 5.6 - 6.8 N.m (49-60 lb in).
- Measure the turbocharger wastegate actuator again to check the adjusted value.
- If the adjusted value does not match repeat step 1-4.
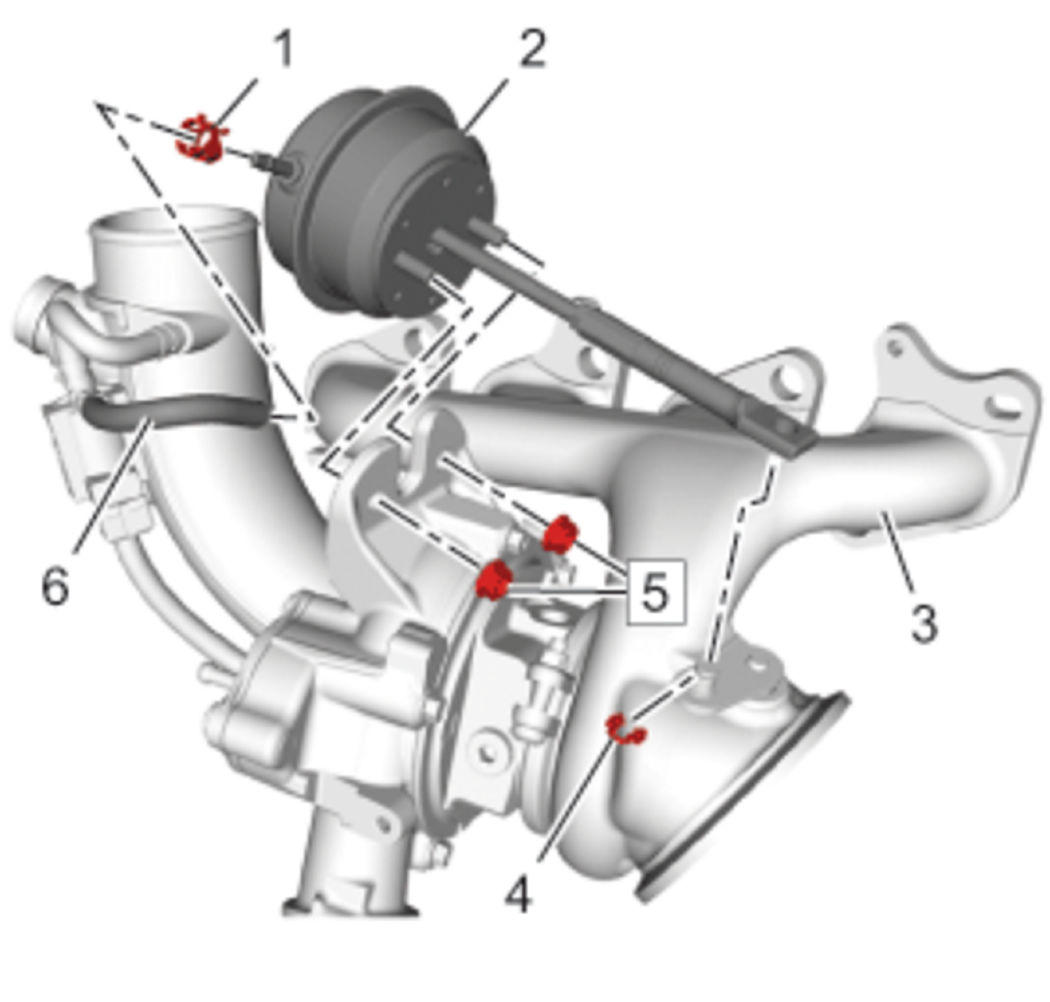
- Turbocharger Wastegate Actuator (2) @ Turbocharger (3) »Install
 Courtesy of GENERAL MOTORS COMPANY
- Nut (5) @ Turbocharger Wastegate Actuator»Install and tighten [2x] 5.6 - 6.8 N.m (49-60 lb in).
- Retainer (4) @ Turbocharger Wastegate Actuator»Install
- Turbocharger Wastegate Actuator Hose (6) @ Turbocharger Wastegate Actuator (2)»Install
- Install the clamp.(1)
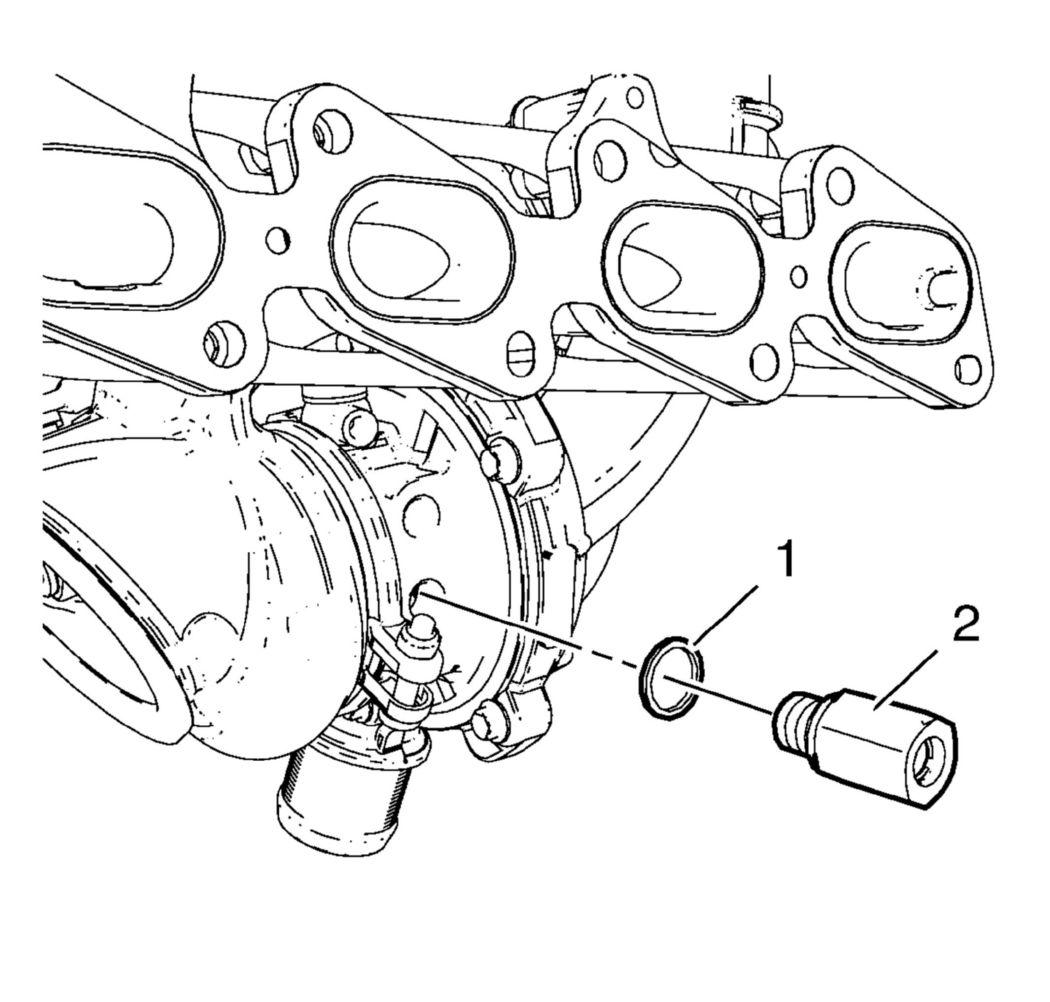
- Install the NEW quick fitting connector (2) and a NEW seal ring (1) to the turbocharger and tighten to 20 N.m (15 lb ft).
 Courtesy of GENERAL MOTORS COMPANY
- Inspect the turbocharger coolant pipes for ridges and damage.
 Courtesy of GENERAL MOTORS COMPANY
- Install the turbocharger coolant feed pipe (1) to the quick fitting connector (2) by pushing in direction of the arrow until an audible click is heard.
- Use the same procedure for the turbocharger coolant return pipe and the turbocharger coolant return pipe quick fitting connector.
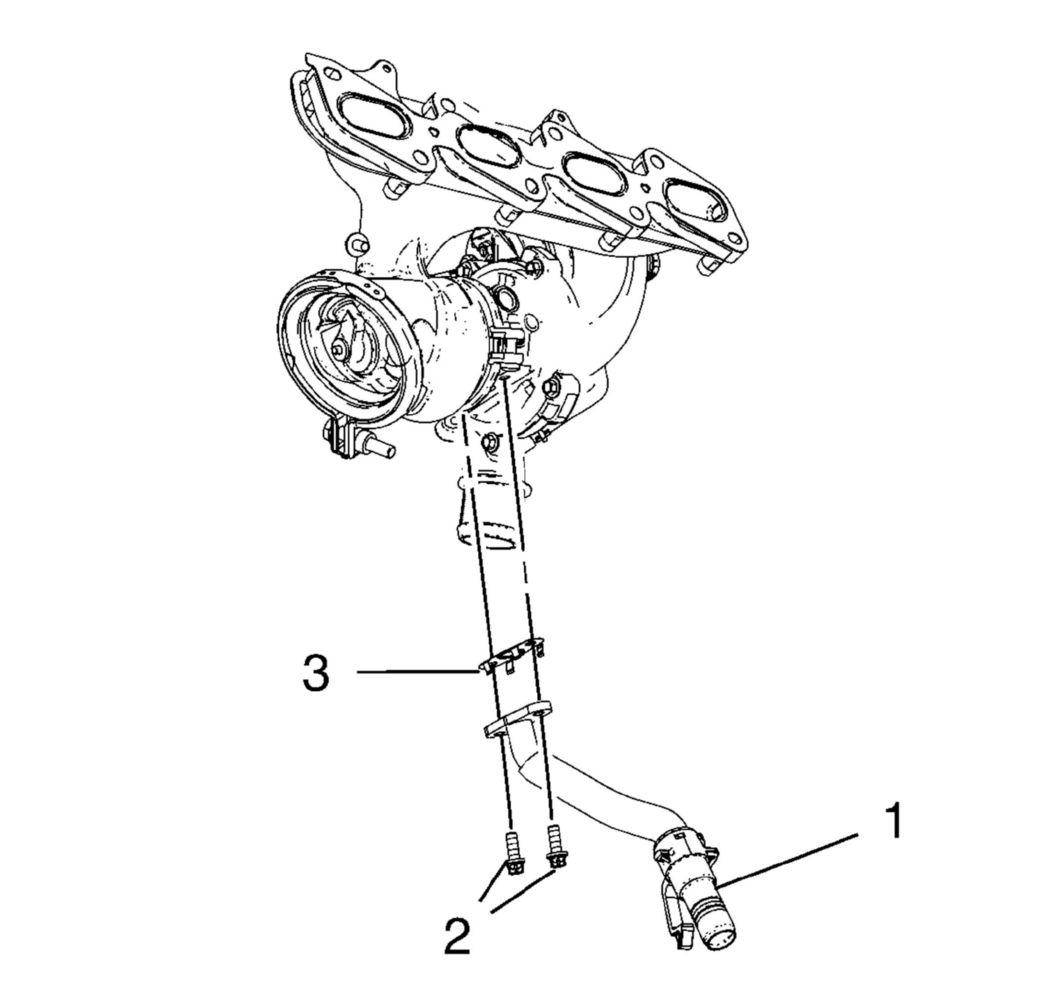
- Install the turbocharger oil return pipe (1) and a NEW sealing (3) to the turbocharger.
 Courtesy of GENERAL MOTORS COMPANY
- Install the 2 turbocharger oil return pipe bolts (2) and tighten to 8 N.m (71 lb in).