- Remove the outer constant velocity (CV) joint and boot from the wheel drive shaft. Refer to Front Wheel Drive Shaft Outer Joint and Boot Replacement .
- Remove any lubricant from the CV joint.
- Install the outer CV joint assembly in a soft jawed vise.
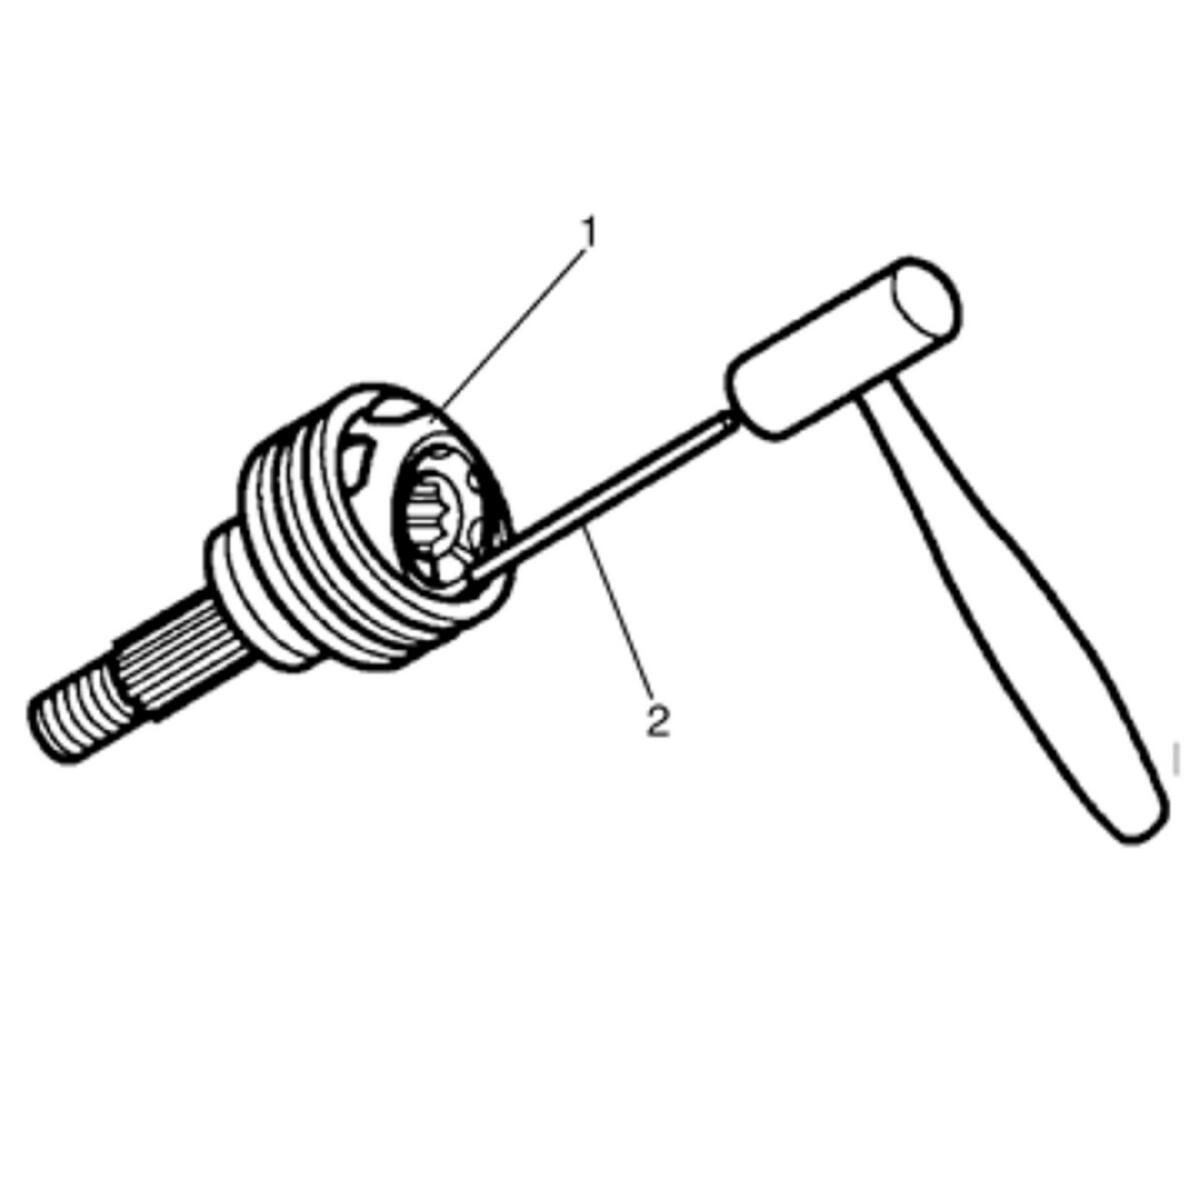 Courtesy of GENERAL MOTORS COMPANY
NOTE:
Position the cage and the inner race so they are level.
- Using a brass drift (1), gentle tap the cage until the ball bearing can be removed from the cage.
NOTE:
The following procedure will have to be repeated until all the ball bearing are removed form the cage.
- Using a small screwdriver, remove the ball bearings (1) from the CV joint (2).
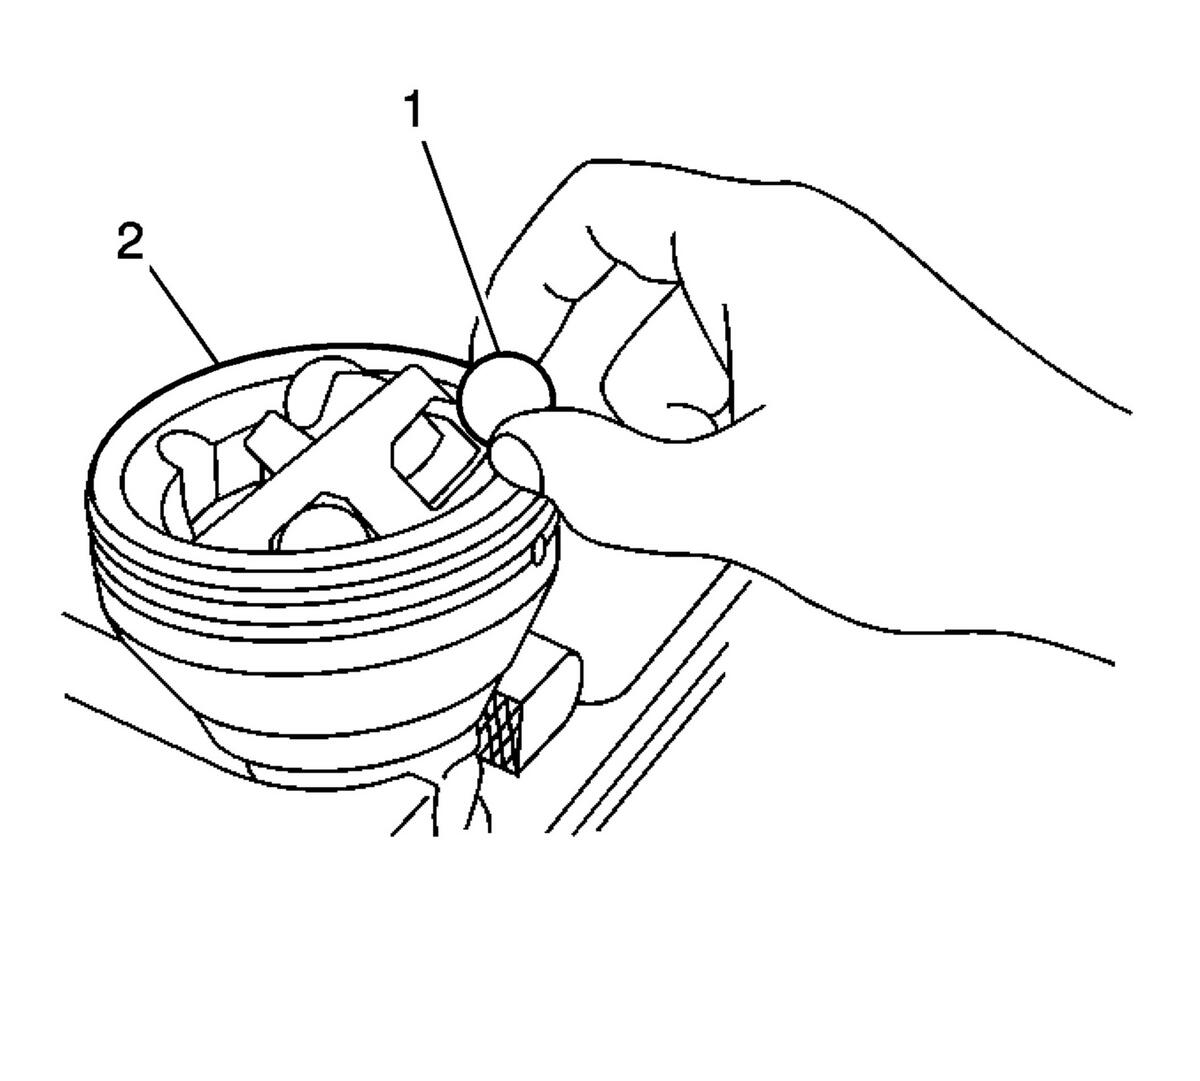 Courtesy of GENERAL MOTORS COMPANY
- Remove the ball bearings from the CV joint in sequence.
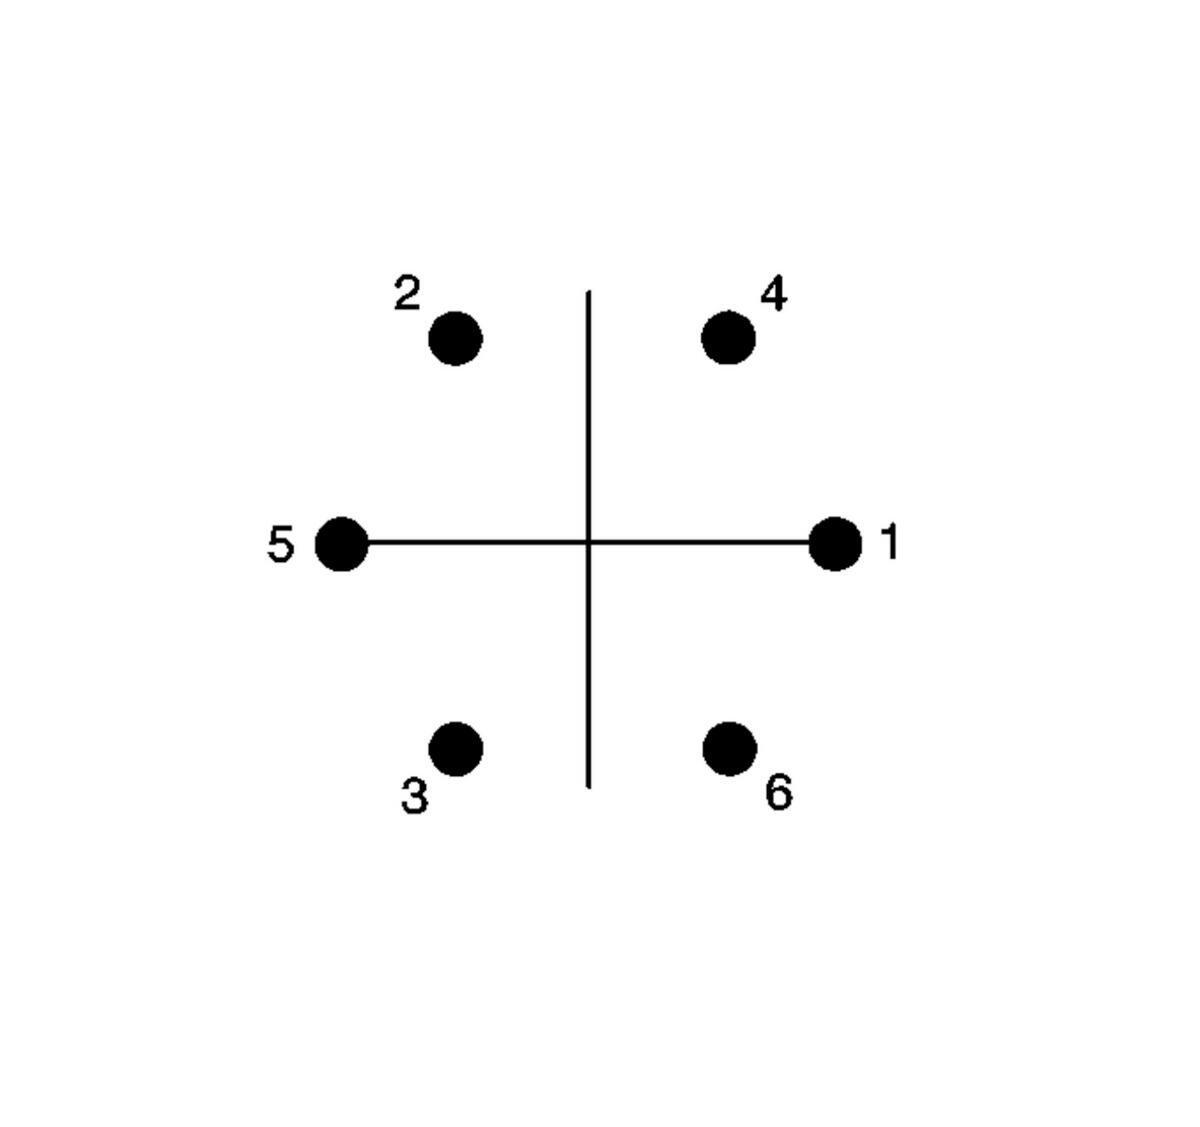 Courtesy of GENERAL MOTORS COMPANY
- Position the cage (1) at a 90 degrees to the centerline of the outer race (2).
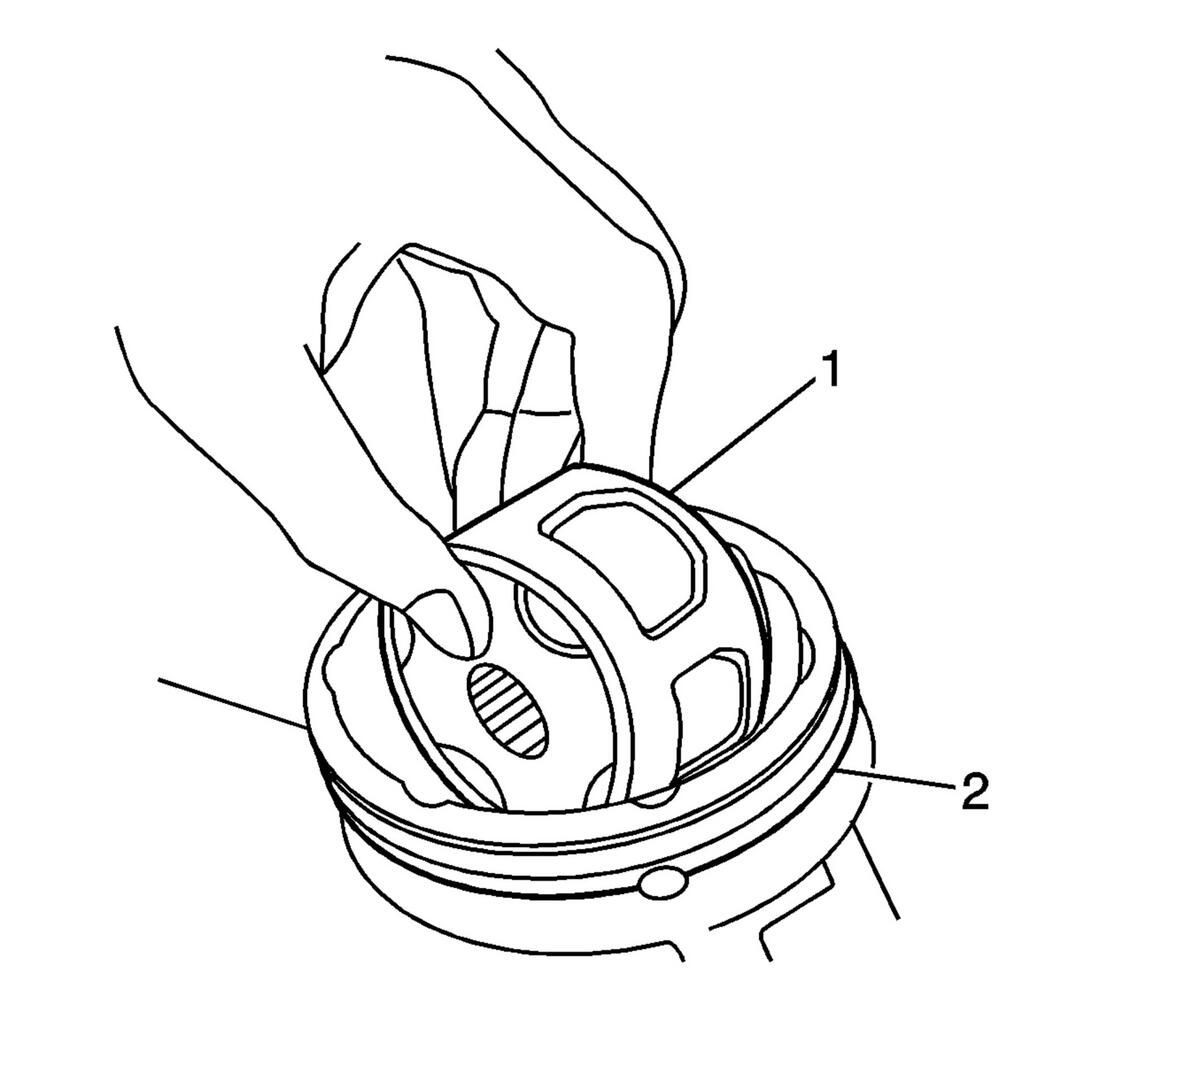 Courtesy of GENERAL MOTORS COMPANY
NOTE:
Position the cage so that the larger radius corners of the cage windows are facing up.
- Align the cage windows with the lands of the outer race (2).
- Lift and remove the cage (1) and the inner race from the outer race (2).
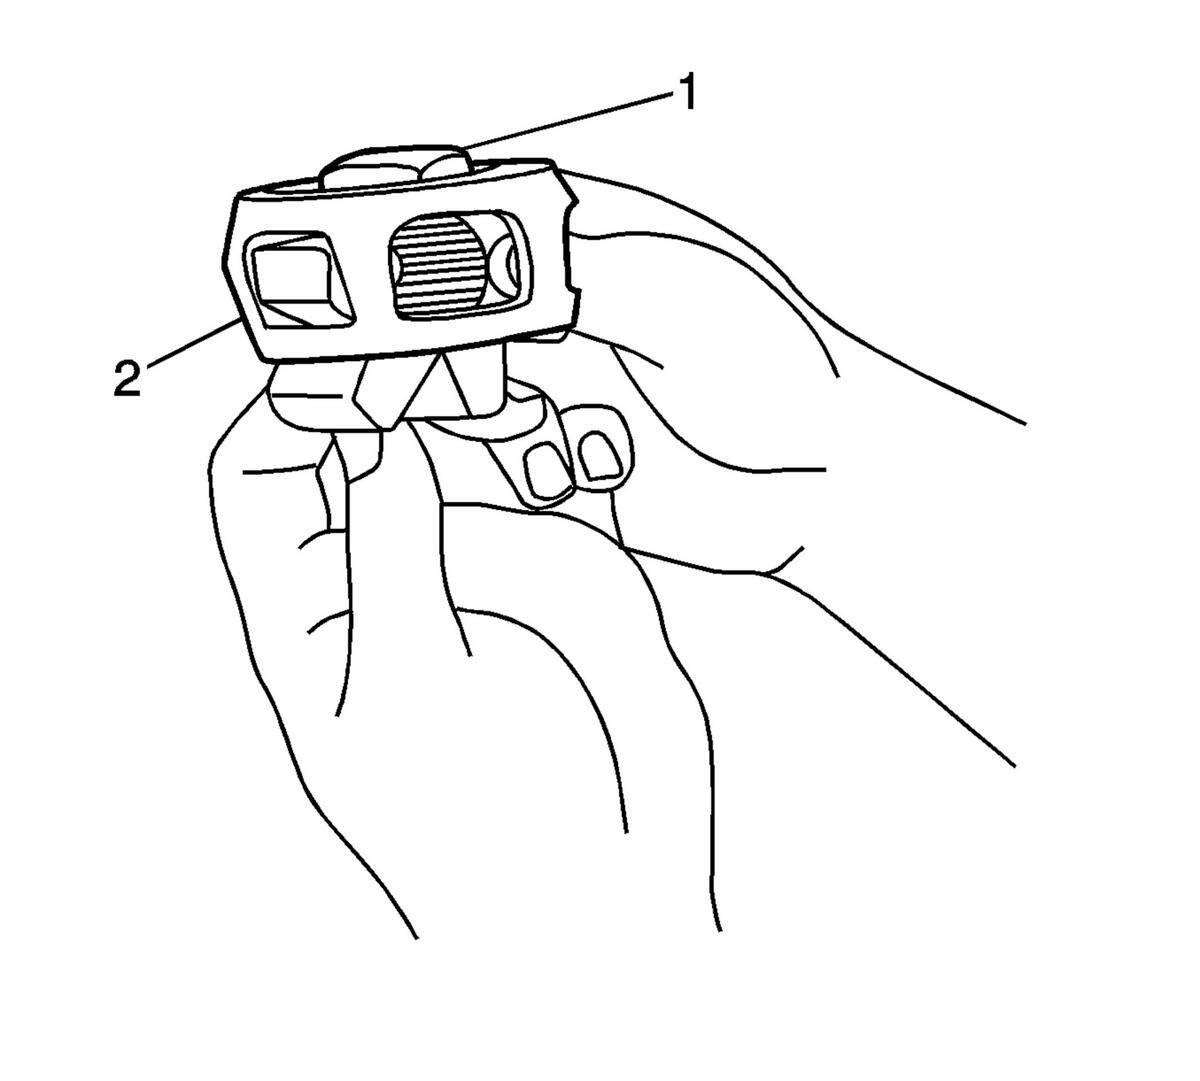
- Position the cage (2) and the inner race (1) so that the larger radius corners of the cage windows are up.
 Courtesy of GENERAL MOTORS COMPANY
- Rotate the inner race (1) 90 degrees to the center line of the cage (2).
- Align the lands of the inner race (1) with the windows of the cage (2).
- Move the inner race (1) land into the cage window (2).
- Rotate the inner race (1) down and remove it from the cage (2).
- Clean the following items thoroughly with the proper cleaning solvent:
- The inner race
- The outer race
- The cage
- The ball bearings
- The exposed end of the wheel drive shaft
- If any of the above items are found to have excessive wear or are damaged, replace the outer CV joint as an assembly.
NOTE:
The internal parts of the CV joint are NOT SERVICED separately. The outer CV joint is serviced as an assembly.