- Raise and suitably support the vehicle. Refer to Lifting and Jacking the Vehicle
.
WARNING:
To prevent personal injury and/or component damage, do not allow the weight of the vehicle to load the front wheels or attempt to operate the vehicle, when the wheel drive shaft(s) or wheel drive shaft nut(s) are removed. To do so may cause the inner bearing race to separate, resulting in damage to brake and suspension components and loss of vehicle control.
CAUTION:
Wheel drive shaft boots, seals and clamps should be protected from sharp objects any time service is performed on or near the wheel drive shaft(s). Damage to the boot(s), the seal(s) or the clamp(s) may cause lubricant to leak from the joint and lead to increased noise and possible failure of the wheel drive shaft.
- Remove the tire and wheel assembly. Refer to Tire and Wheel Removal and Installation
.
- If the vehicle is equipped with a manual transmission, drain the transmission. Refer to Transmission Fluid Drain and Fill
.
NOTE:
Transmission draining is not necessary on vehicles equipped with an automatic transmission.
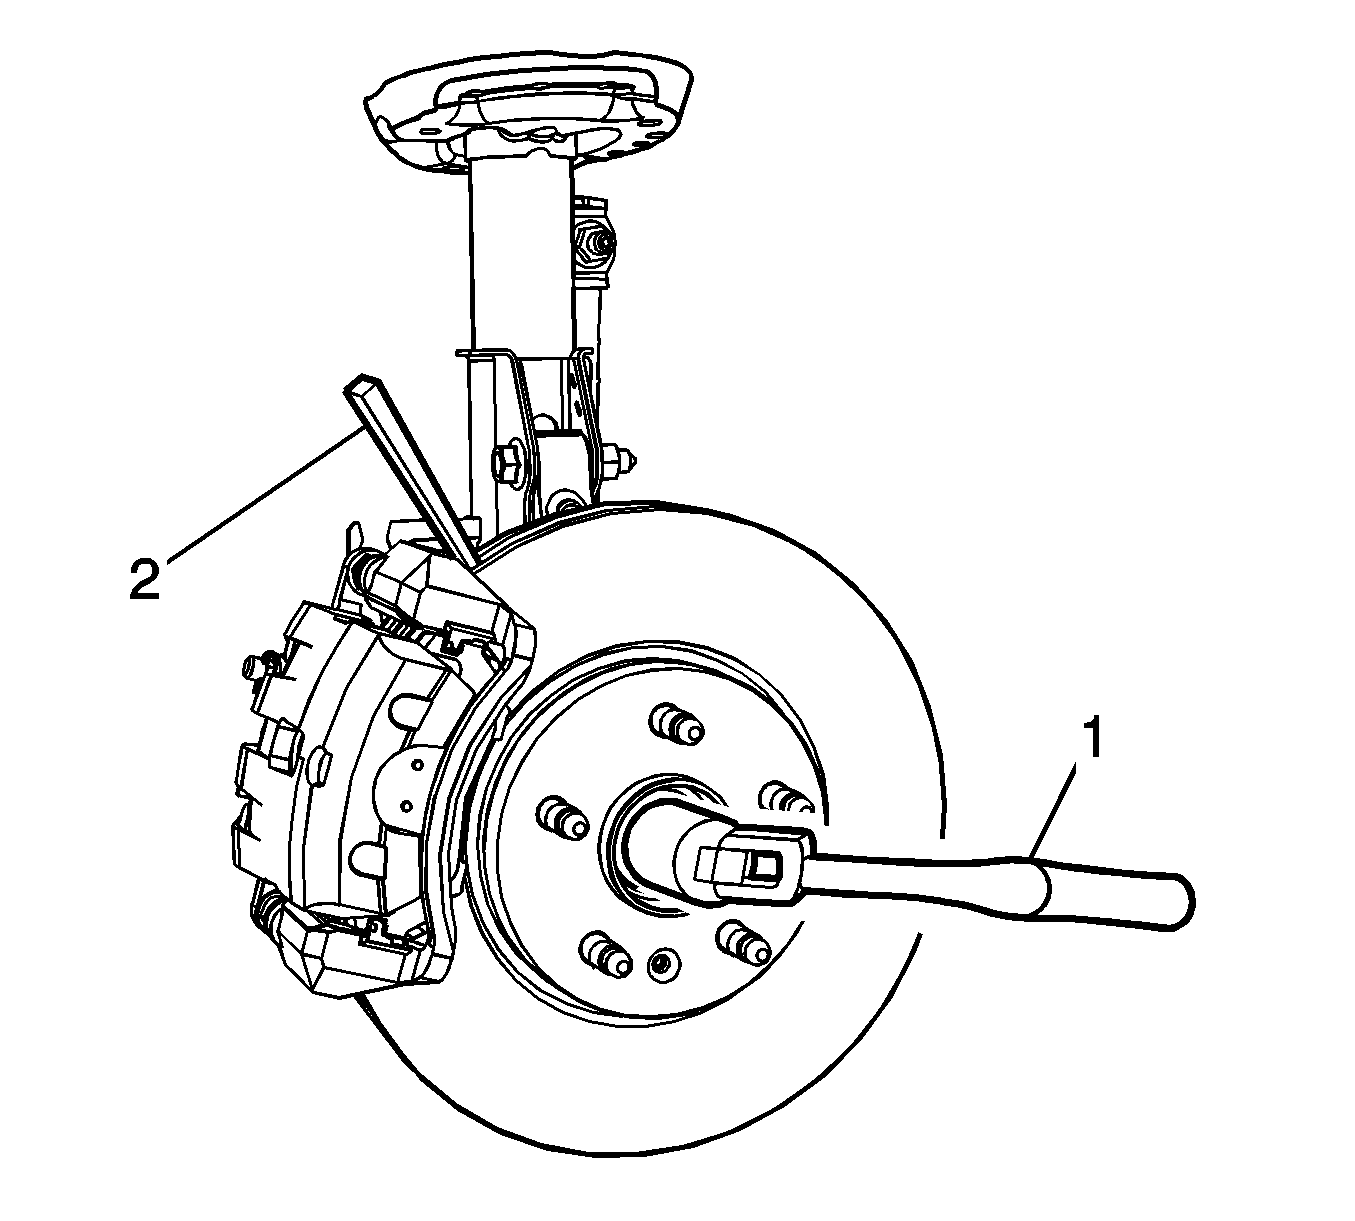
- Insert a drift or punch (2) in the cooling fins of the brake rotor.
 Courtesy of GENERAL MOTORS COMPANY
- Rotate the brake rotor until the drift or punch contacts the brake caliper mounting bracket.
- Using a breaker bar (1), loosen the wheel drive shaft nut.
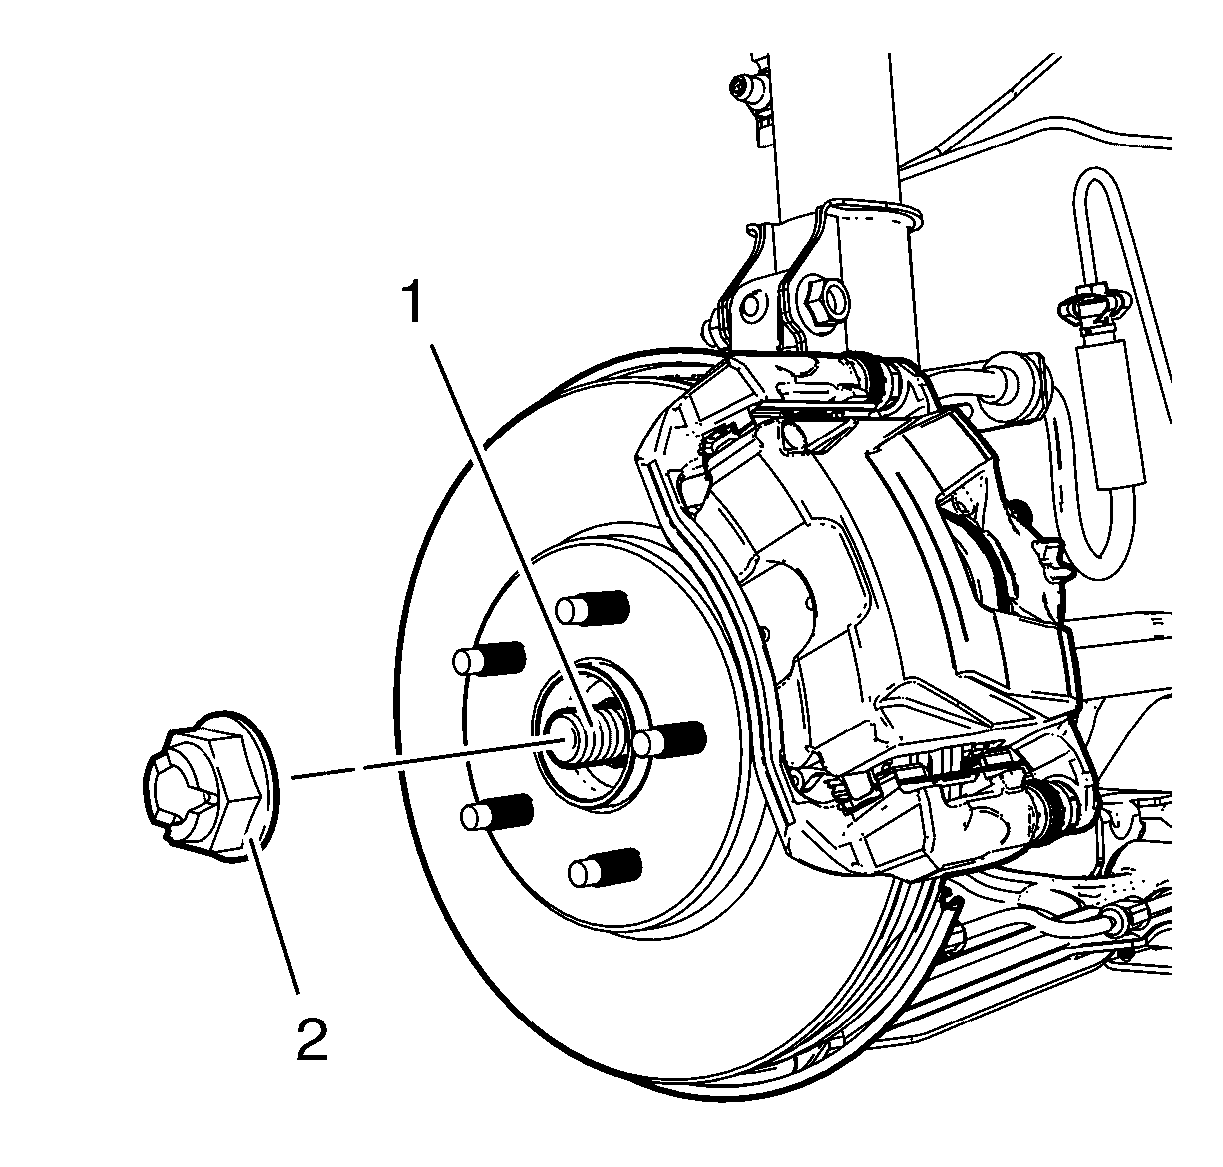
- Remove the wheel drive shaft nut (2) from the wheel drive shaft (1).
 Courtesy of GENERAL MOTORS COMPANY
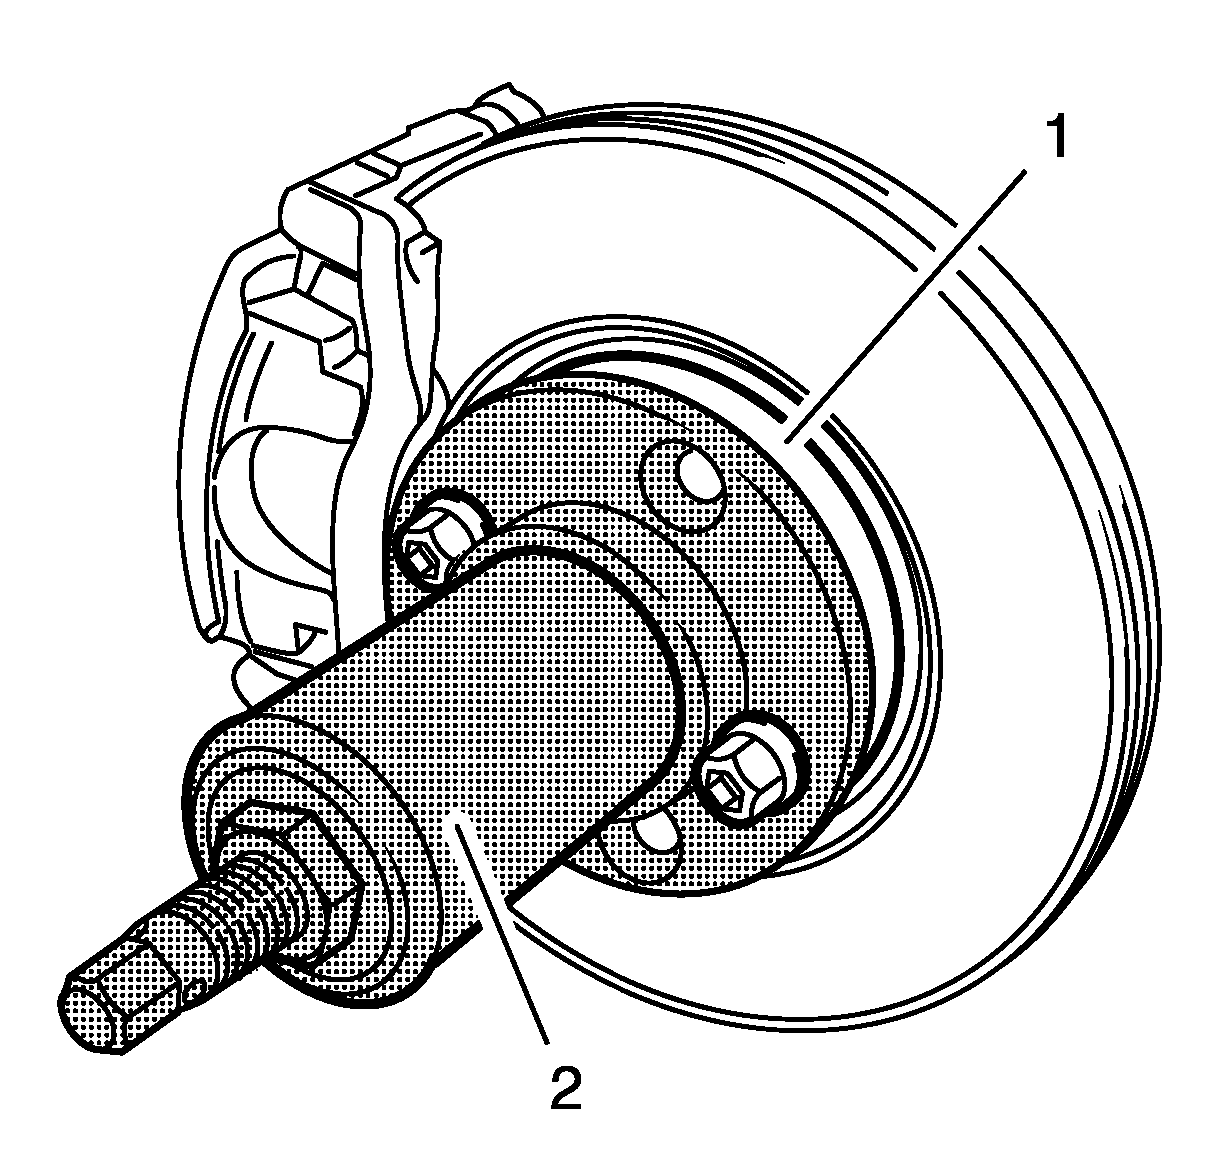
- Using the CH-49400
remover (2) or equivalent, separate the brake rotor and wheel bearing/hub assembly (1).
 Courtesy of GENERAL MOTORS COMPANY
CAUTION:
Support the brake caliper with heavy mechanic wire or equivalent, whenever it is separated from its mount and the hydraulic flexible brake hose is still connected. Failure to support the caliper in this manner will cause the flexible brake hose to bear the weight of the caliper, which may cause damage to the brake hose and in turn may cause a brake fluid leak.
NOTE:
Do not hit the end of the wheel drive shaft with a hammer to separate it from the wheel bearing/hub. Damage to the wheel bearing hub and/or wheel drive shaft may result.
- Remove the outer tie rod assembly from the steering knuckle. Refer to Steering Linkage Outer Tie Rod Replacement
.
- Remove the ball joint from the steering knuckle. Refer to Lower Control Arm Replacement
.
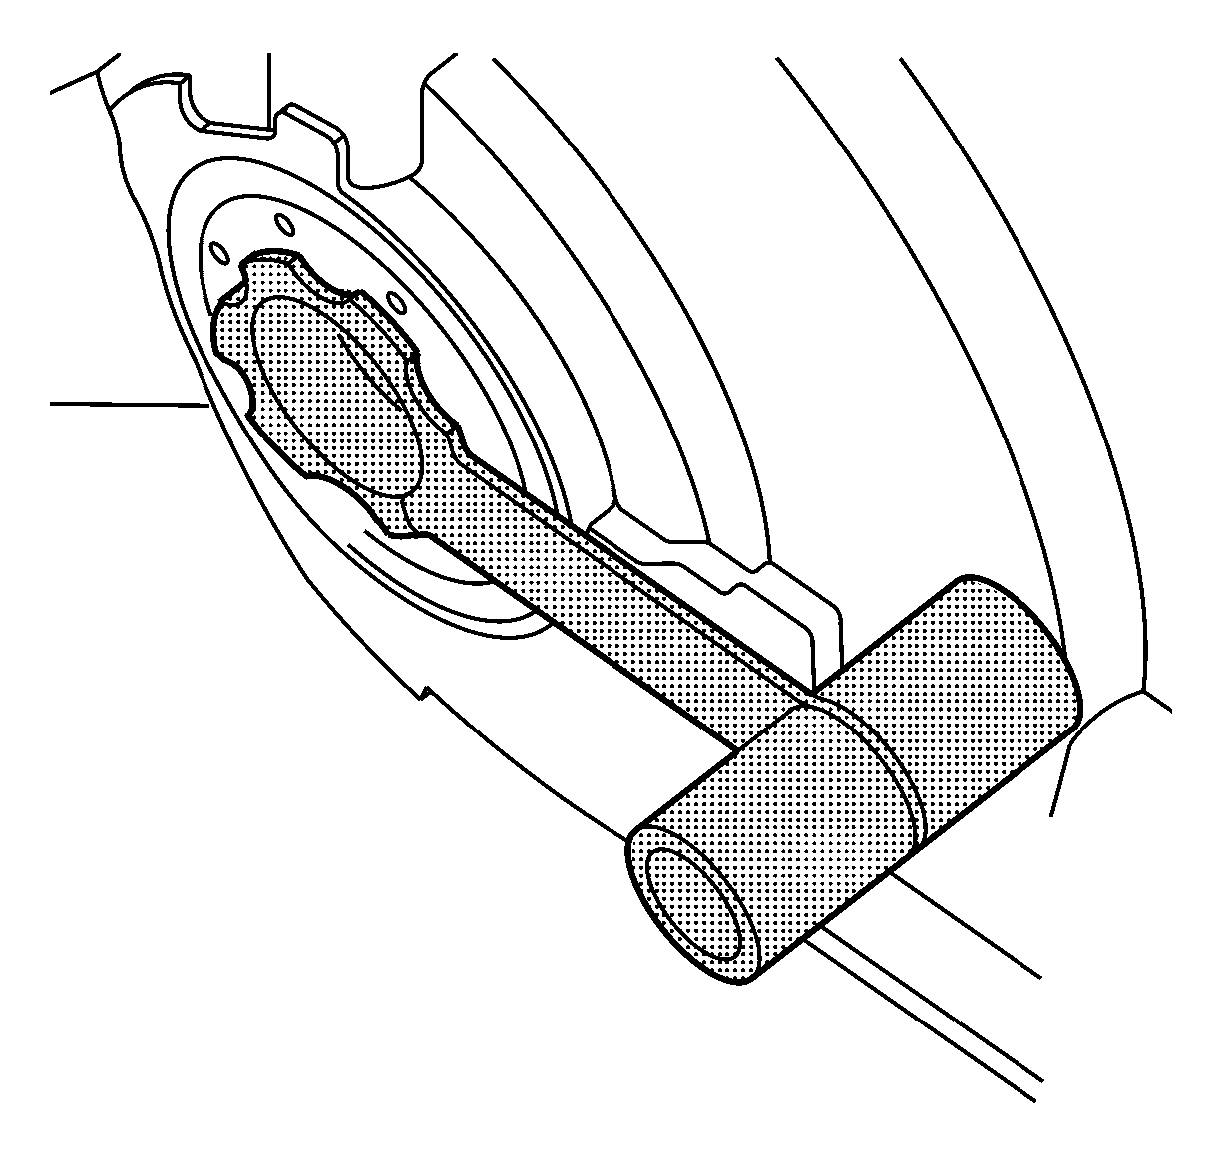
- Install the DT-6332
protector into the differential output shaft seal.
 Courtesy of GENERAL MOTORS COMPANY
CAUTION:
Wheel drive shaft seal protector must be installed into the differential output shaft seal prior to removing and installing the wheel drive shaft. Failure to install the wheel drive shaft seal protector as indicated may cause the splines of the wheel drive shaft to cut the differential output seal.
- Using the CH-313
hammer (2) with CH-6003
remover (1) along with DT-29794
extension and remove the wheel drive shaft (3) from the vehicle.
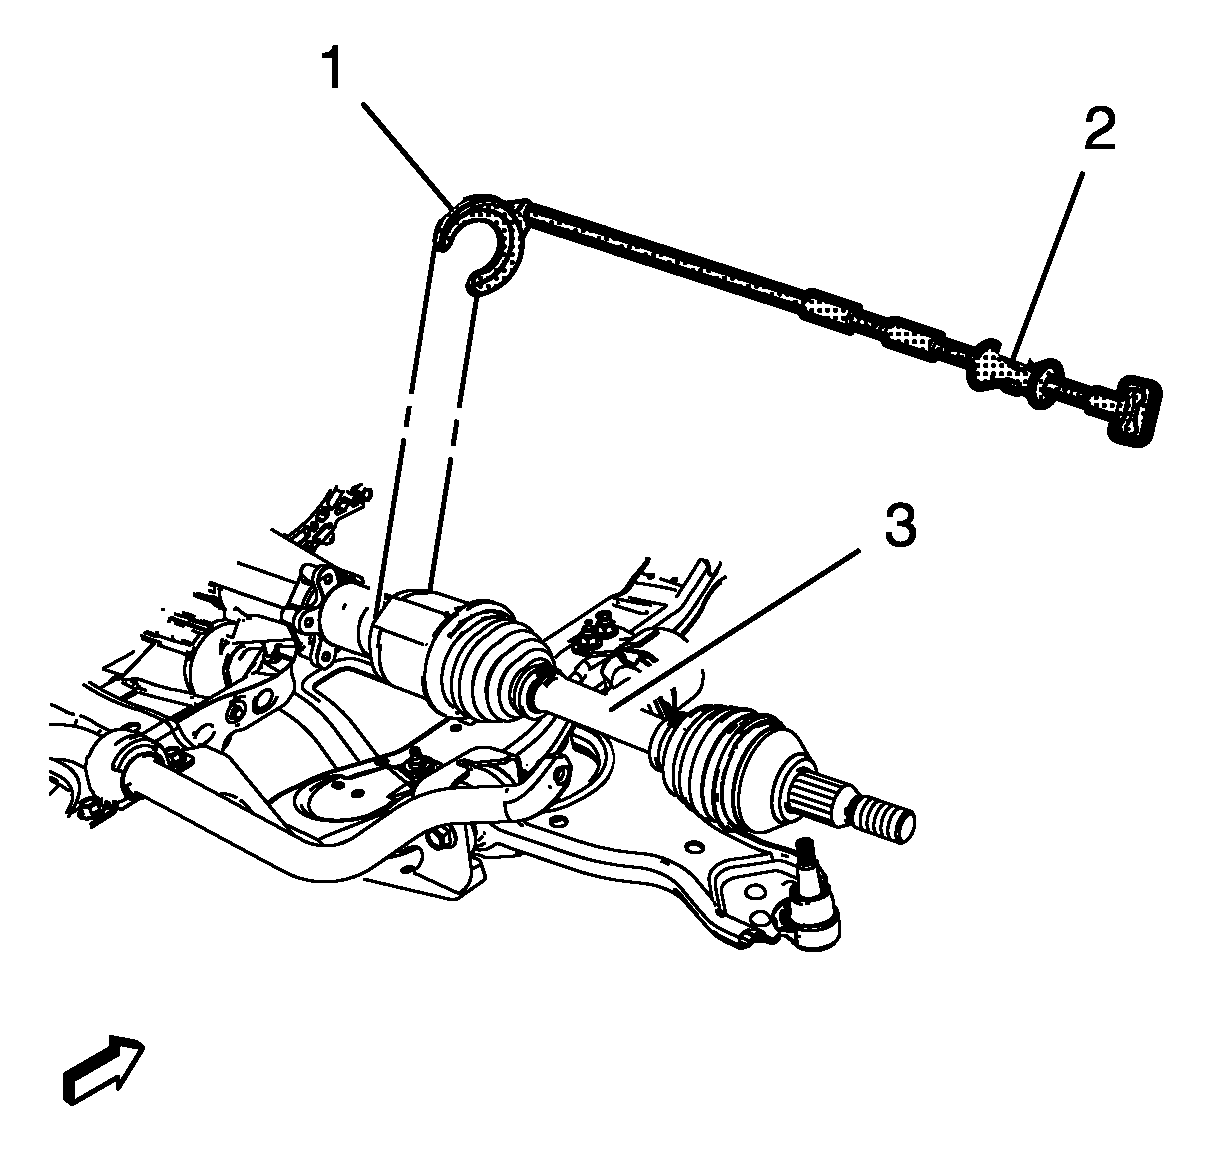 Courtesy of GENERAL MOTORS COMPANY
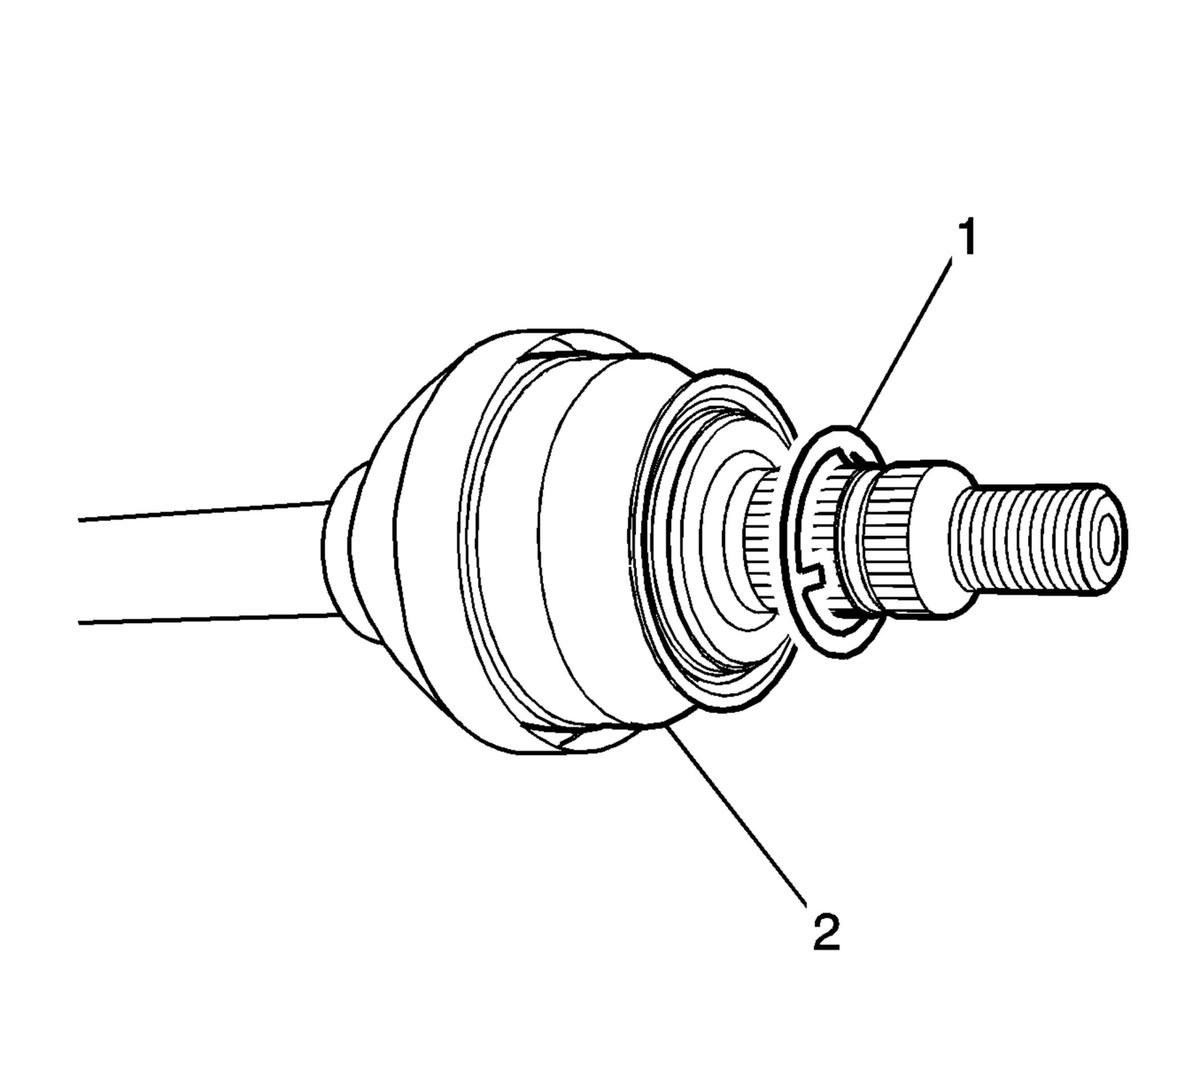
- Remove and discard the washer (1) from the wheel drive shaft (2). DO NOT re-use the washer, replace with NEW only.
 Courtesy of GENERAL MOTORS COMPANY
NOTE:
If there is no washer on the wheel drive shaft, install a NEW washer.