Installation Procedure
- Using the CH-42450-A
kit, thoroughly clean any rust or corrosion from the mating surface of the hub/axle flange.
- Using the CH-41013
kit, thoroughly clean any rust or corrosion from the mating surface and mounting surface of the brake rotor.
- Inspect the mating surfaces of the hub/axle flange and the rotor to ensure that there are no foreign particles or debris remaining.
- Install the brake rotor (1) to the hub/axle flange. Use the matchmark made prior to removal for proper orientation to the flange.
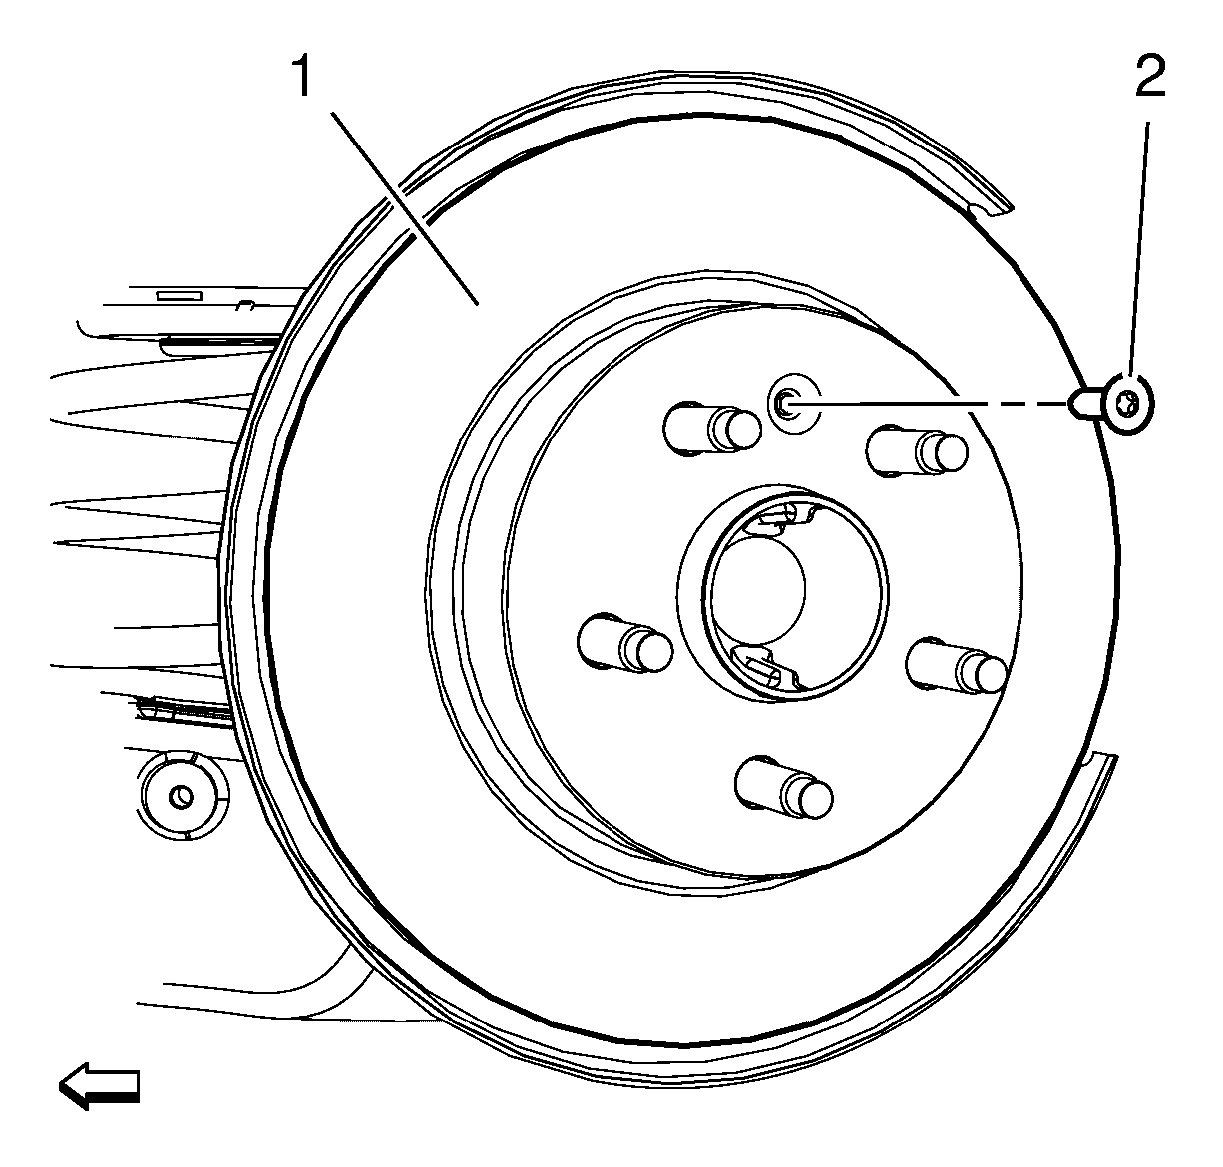 Courtesy of GENERAL MOTORS COMPANY
- Install rear brake rotor bolt (2) and tighten to 9 N.m (80 lb in).
- Install the brake caliper and the caliper mounting bracket assembly to the steering knuckle. Refer to Rear Brake Caliper Bracket Replacement .
- If the brake rotor was removed and installed as part of a brake system repair, measure the assembled lateral run out (LRO) of the brake rotor to ensure optimum performance of the disc brakes. Refer to Brake Rotor Assembled Lateral Runout Measurement .
- If the brake rotor assembled LRO measurement exceeds the specification, bring the LRO to within specifications. Refer to Brake Rotor Assembled Lateral Runout Correction .