Roof Drip Scalp Molding Replacement (Coupe)
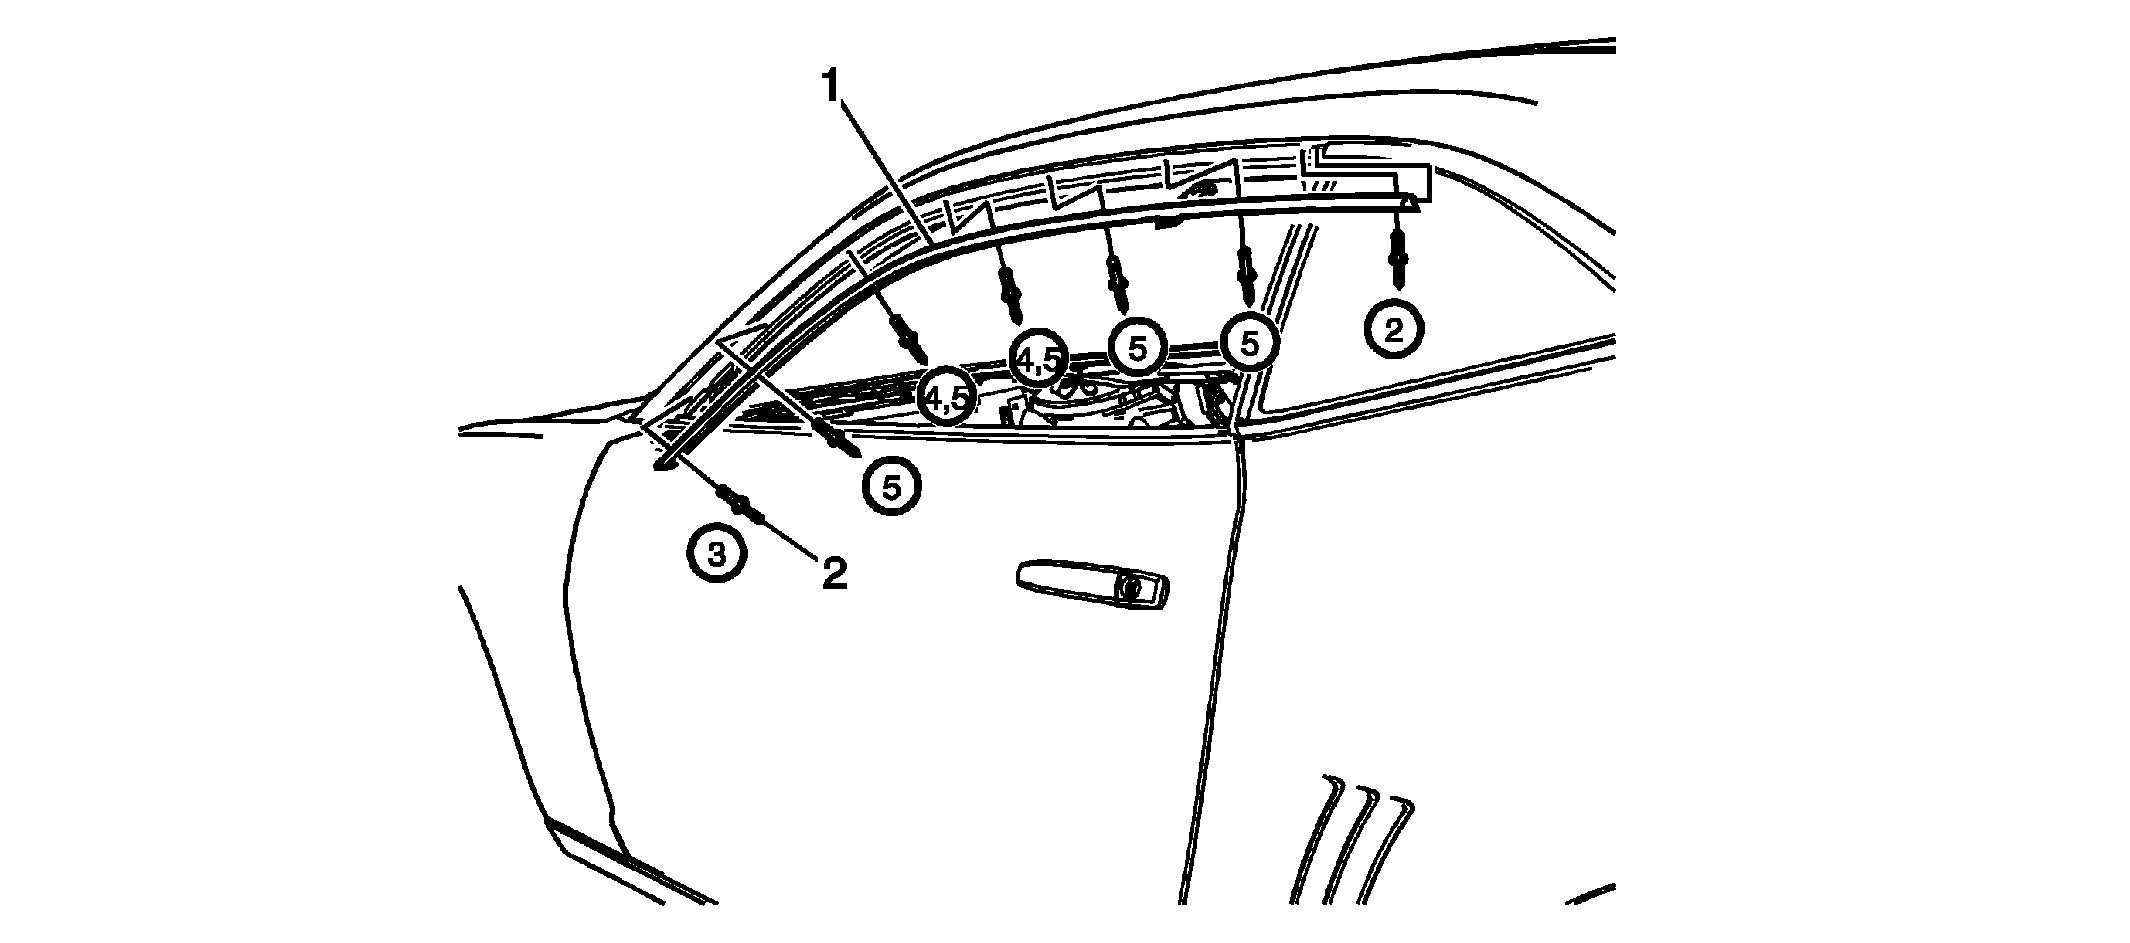 Courtesy of GENERAL MOTORS COMPANY
 Roof Drip Scalp Molding Replacement (Coupe)
| Callout |
Component Name |
|
Preliminary Procedures
- Open the door on the side the roof drip scalp molding is to be replaced.
- Pull the top half of the front side door opening weatherstrip downward from the roof drip scalp molding and quarter window in order to access the rivets in the roof drip scalp molding.
WARNING:
Use the proper eye protection when drilling to prevent metal chips from causing physical injury.
- Drill the rivets in order to remove the roof drip scalp molding from the body outer panel surface.
|
| 1 |
Roof Drip Scalp Molding Procedures
- Insert the rearward end of the roof drip scalp molding into the front end of the rear encapsulated glass molding.
TIP:
Medium insertion effort is required when securing the roof drip scalp molding into the front end of the rear encapsulated quarter glass upper joint.
- Hold the roof drip scalp molding into position on the body side outer.
- Install and secure a rivet to the center of the molding
- Install and secure a rivet to the rear edge
- Install and secure a rivet to the front edge
- Install and secure the remaining rivets
- Reposition the upper half of the front side door weatherstrip into roof drip scalp molding and quarter window channel.
|
| 2 |
Roof Drip Scalp Molding Rivet (Qty: 7)
TIP:
Follow the mandatory sequence when securing the rivets to body panel. |