Clutch Master Cylinder Replacement (Left Hand Drive)
Clutch Master Cylinder Replacement (Left Hand Drive)
Removal Procedure
1. Remove battery tray. Refer to Battery Tray Replacement (Battery Tray Replacement).
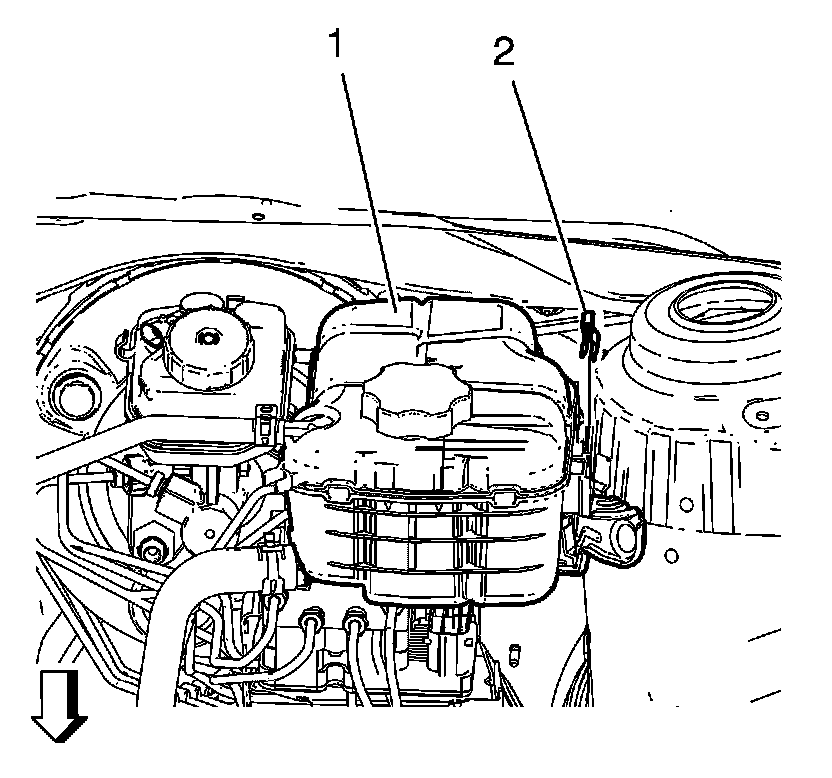
2. Remove radiator surge tank clip (2).
3. Remove radiator surge tank (1) and lay aside.
4. Place basin underneath.
5. Extract as much brake fluid out of brake fluid reservoir as possible.
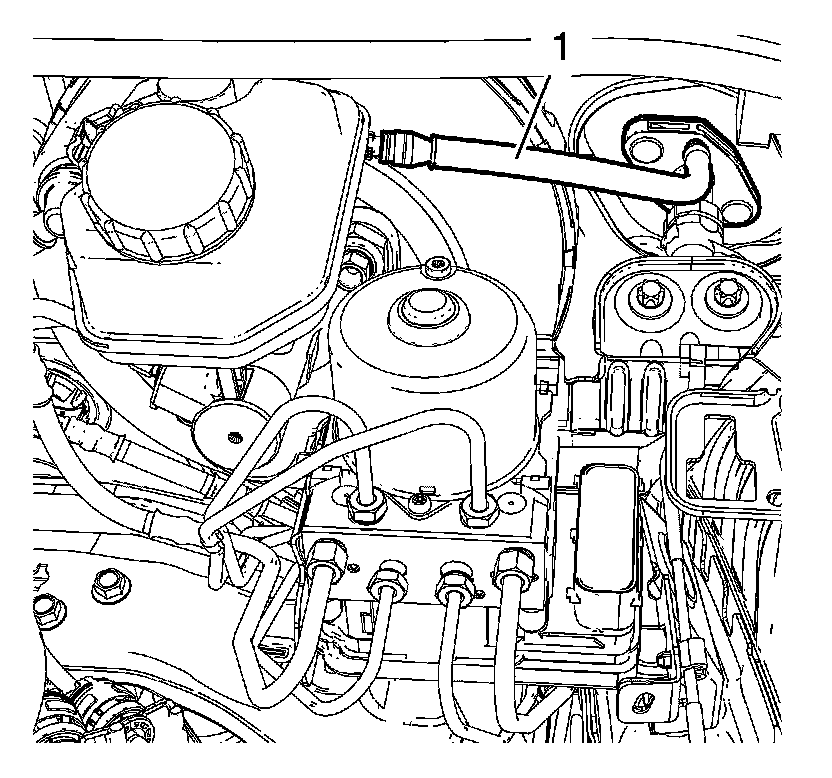
6. Remove clutch master cylinder reservoir hose (1) from clutch master cylinder.
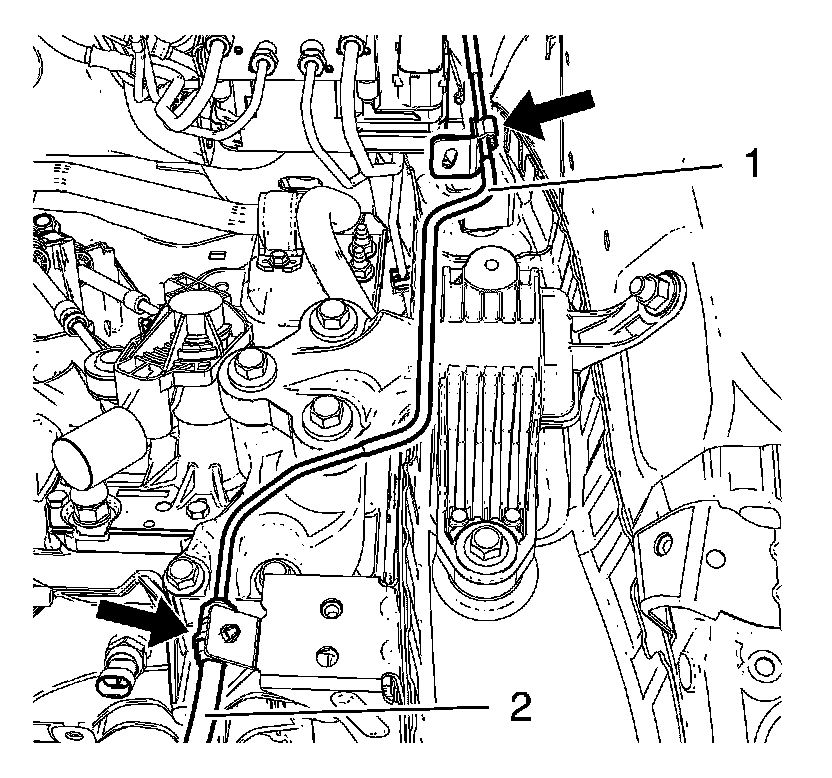
7. Clip clutch actuator cylinder front (1) pipe out of 2 retainers (arrows).
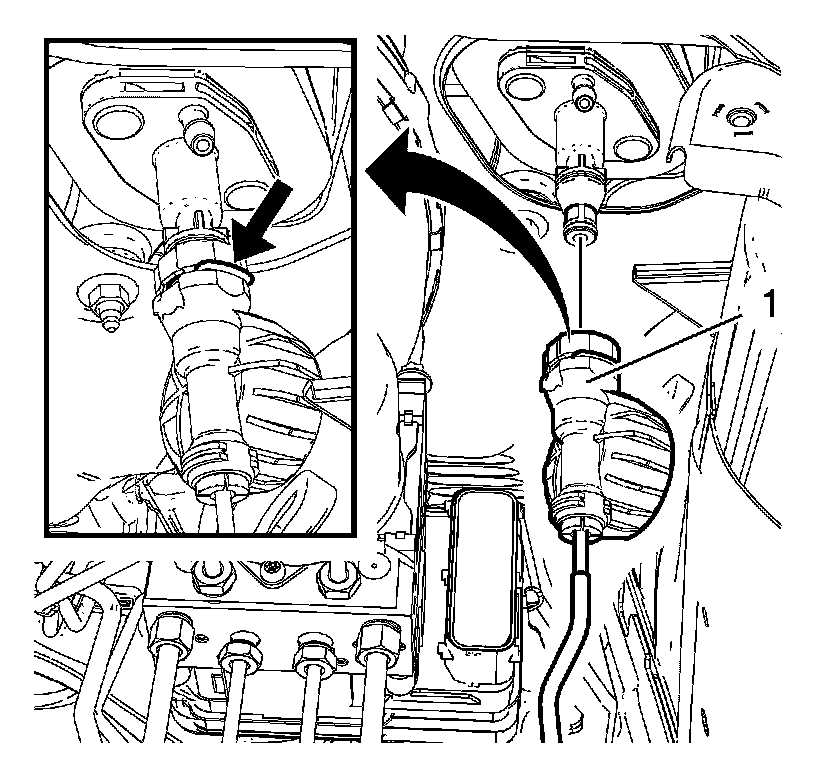
8. Open retaining clip (arrow).
9. Disconnect clutch actuator cylinder front pipe (1) from clutch master cylinder.
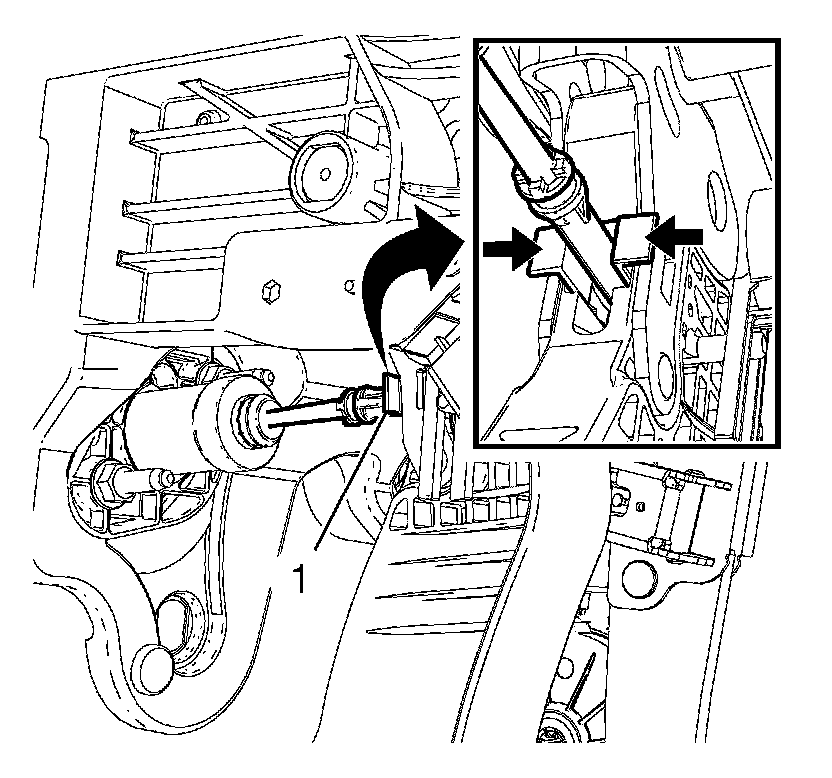
Note: Press 2 latches (arrows) together.
10. Disconnect push rod retainer (1) from clutch pedal.
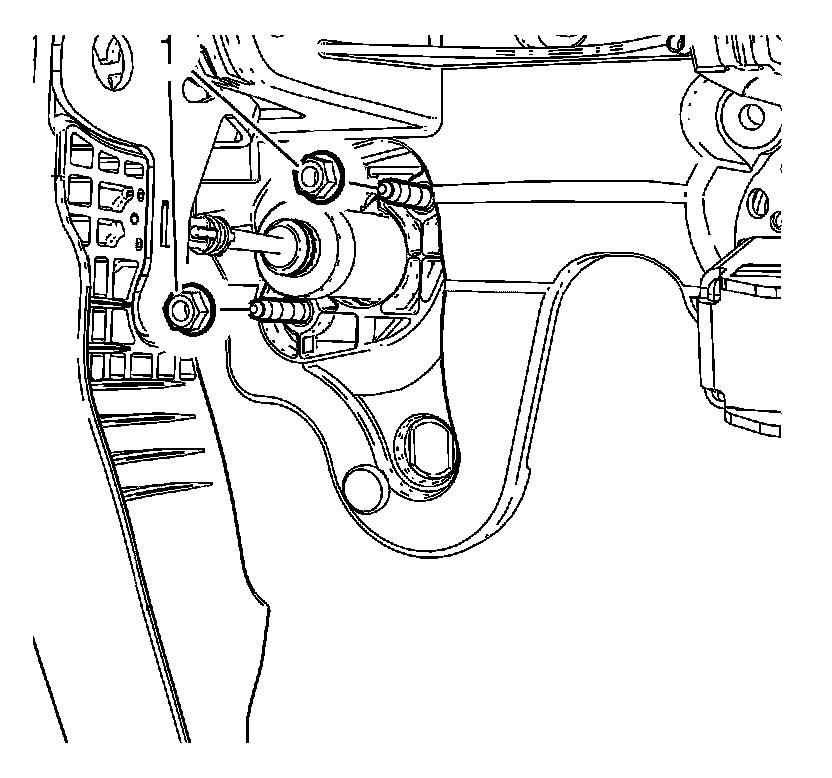
11. Remove 2 clutch master cylinder nuts (1).
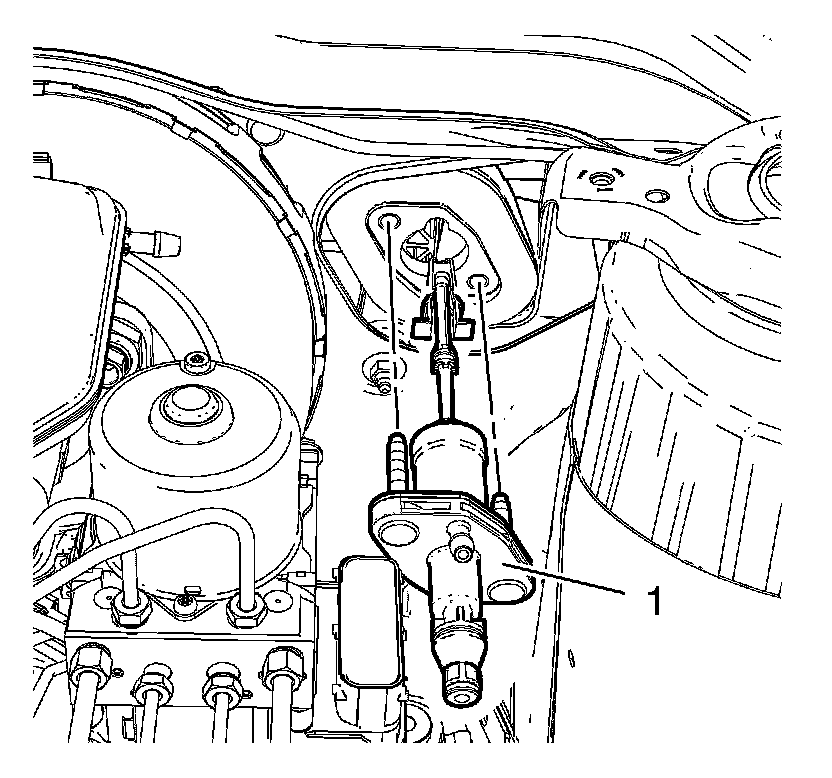
12. Remove clutch master cylinder (1).
Installation Procedure
1. Install clutch master cylinder (1).
Caution: Refer to Fastener Caution (Fastener Caution).
2. Install 2 clutch master cylinder nuts (1) and tighten to 18 Nm (13 lb ft).
Note: The retaining clip (arrows) has to engage audibly.
3. Connect push rod retainer (1) to clutch pedal.
4. Connect clutch actuator cylinder front pipe (1) to clutch master cylinder.
5. Close retaining clip (arrow).
6. Clip clutch actuator cylinder front pipe (1) into 2 retainers (arrows).
7. Install clutch master cylinder reservoir hose (1) to clutch master cylinder.
8. Install radiator surge tank (1).
9. Install radiator surge tank clip (2).
10. Bleed hydraulic clutch system. Refer to Hydraulic Clutch System Bleeding (Service and Repair).
11. Install battery tray. Refer to Battery Tray Replacement (Battery Tray Replacement).