Rear Floor Panel Carpet Replacement
Rear Floor Panel Carpet Replacement
Removal Procedure
1. Remove the front seats. Refer to Front Seat Replacement - Bucket (Front Seat Replacement - Bucket).
2. Remove the rear seat cushions. Refer to Rear Seat Cushion Replacement (Rear Seat Cushion Replacement).
3. Remove the communication interface module. Refer to Communication Interface Module Replacement (TrailBlazer, Envoy) (Communication Interface Module Replacement).
4. Remove the navigation control processor bracket. Refer to Communication Interface Module Bracket Replacement (Communication Interface Module Bracket Replacement).
5. Remove the seat back, left and right side. Refer to Rear Seat Number 1 Back Replacement (Rear Seat Number 1 Back Replacement).
6. Remove the front bucket seats. Refer to Front Seat Replacement - Bucket (Front Seat Replacement - Bucket).
7. Remove the front door sill plates. Refer to Front Side Door Sill Trim Plate Replacement (Service and Repair).
8. Remove the rear door sill plates. Refer to Rear Side Door Sill Trim Plate Replacement (Service and Repair).
9. Remove the liftgate door sill plate. Refer to Liftgate Door Sill Plate Replacement (Service and Repair).
10. Remove the center pillar trim panels. Refer to Center Pillar Garnish Molding Replacement (Service and Repair).
11. Remove the lower rear quarter trim panels. Refer to Rear Quarter Trim Panel Replacement - Left Side (Service and Repair) or to Rear Quarter Trim Panel Replacement - Right Side (Service and Repair).
12. Remove the tool kit carrier.
13. Remove the bussed electrical center junction block from the bussed electrical center (BEC) base, and the bussed electrical center base from the floor panel studs. Refer to Rear Electrical Center or Junction Block Replacement (Rear Electrical Center or Junction Block Replacement).
14. Remove the child restraint tether anchors. Refer to Child Restraint Tether Anchor Replacement - Rear No. 1 (Service and Repair).
15. Remove the bussed electrical center base and communication interface module electrical connectors through the pass through holes in the carpet.
16. Remove the floor console to the floor console carrier. Refer to Console Replacement (Service and Repair).
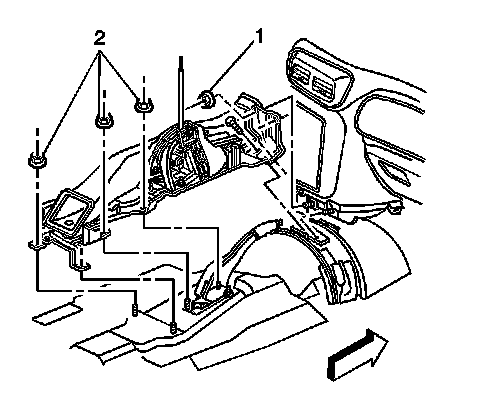
17. Remove the 4 nuts (1, 2) retaining the rear of the floor console bracket to the floor weld studs.
18. Raise the rear portion of the floor console bracket and remove the carpet from underneath the console bracket.
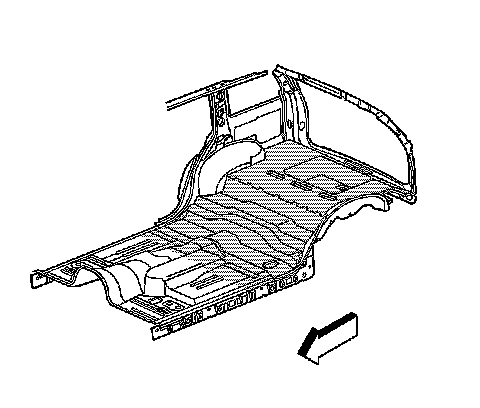
19. Remove the carpet from the vehicle.
Installation Procedure
Warning
In order to avoid personal injury or vehicle damage when you repair or replace the carpet, use the same thickness and material size as the original installation. Always return the carpet to the original location.
1. Position the carpet to the floor panel.
2. Raise the rear portion of the floor console bracket and slide the carpet underneath the console bracket.
3. Position the rear carpet over the edge of the front carpet.
4. Align the holes in the carpet to the seat studs on the floor panel.
Caution: Refer to Fastener Caution (Fastener Caution).
5. Install the 4 nuts retaining the rear of the floor console bracket to the floor weld studs.
Tighten the nuts to 25 Nm (18 lb ft).
6. Feed the BEC base and the communication interface module electrical connectors through the pass through holes in the carpet.
7. Install the floor console Refer to Console Replacement (Service and Repair).
8. Install the child restraint tether anchors. Refer to Child Restraint Tether Anchor Replacement - Rear No. 1 (Service and Repair).
9. Install the BEC. Refer to Rear Electrical Center or Junction Block Replacement (Rear Electrical Center or Junction Block Replacement).
10. Install the tool kit carrier.
11. Install the 3 tool carrier nuts to the floor studs.
Tighten the nuts to 7 Nm (62 lb in).
12. Install the lower rear quarter trim panels. Refer to Rear Quarter Trim Panel Replacement - Left Side (Service and Repair) or to Rear Quarter Trim Panel Replacement - Right Side (Service and Repair).
13. Install the center pillar trim panels. Refer to Center Pillar Garnish Molding Replacement (Service and Repair).
14. Install the liftgate door sill plate. Refer to Liftgate Door Sill Plate Replacement (Service and Repair).
15. Install the rear door sill plates. Refer to Rear Side Door Sill Trim Plate Replacement (Service and Repair).
16. Install the front door sill plates. Refer to Front Side Door Sill Trim Plate Replacement (Service and Repair).
17. Install the front bucket seats. Refer to Front Seat Replacement - Bucket (Front Seat Replacement - Bucket).
18. Instal the seat back, right and left side. Refer to Rear Seat Number 1 Back Replacement (Rear Seat Number 1 Back Replacement).
19. Install the navigation control processor bracket to the floor panel. Refer to Communication Interface Module Bracket Replacement (Communication Interface Module Bracket Replacement).
20. Install the rear seat cushions. Refer to Rear Seat Cushion Replacement (Rear Seat Cushion Replacement).
21. Install the communication interface module. Refer to Communication Interface Module Replacement (TrailBlazer, Envoy) (Communication Interface Module Replacement).
22. Install the front seats. Refer to Front Seat Replacement - Bucket (Front Seat Replacement - Bucket).