2nd Clutch Assemble: Assembly
 Courtesy of GENERAL MOTORS CORP.
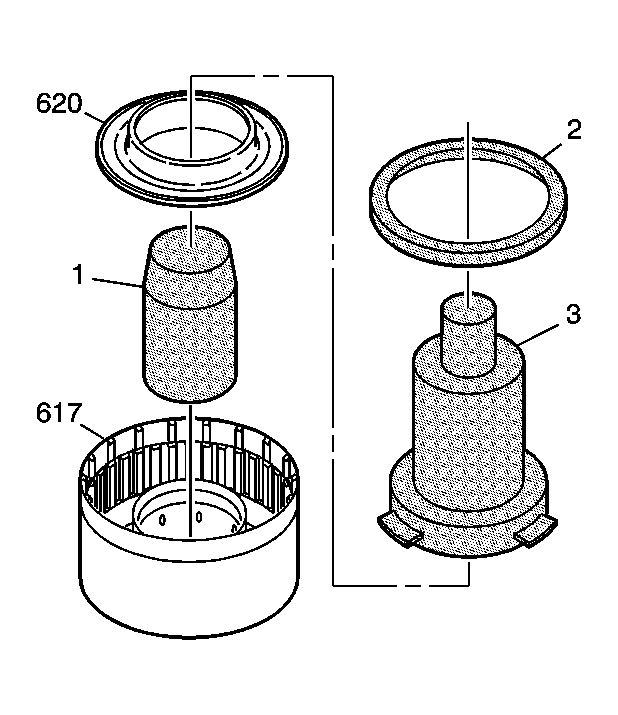
- Install J 41992-2:
piston adapter (1) into the second clutch housing (617).
- Install the second clutch piston (620) and J 41992-3:
piston installer (3) into J 41992-1:
piston protector (2).
- Install the second clutch piston and tool assembly into the second clutch housing assembly (617).
- Use hand pressure to press down on J 41992-3:
piston installer (3) until the second clutch piston (620) is seated.
- Remove J 41992-1:
piston protector (2), J 41992-2:
piston adapter (1) and J 41992-3:
piston installer (3). If necessary, gently tap with a punch through the center of the second clutch housing to remove the tools.
 Courtesy of GENERAL MOTORS CORP.
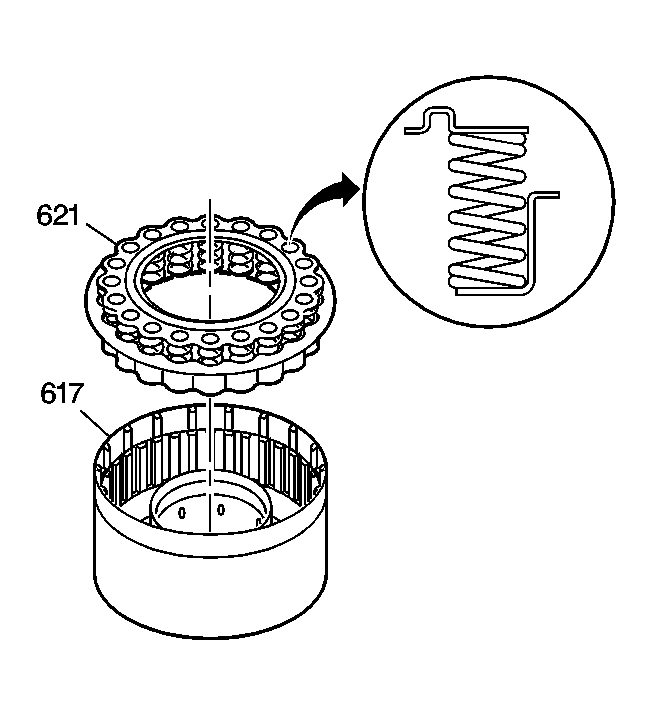
- Assemble the second clutch spring assembly (621) into the second clutch housing assembly (617).
 Courtesy of GENERAL MOTORS CORP.
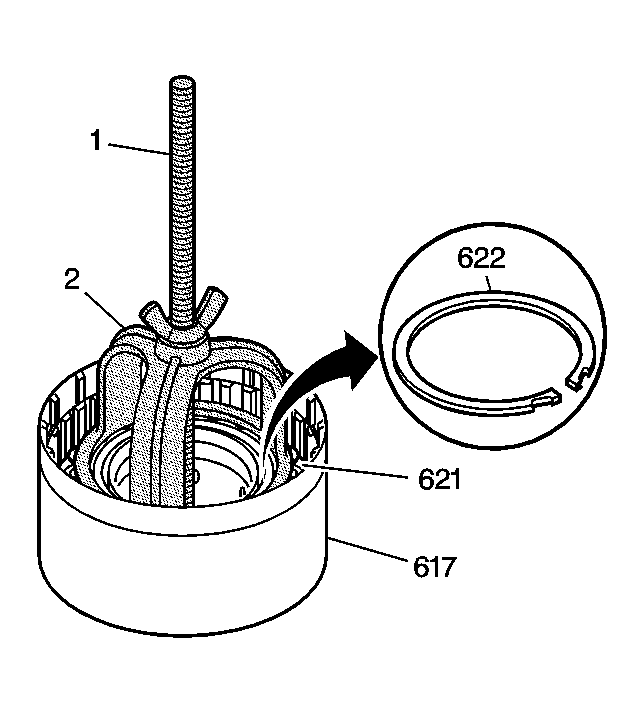
- Use J 23327:
spring compressor (1) and J 38734:
compressor adapter (2) in order to compress the second clutch piston spring (621).
- Install the second clutch spring assembly retainer ring (622).
- Remove J 23327:
spring compressor and J 38734:
compressor adapter from the second clutch housing (617).
 Courtesy of GENERAL MOTORS CORP.
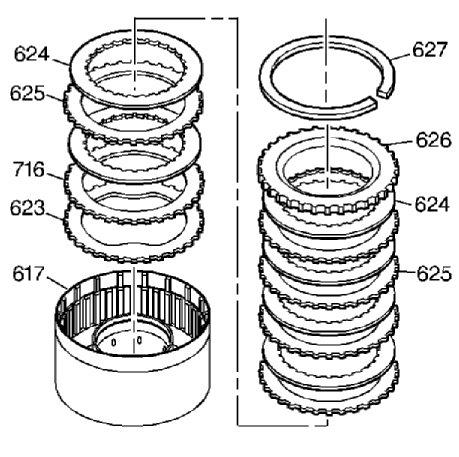
- Install the second clutch waved plate (623) into the second clutch housing (617).
- Install the second clutch apply plate (716) into the second clutch housing (617) with the marking DN or DOWN toward the piston.
- Install the second clutch fiber plate assemblies (624) and the second clutch steel plates (625), starting with a fiber plate assembly.
- Assemble the remaining plates, alternating between steel and fiber.
- Install the second clutch backing plate (626) into the housing.
- Install the second clutch backing plate retaining ring (627).