Digital Radio Antenna Cable Replacement
Digital Radio Antenna Cable Replacement
Removal Procedure
1. Remove the right windshield garnish molding.
2. Remove the instrument panel (I/P) trim pad.
3. Remove the right sunshade and inboard retaining clip.
4. Lower the front portion of the headliner. Refer to Headlining Trim Panel Replacement.
5. Disconnect the electrical connectors from the digital radio antenna assembly.
6. Remove the right front door sill plate.
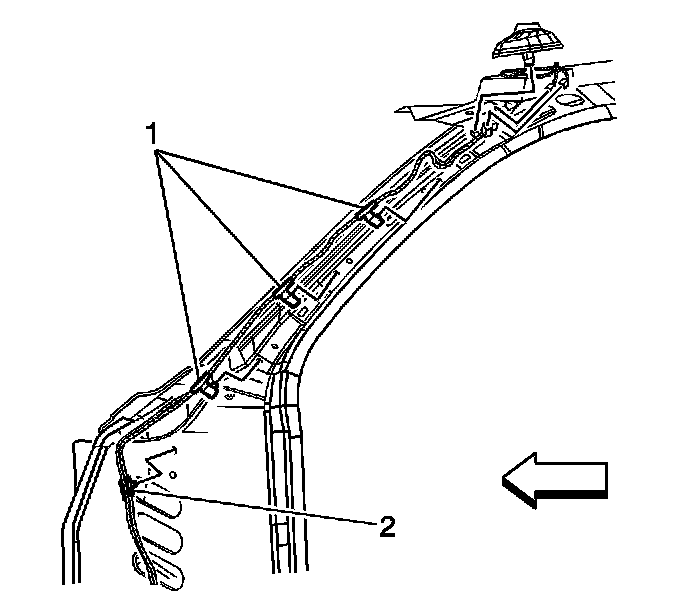
7. Remove the coaxial cable from the right windshield pillar (1).
8. Lower the right closeout insulator panel. Refer to Instrument Panel Insulator Panel Replacement - Right Side.
9. Disconnect the coaxial cable from the digital radio receiver.
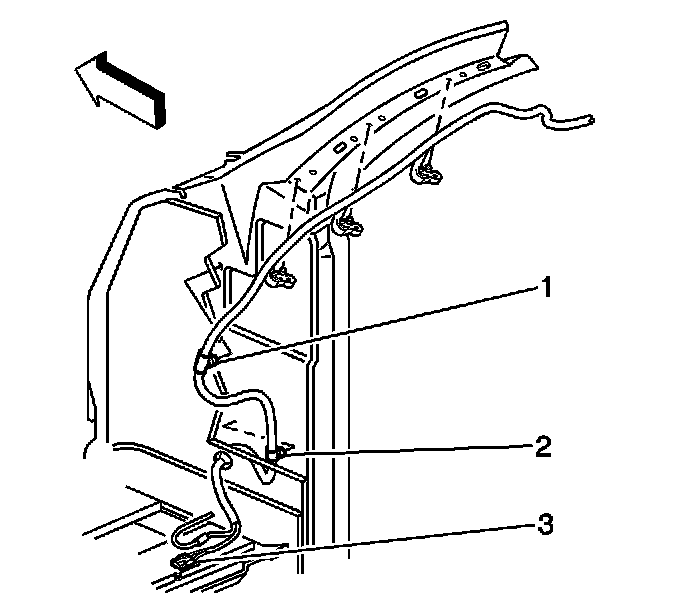
10. Remove the lower rose bud (2) from the cowl.
11. Securely attach a mechanics wire to the end of the coaxial cable (3).
12. The coaxial cable is routed through the cowl insulator access hole and positioned between the cowl and the I/P. In order to release the upper rose bud (1), grasp the coaxial cable near the bottom of the windshield and carefully pull upward.
13. Leaving the mechanics wire routed behind the I/P, remove the mechanics wire from the coaxial cable.
14. Remove the coaxial cable from the vehicle.
Installation Procedure
1. Securely attach the mechanics wire already routed behind the I/P to the end of the coaxial cable (3).
2. If equipped, carefully remove the rose bud (1) from the coaxial cable.
3. Grasp and gently pull the mechanics wire through the cowl insulator, routing the coaxial cable behind the I/P.
4. Attach the lower rose bud (2) to the cowl.
5. Connect the coaxial cable to the digital radio receiver.
6. Attach the coaxial cable to the right windshield pillar (1).
7. Install the right front door sill plate.
8. Install the right closeout insulator panel.
9. Connect the electrical connectors to the digital radio antenna assembly.
10. Install the headliner.
11. Install the right sunshade and inboard retaining clip.
12. Install the I/P trim pad.
13. Install the right windshield garnish molding.