Adjustment Procedure
- Release the park brake.
- Raise and support the vehicle. Refer to Lifting and Jacking the Vehicle
in General Information.
- Turn the rear wheel by hand in order to test the amount of drag in the park brake.
- Apply the park brake.
- Test the amount of drag in the park brake. If the park brake does NOT apply and release properly, continue with this procedure.
- Release the park brake.
- Remove the rear wheels. Refer to Tire and Wheel Removal and Installation
in Tires and Wheels.
- Remove the rear brake calipers. Refer to Brake Caliper Replacement - Rear
in Disc Brakes.
- Remove the rear brake rotors. Refer to Brake Rotor Replacement - Rear
in Disc Brakes.
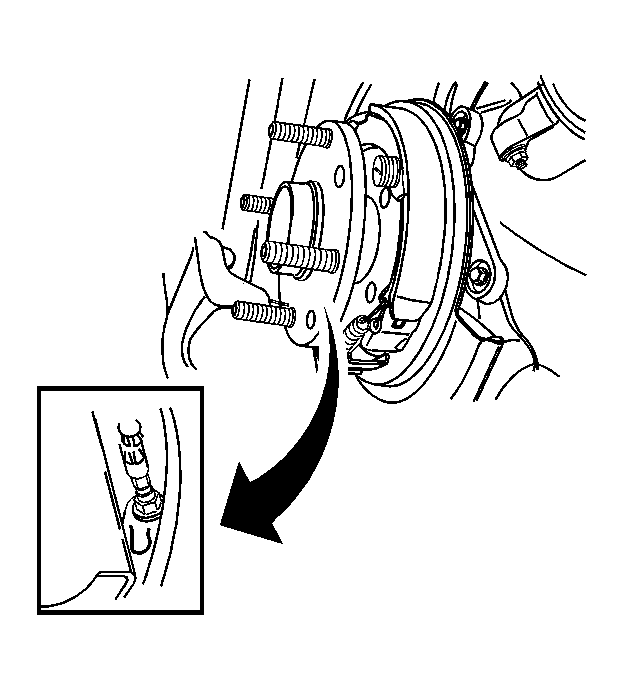 Courtesy of GENERAL MOTORS CORP.
- Disconnect the park brake cable from the park brake lever on each side of the vehicle.
- Inspect and replace any parts of doubtful strength or quality. This can be shown by discoloration from heat or stress.
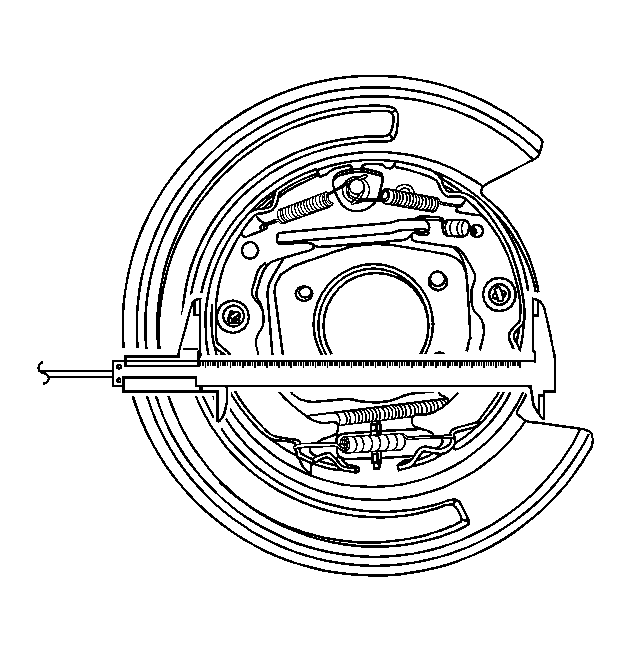 Courtesy of GENERAL MOTORS CORP.
- Using a vernier caliper, measure the shoe assembly diameter as closely as possible to the center of the lining material.
- Adjust the shoe assembly to 167.6-167.8 mm (6.60-6.61 in). Turn the adjuster nut clockwise to increase the diameter.
- Inspect and install the rear brake rotors. Refer to Brake Rotor Replacement - Rear
in Disc Brakes.
Courtesy of GENERAL MOTORS CORP.
- Install the park brake cable to the park brake lever on each side of the vehicle.
- Apply the park brake. Stop after hearing 2 clicks.
- Turn the rear rotor by hand until the wheel begins to drag.
- Release the park brake.
- Turn the rear rotor by hand to inspect the drag. Adjust the cable if necessary.
- Repeat the process for the other rear wheel. Adjust the cable if necessary.
- Install the rear brake calipers. Refer to Brake Caliper Replacement - Rear
in Disc Brakes.
- Install the rear wheels. Refer to Tire and Wheel Removal and Installation
in Tires and Wheels.
- Lower the vehicle.