Removal Procedure
 Courtesy of GENERAL MOTORS CORP.
- Disconnect the negative battery cable.
- Remove the instrument cluster. Refer to Instrument Panel Cluster (IPC) Replacement .
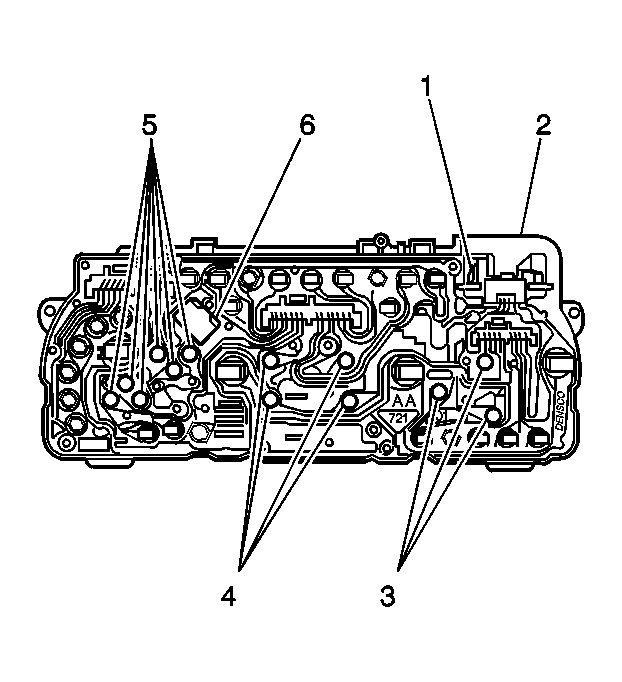
- Remove all of the bulb sockets from the rear of the instrument cluster (2).
- Remove the following from the rear of the instrument cluster (2):
- The multifunction alarm retainer
- The multifunction alarm (1)
- Remove the anti-lock brake indicator check module (6) from the rear of the instrument cluster (2).
 Courtesy of GENERAL MOTORS CORP.
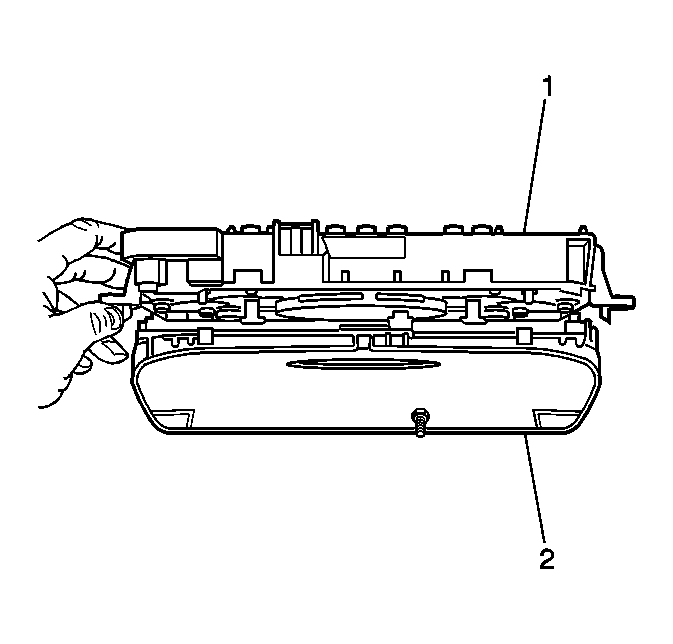
- Remove the instrument cluster lens and bezel assembly (2) from the instrument cluster (1) by releasing the 6 black plastic tabs.
- Remove the engine tachometer from the instrument cluster. Refer to Tachometer Replacement .
- Remove the speedometer from the instrument cluster. Refer to Speedometer Replacement .
- Remove the fuel/temperature gage from the instrument cluster. Refer to Fuel/Temperature Gage Replacement .
 Courtesy of GENERAL MOTORS CORP.
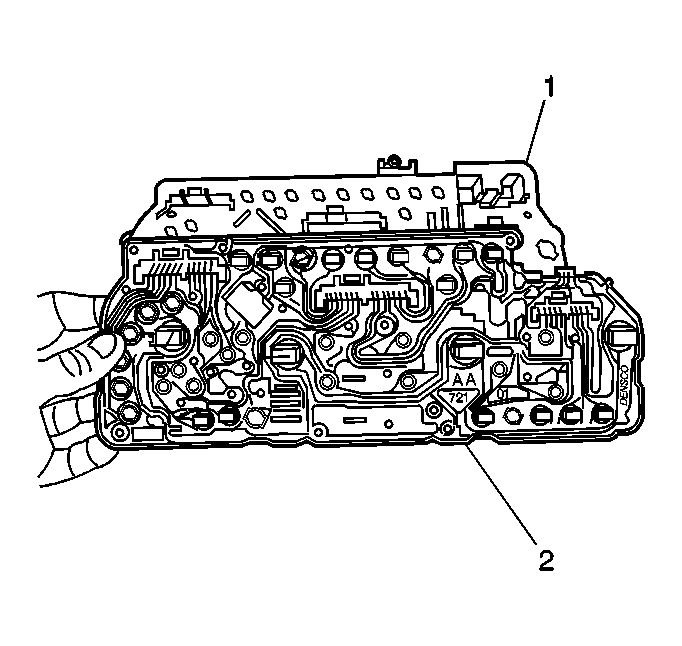
- Remove the instrument cluster printed circuit (2) from the instrument cluster (1).