Removal Procedure
- Remove the lower control arm from the vehicle. Refer to Lower Control Arm Replacement (RWD) or Lower Control Arm Replacement (4WD) .
- Install the lower control arm in a vise.
- Remove the rear bushing.
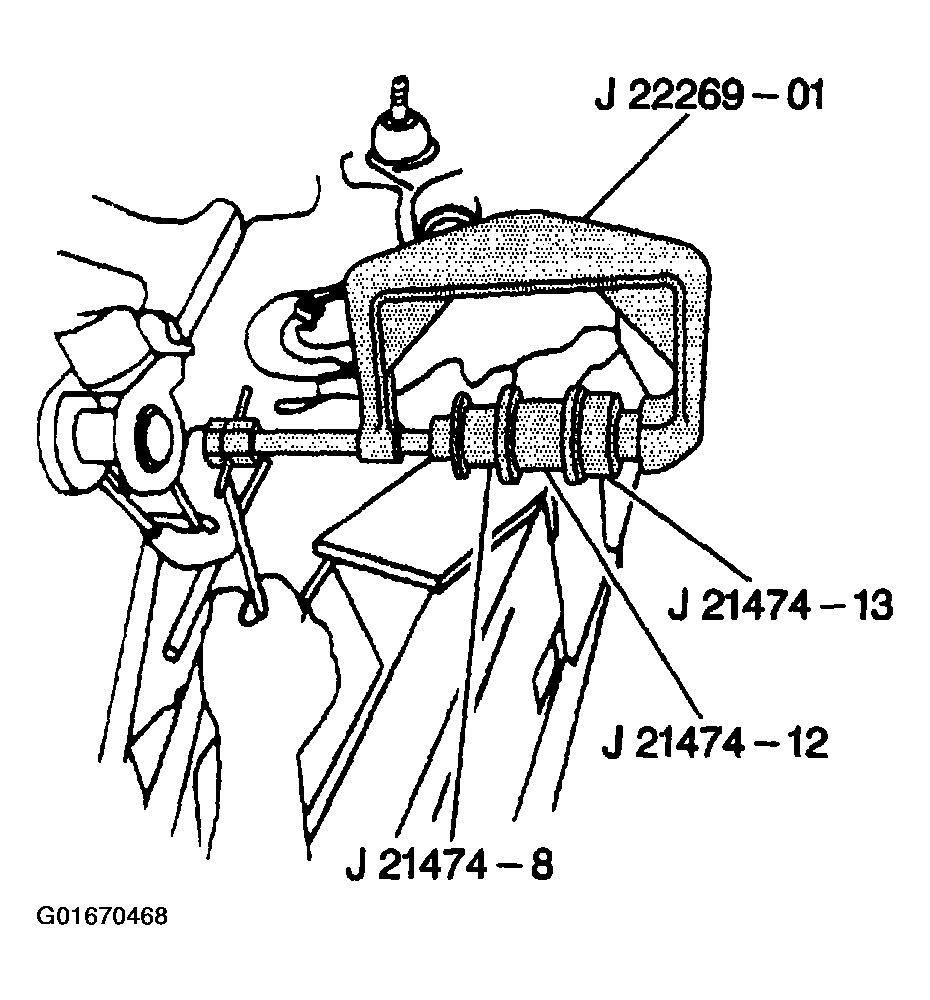
- 3.1. Install the following tools:
- The J 22269-01
- The J 21474-8
- The J 21474-12
- The J 21474-13
 Courtesy of GENERAL MOTORS CORP.
- 3.2. Tighten until the rear bushing becomes free.
- Using a blunt chisel, drive the front bushing flare down flush with the rubber part of the bushing.
- Prior to removing or installing the front bushing, place a wedge or spacer between the control arm bushing housing. This keeps the control arm bushing housing from bending while removing or installing the bushing.
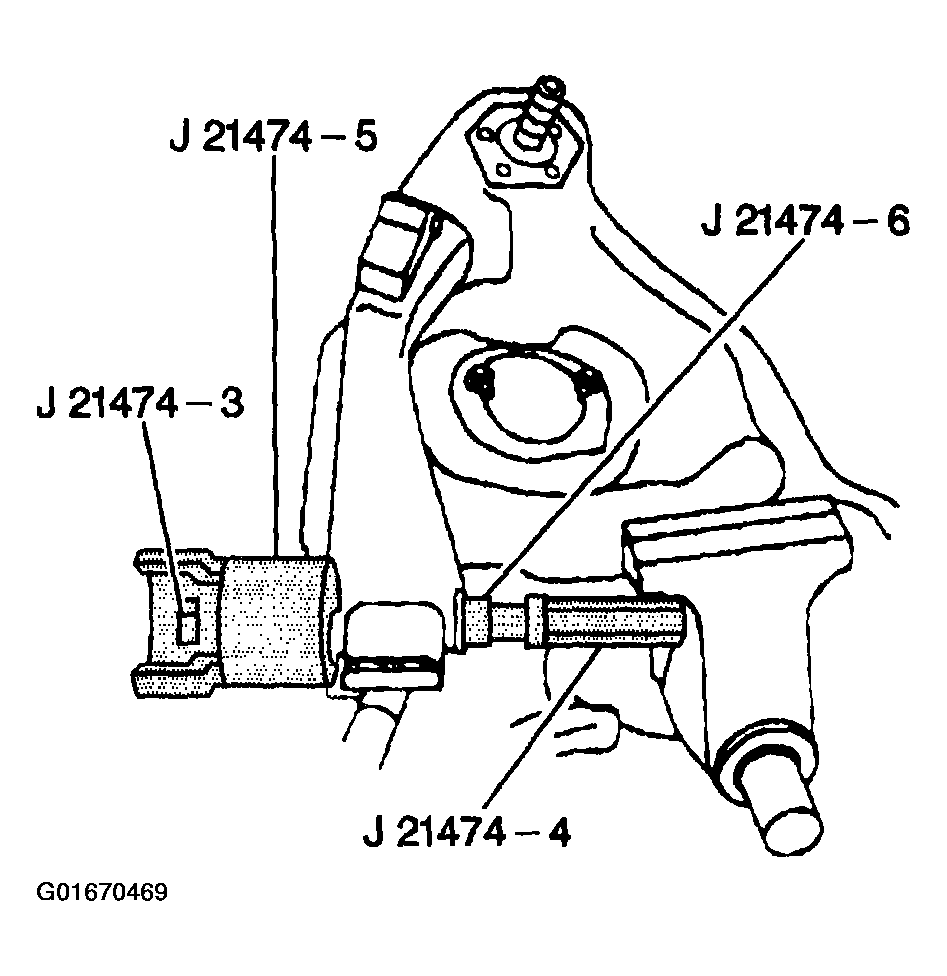
- Remove the front bushing.
- 6.1. Install the following tools:
- The J 21474-3
- The J 21474-4
- The J 21474-5
- The J 21474-6
- 6.2. Tighten until the bushing is partially removed.
- 6.3. Reverse the J 21474-6
.
- 6.4. Tighten until the front bushing becomes free.
 Courtesy of GENERAL MOTORS CORP.