Removal & Installation (2.2L)
- Recover the refrigerant from the A/C system. See RECOVERY, EVACUATION & RECHARGING in GENERAL SERVICING PROCEDURES article in GENERAL SERVICING. Remove the compressor hose assembly bolt and the washer. See Fig 1. Remove the compressor hose assembly from the compressor.
- Remove the sealing washers. Remove the compressor hose assembly from the accumulator. Remove the O-ring seal. Remove the air intake resonator.
- Remove the compressor hose assembly from the condenser. See Fig 2. Remove the O-ring seal. Remove the compressor hose assembly from the evaporator. Cap or plug all of the open connections.
- To install, remove the caps or plugs from the open connections. Install the compressor hose assembly to the evaporator. Install the air intake resonator. Install a new O-ring seal. Install the compressor hose assembly to the condenser. Tighten the hose to specification. See TORQUE SPECIFICATIONS .
- Install a new O-ring seal. Install the compressor hose assembly to the accumulator. Tighten the hose to specification. Install the sealing washers. Install the compressor hose assembly to the compressor.
- Install the compressor hose assembly washer and the bolt. Tighten the bolt to specification. Evacuate and recharge the A/C system. See RECOVERY, EVACUATION & RECHARGING in GENERAL SERVICING PROCEDURES article in GENERAL SERVICING. Leak test the fittings of the components.
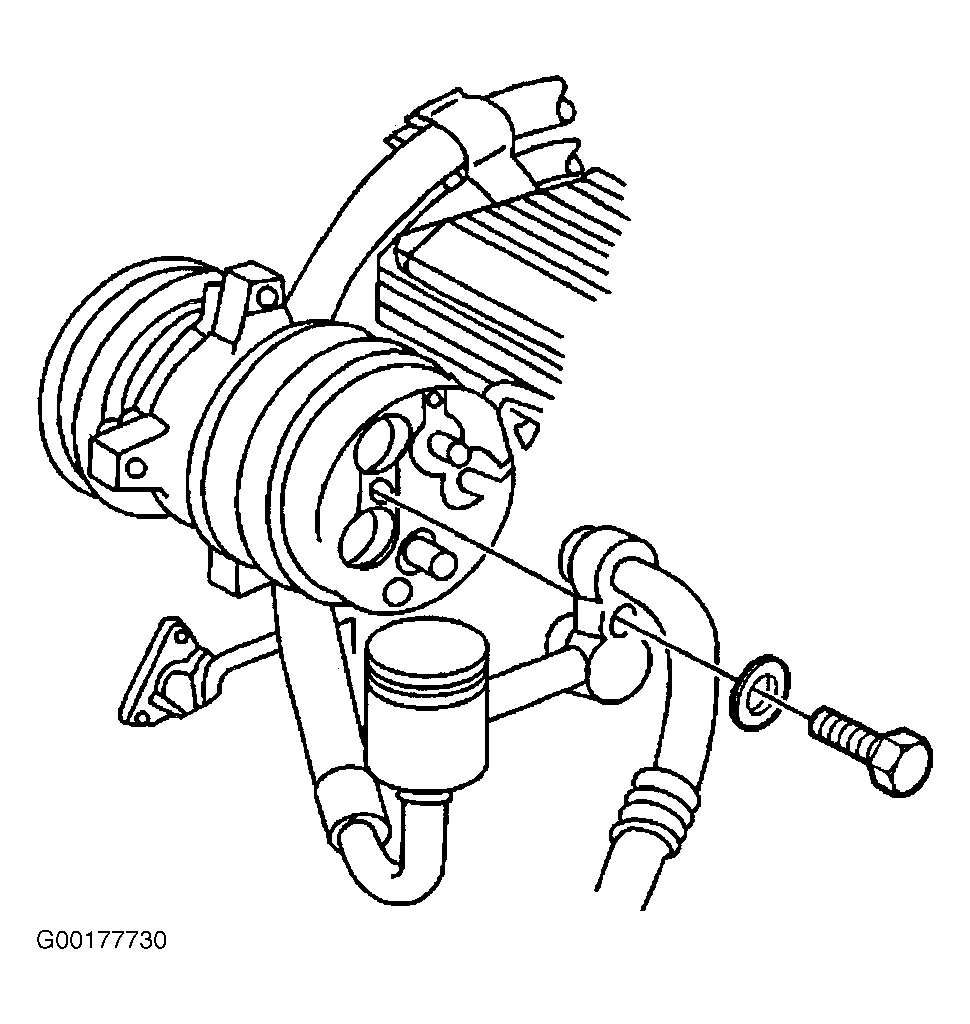 Courtesy of GENERAL MOTORS CORP.
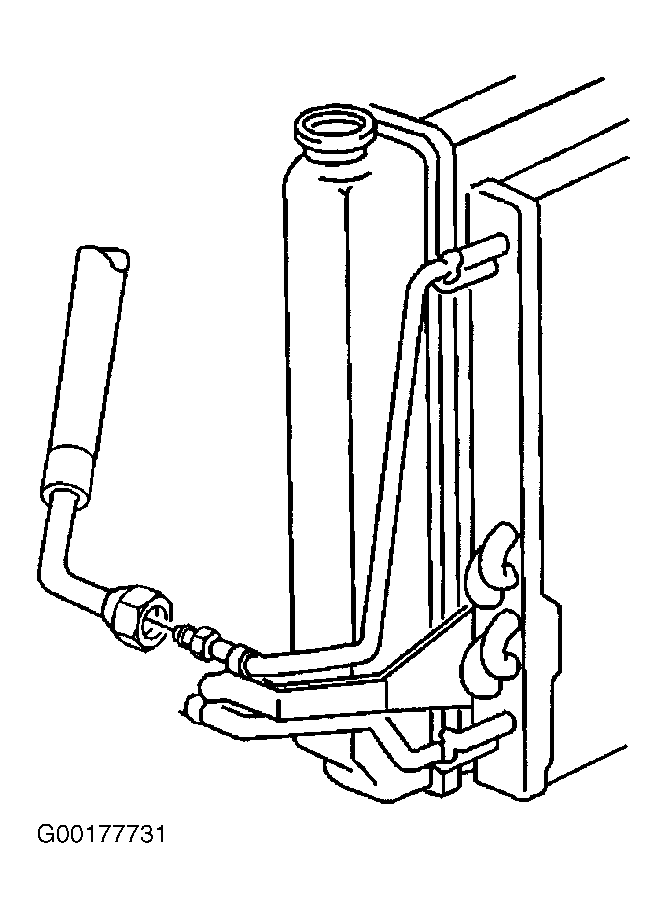 Courtesy of GENERAL MOTORS CORP.