Right Axle Shaft & Housing: Installation
- To install, apply Sealant (GM 1052942 or Loctite 518) on axle housing to differential surface. Ensure thrust washers, clutch shaft, clutch sleeve and clutch gear are in place before installation. Install clutch gear thrust washer to housing as illustrated. See Fig 3. Use grease to hold washer in place. Install axle shaft and housing assembly to differential carrier. Install axle shaft housing to differential carrier bolt, finger tight, at one o' clock position. Position shaft cable housing on axle housing flange.
- Pull axle shaft and housing assembly down in order to install remaining bolts. Install and tighten all nuts and bolts to specification. See TORQUE SPECIFICATIONS . To inspect operation of shift mechanism, install Hub Engagement Tool (J-337798) into shift fork. Check for rotation of axle shaft. Install shift cable and indicator assembly. To complete installation, reverse removal procedure. Refill differential to proper level with appropriate fluid. See LUBRICATION .
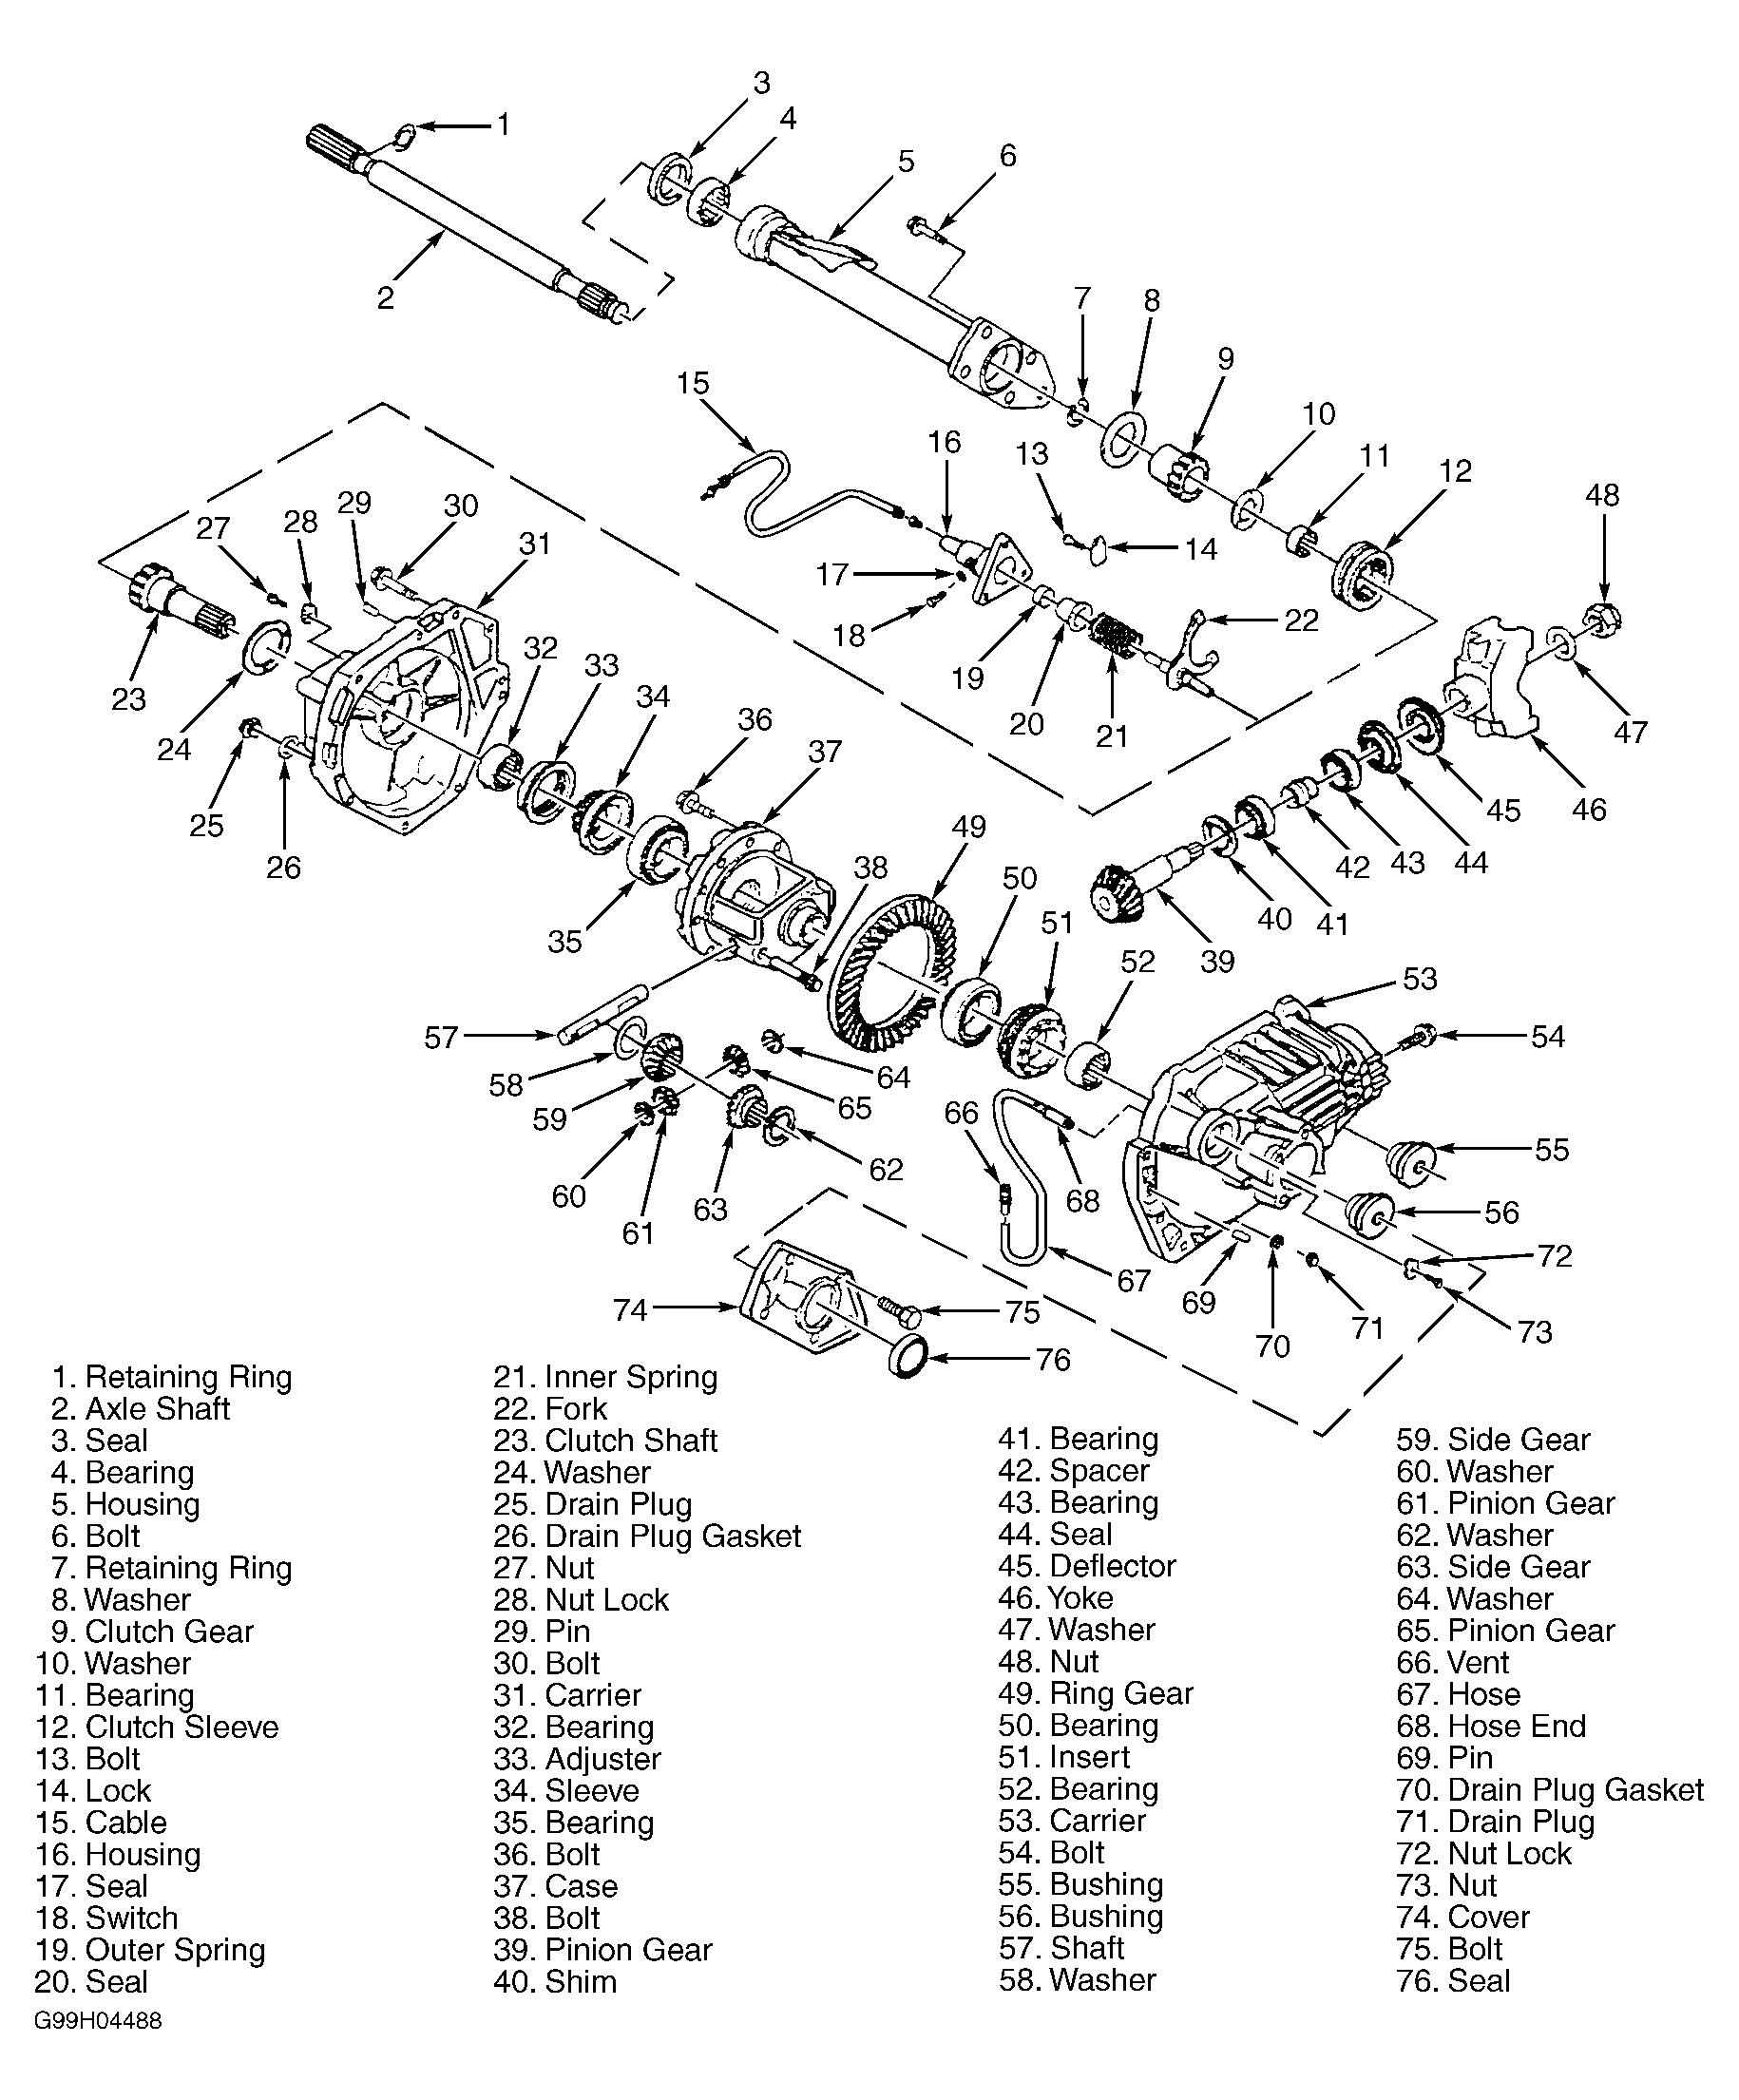 Courtesy of GENERAL MOTORS CORP.
 Courtesy of GENERAL MOTORS CORP.
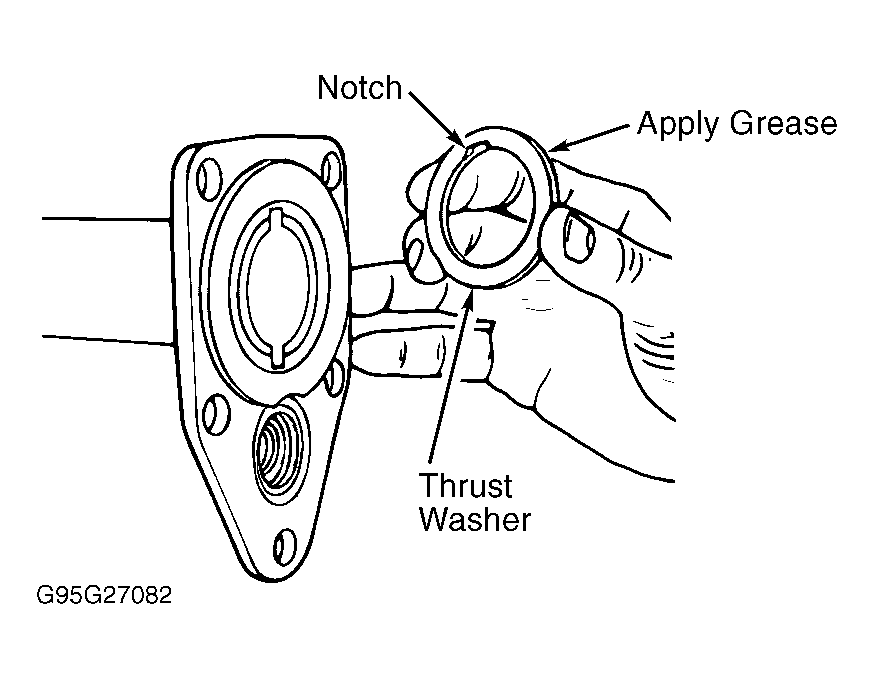 Courtesy of GENERAL MOTORS CORP.
 Courtesy of GENERAL MOTORS CORP.