Ring Gear Backlash
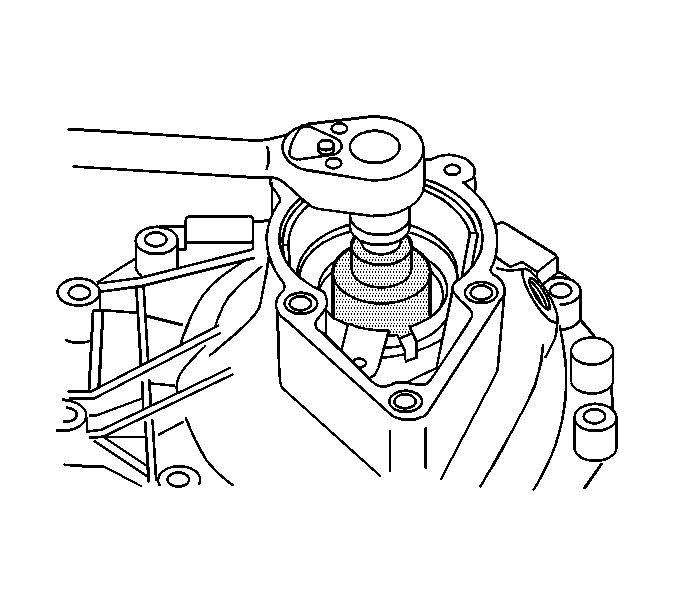
- Use Side Bearing Adjusting Socket (J-33792) and torque wrench to tighten right adjusting sleeve until no backlash is present. This torque measurement should be 103 ft. lbs. (140 N.m).
- Using Side Bearing Adjusting Socket (J-42213), tighten left adjusting sleeve until no backlash is present. This torque measurement should be about 103 ft. lbs. (140 N.m).
 Courtesy of GENERAL MOTORS CORP.
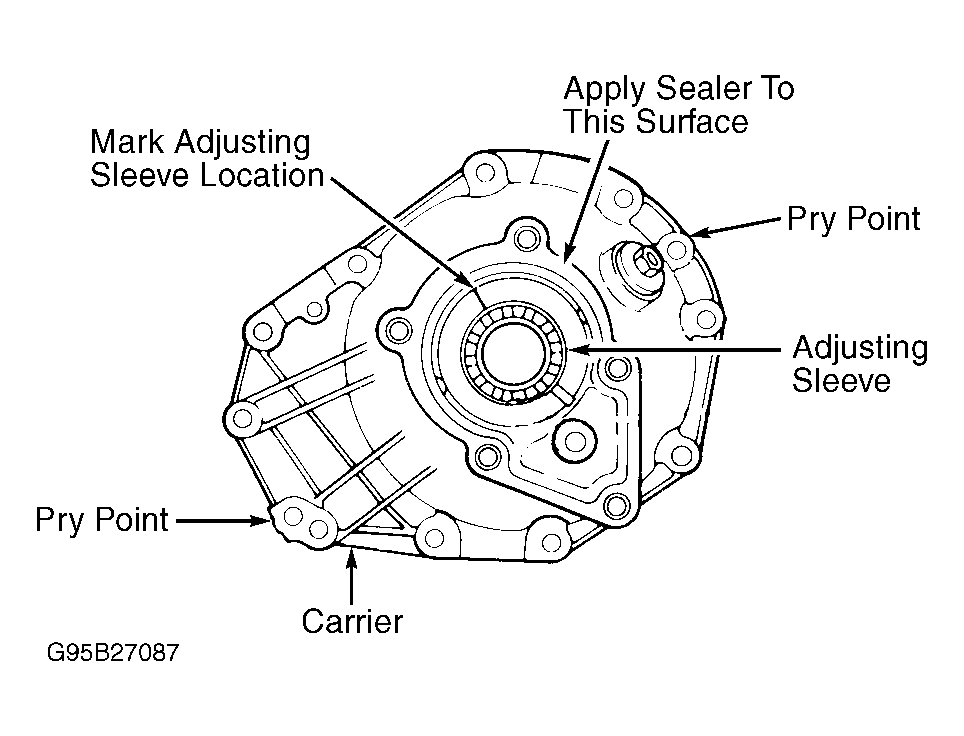
- Mark location of adjusting sleeves in relation to carrier halves so notches can be counted when turned. See Fig 2. Turn right sleeve OUT 2 notches using side bearing adjusting socket. Turn left sleeve IN one notch. Rotate pinion several times to seat bearings.
 Courtesy of GENERAL MOTORS CORP.
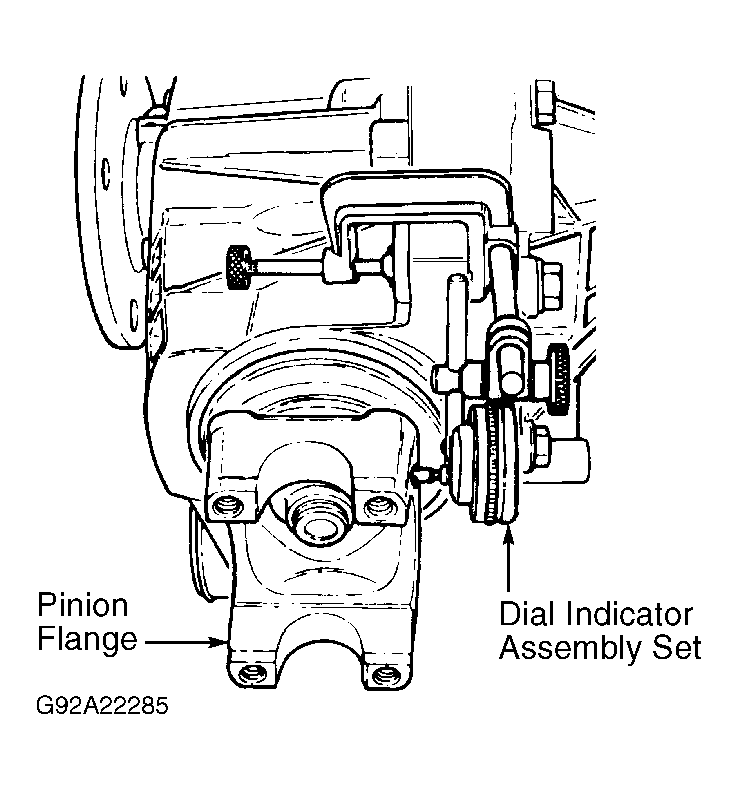
- Mount base clamp of Dial Indicator Set (J-8001) so gauge plunger button contact outer edge of pinion flange. Ensure plunger is at right angle to flange. See Fig 3. Move pinion flange through its free play travel while holding differential carrier and ring gear stationary. Record dial indicator reading. Divide dial indicator reading by 2 to obtain backlash reading.
 Courtesy of GENERAL MOTORS CORP.
- Inspect and record backlash at 3 or 4 points. Hold case stationary when checking backlash. If backlash varies more than .002" (.05 mm), check for burrs, distorted case flange, uneven bolting or foreign matter between case and ring gear. Gear backlash at pinion flange should be .003-.010" (.08-.25 mm), with a preferred measurement of .005-.007" (.13-.18 mm). If backlash is not within specification, equally turn adjusting sleeves as necessary. Maintain one notch preload on side bearings. For example, if right sleeve needs to be turned out one notch, turn left sleeve in one notch.
- To increase backlash, turn left sleeve in and turn right sleeve out an equal amount. To decrease backlash, turn right sleeve in and turn left sleeve out an equal amount. Turning sleeve one notch will change backlash about .003" (.08 mm). DO NOT install sleeve locks yet.
- When backlash is within specification, mark position of sleeves and perform gear tooth contact pattern check. See GEAR TOOTH CONTACT PATTERNS
article in GENERAL INFORMATION. When pattern is satisfactory, complete reassembly of differential carrier. See DIFFERENTIAL CARRIER under OVERHAUL.