Except All Wheel Drive
- Install Final Drive/Clutch Remover/Installer (J-33381-A) into input clutch housing and sprag clutch assemblies. Tighten threaded rod until rod is finger tight. Use Remover/Installer to lift input clutch housing. See Figure. Install input clutch housing assembly into case. Ensure assembly is fully seated. Ensure selective thrust washer is NOT installed with input clutch housing.
- Remove remover/installer from input clutch housing. Install case extension with Output Shaft Loading/Aligning Tool (J-26958), Adapter Plug (J-26958-10) and Loading Tool Adapter (J-43425) attached to case extension. See Fig 3. Using 2 bolts, install End Play Gauge (J-33386) onto case. See Fig 2. Tighten bolts to securely hold gauge. Tighten aligning tool finger tight in order to eliminate differential carrier end play. See Fig 3.
- Install thrust washer from input clutch housing into end play gauge. If thrust washer will not fit into gauge, select next size smaller thrust washer and recheck. Using a feeler gauge, measure end play between end play gauge and thrust washer.
- Record measurement for proper end play clearance during reassembly. End play should be 0-.006" (0-.15 mm). If end play is within specification, use original thrust washer during transaxle reassembly. If end play is greater than .006" (.15 mm), select next size larger thrust washer and recheck. For input clutch thrust washer identification, see INPUT CLUTCH THRUST WASHER IDENTIFICATION table under TRANSAXLE REASSEMBLY.
- Remove end play gauge. Install remover/installer into input clutch housing. Lift input clutch housing from case. Remove aligning tool, adapter plug and loading tool adapter from case extension.
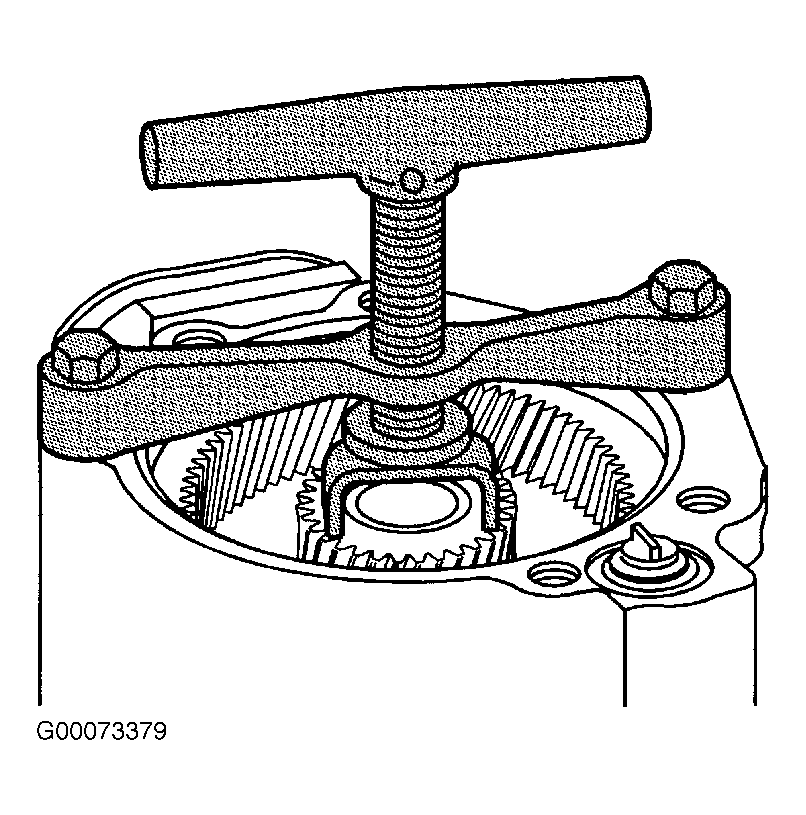 Courtesy of GENERAL MOTORS CORP.
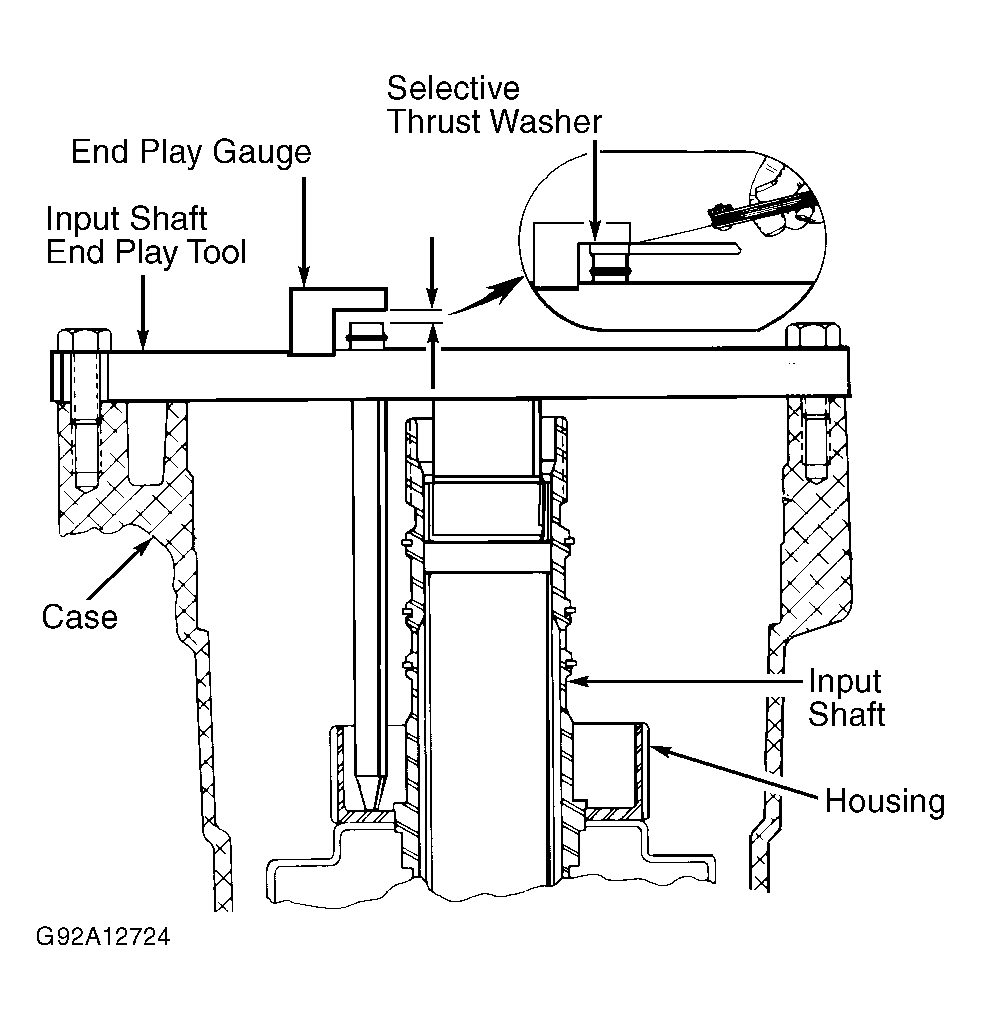 Courtesy of GENERAL MOTORS CORP.
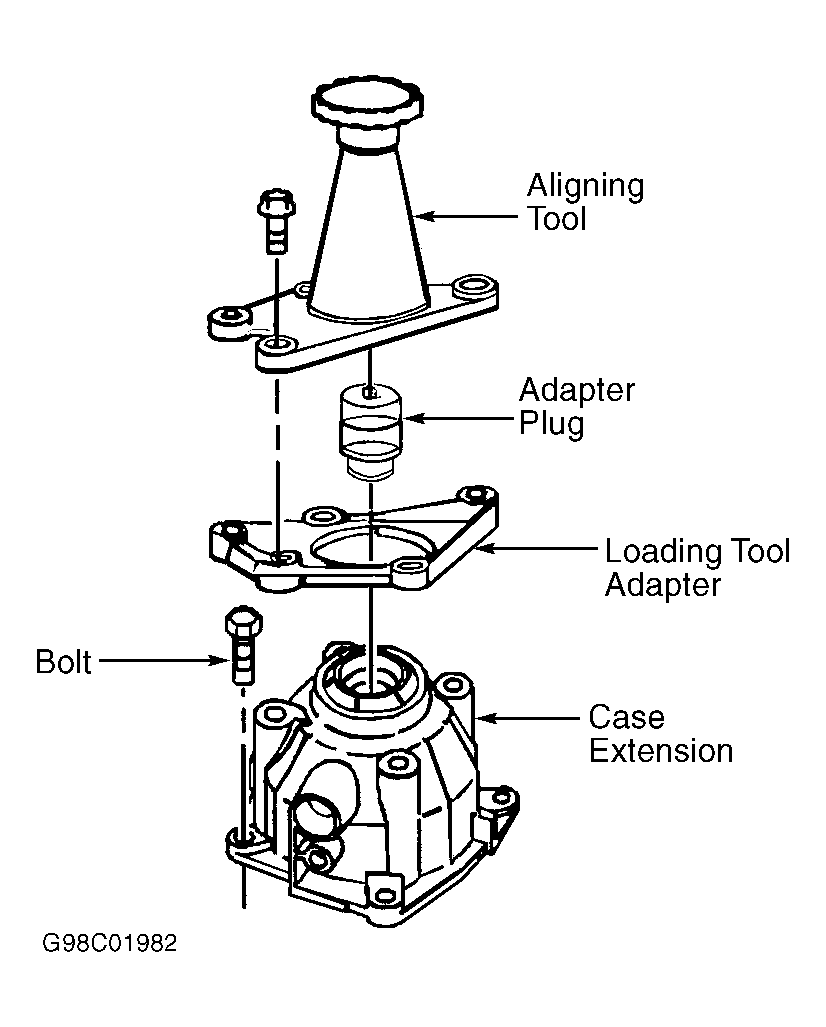 Courtesy of GENERAL MOTORS CORP.