Removal Procedure
- Remove the Engine/Transaxle assembly. Refer to ENGINE REPLACEMENT
.
- Remove the transfer case. Refer to TRANSFER CASE AND/OR SEAL REPLACEMENT
.
 Courtesy of GENERAL MOTORS CORP.
- Remove the case extension housing. Refer to Case Extension Housing Replacement
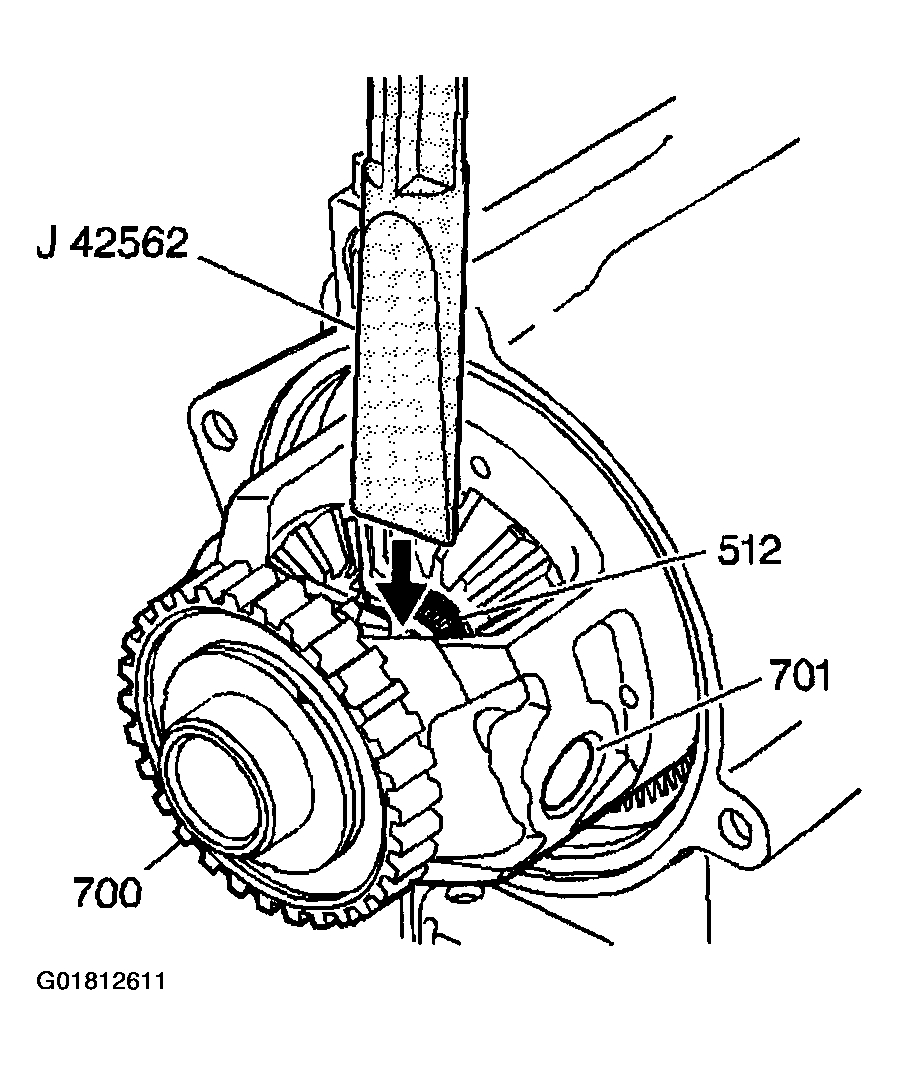
- Rotate the differential carrier until the end of the output shaft can be seen and the differential pinion shaft (701) is in a horizontal position.
- Place the J 42562
between the end of the output shaft and the differential pinion shaft.
- Using a hammer, hit the end of the axle removal tool in order to compress the output shaft compression ring (512) and push the output shaft through the differential side gear.
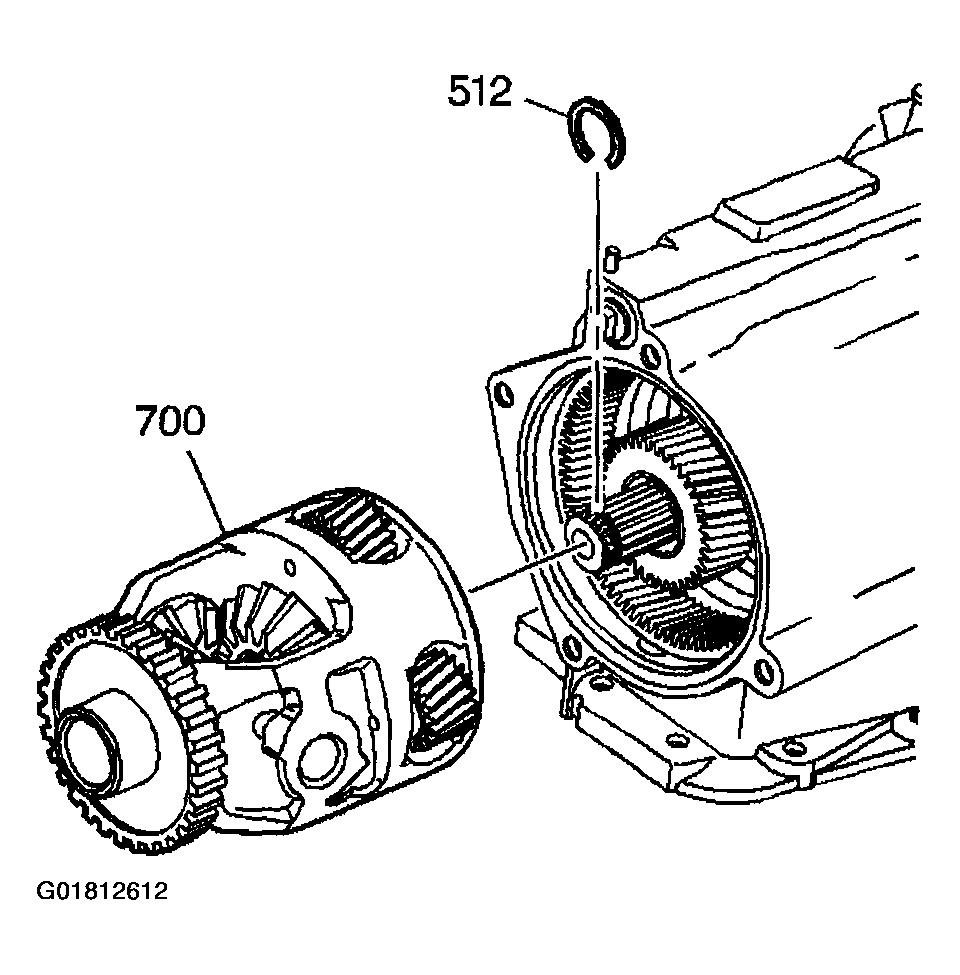
- Remove the differential carrier (700).
 Courtesy of GENERAL MOTORS CORP.
- Using snap ring pliers remove the compression ring (512) from the output shaft.
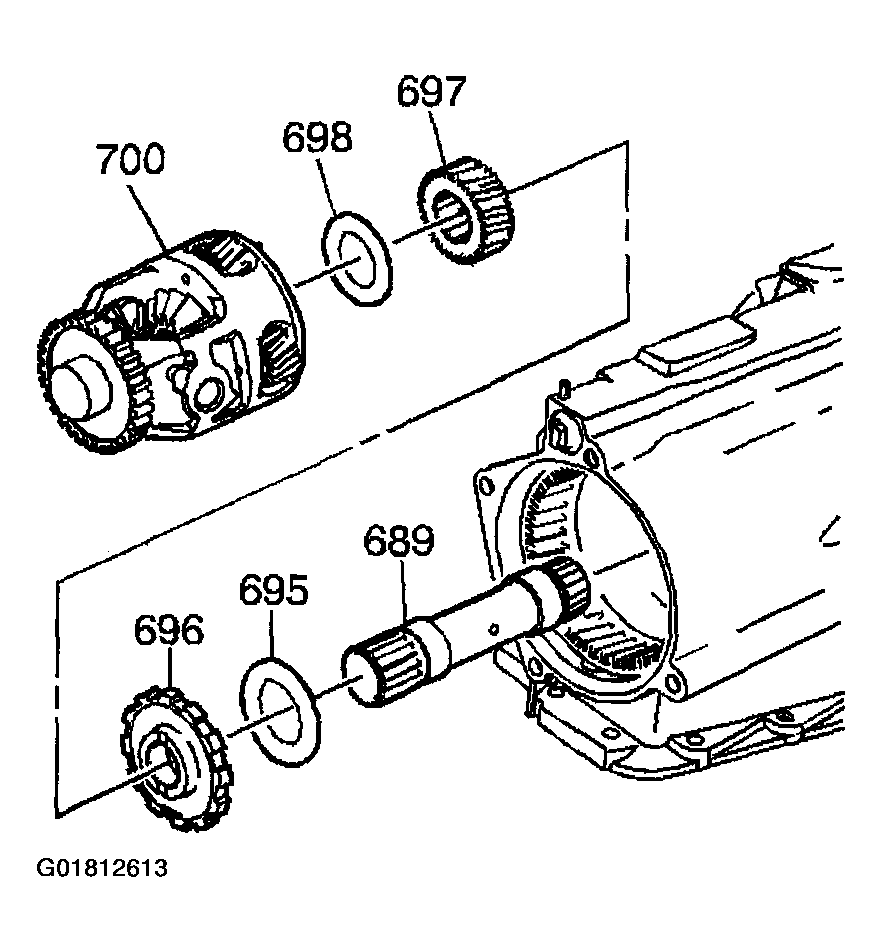
- Remove the sun gear thrust bearing (698) from the differential carrier sun gear. The bearing may be stuck to the differential carrier.
 Courtesy of GENERAL MOTORS CORP.
- Remove the differential carrier sun gear (697).
- Remove the park gear (696).
- Remove the internal gear thrust bearing (695) from the differential carrier internal gear.
- Remove the sun gear shaft (689).
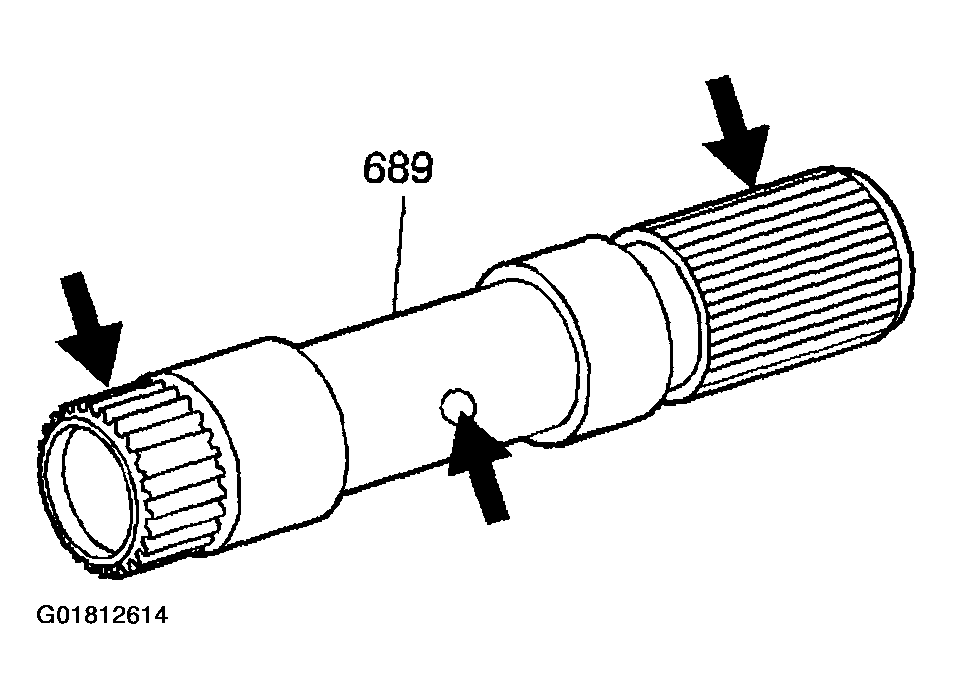
- Inspect the sun gear shaft (689) for damage.
 Courtesy of GENERAL MOTORS CORP.