Removal & Installation (Metro - 1.0L & 1.3L)
- Fuel pump is located in fuel tank and is integral with fuel sending unit assembly. Relieve the fuel system pressure. See FUEL SYSTEM PRESSURE RELEASE . Drain the fuel tank. Remove the rear seat cushion from the vehicle.
- Disconnect the fuel pump, the fuel level sensor, and the electrical connectors. See Fig 1. Push the electrical connectors through the grommet in the floor of the vehicle. Raise and suitably support the vehicle. Remove right rear wheel/tire assembly. Remove rear stabilizer shaft assembly.
- Remove 2 nuts and the resonator/muffler/tailpipe assembly from the front pipe/Three Way Catalytic Converter (TWC) assembly. Remove one bolt and the hanger from the pipe at the resonator. Remove three bolts and the hangers from the muffler. Turn the resonator/muffler/tailpipe assembly counterclockwise. Pull back the resonator/muffler/tailpipe assembly. Move the resonator/muffler/tailpipe assembly toward the wheel. Remove the resonator/muffler/tailpipe assembly.
- Remove the clamp and the fuel filler hose from the fuel tank filler neck. Remove the clamp and the fuel breather hose from the fuel tank breather neck. Remove the clamp and the air inlet hose to the EVAP canister from the canister air inlet pipe, if necessary.
- Remove the 2 bolts from the 2 parking brake cable brackets on the vehicle underbody. Move the cable aside. Remove the clamp and the EVAP canister vapor hose from the EVAP canister vapor pipe.
- Disconnect the quick connect line from the fuel feed pipe. Disconnect the quick connect line from the fuel return pipe. Remove the 5 fuel tank mounting bolts and the fuel tank.
- Remove 6 fuel sending unit hold-down bolts and remove fuel sending unit assembly from fuel tank. See Fig 2. Disconnect fuel level sensor harness connector. Depress fuel level sensor retaining tab and slide sensor down to remove from fuel sending unit assembly.
- To install, reverse removal procedure. Use NEW gasket on fuel sending unit assembly. Tighten fuel sending unit assembly hold-down bolts to specification. See TORQUE SPECIFICATIONS .
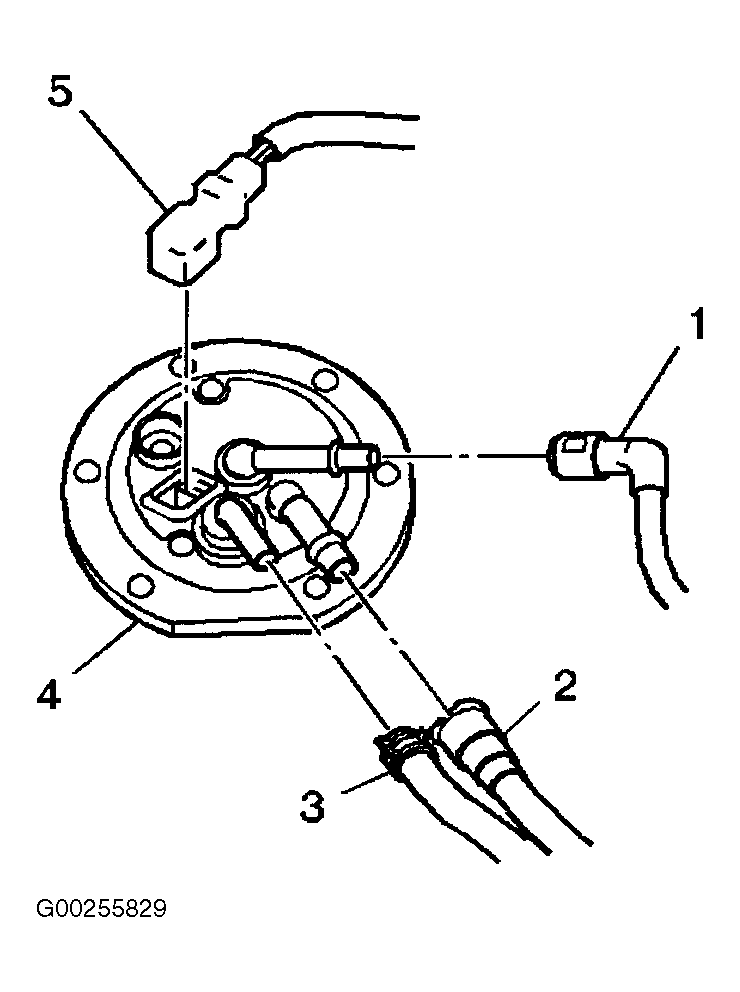 Courtesy of GENERAL MOTORS CORP.
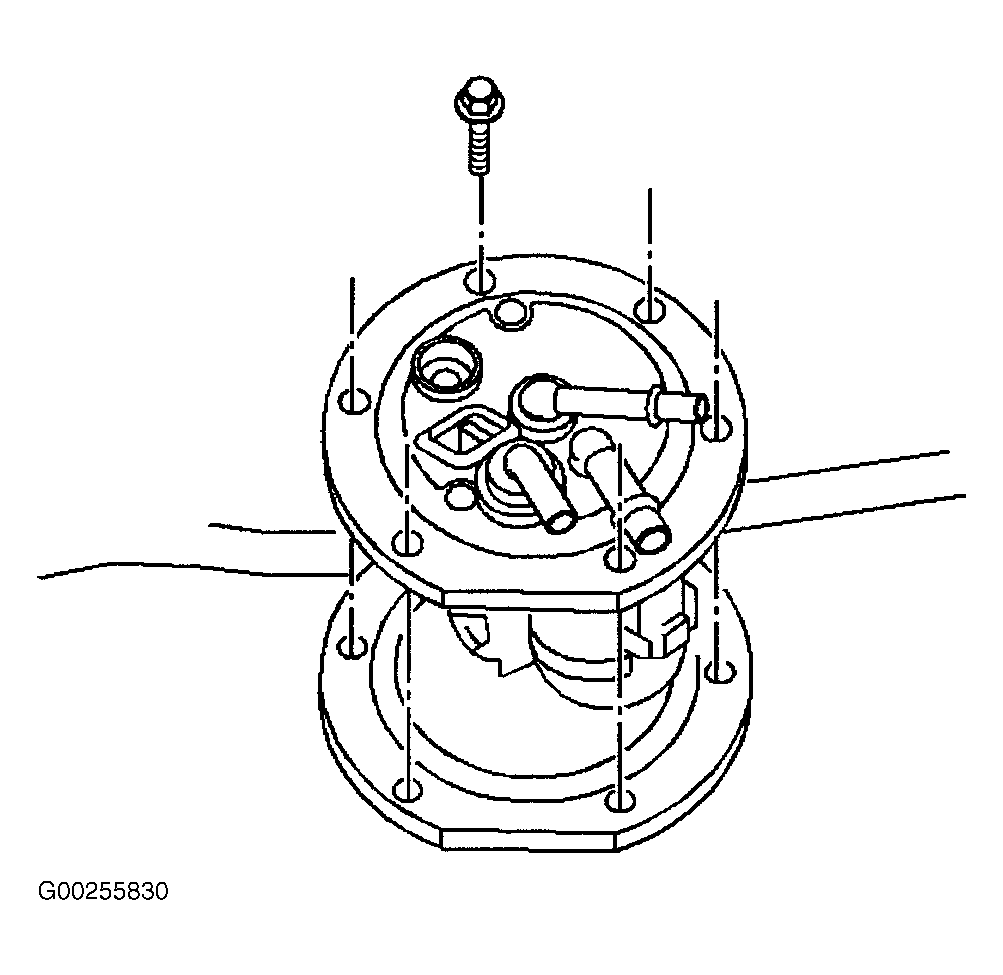 Courtesy of GENERAL MOTORS CORP.