Wheel Stud / Lug Nut: Service and Repair
Removal ProcedureTools Required
^ J 35917 Wheel Bolt Remover
1. Raise and support the vehicle. Refer to Vehicle Lifting.
2. Remove the tire and wheel assembly. Refer to Tire and Wheel Removal and Installation in Wheels, Tires and Alignment.
3. Remove the brake caliper and bracket. Refer to Brake Caliper Bracket Replacement (Front) or Brake Caliper Bracket Replacement (Rear) in Disc Brakes.
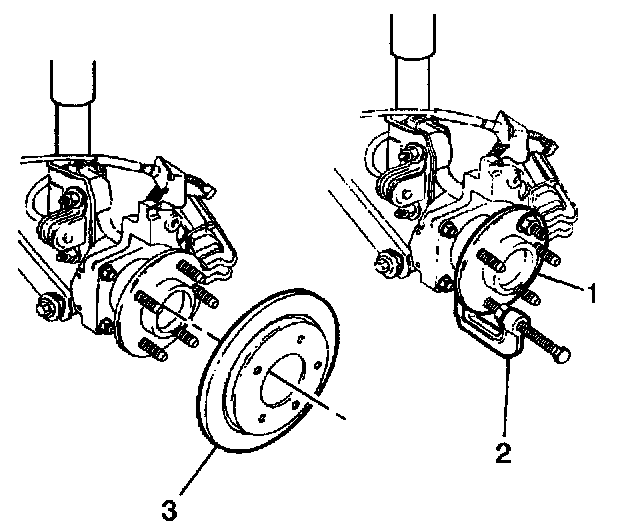
4. Remove the rotor (3). Refer to Brake Rotor Replacement (Front) or Brake Rotor Replacement (Rear) in Disc Brakes.
5. Use the J 35917 (2) to extract the wheel hub bolt from the hub (1).
6. Clean the wheel hub flange and clean the rotor of any corrosion, metal chips or foreign material.
Installation Procedure
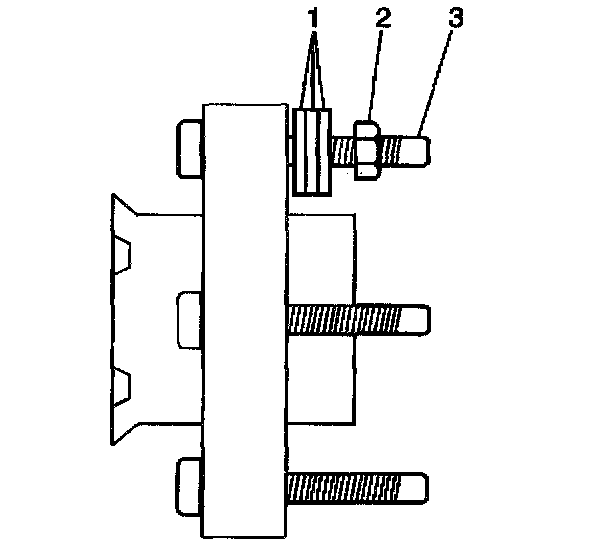
1. Install the replacement bolt in the wheel hub (1).
2. Add enough washers to draw the bolt into the hub.
Important: Seat the wheel bolt fully against the hub flange.
Notice: Refer to Fastener Notice in Service Precautions.
3. Install the wheel nut with the flat side to the washers.
Tighten the wheel nut until the wheel bolt head seats against the hub flange.
4. Back off the wheel nut.
5. Remove the washers.
6. Install the rotor (3). Refer to Brake Rotor Replacement (Front) or Brake Rotor Replacement (Rear) in Disc Brakes.
7. Install the brake caliper. Refer to Brake Caliper Bracket Replacement (Front) or Brake Caliper Bracket Replacement (Rear) in Disc Brakes.
8. Install the tire and wheel assembly. Refer to Tire and Wheel Removal and Installation in Wheels, Tires and Alignment.
9. Lower the vehicle.