Rear Crankshaft Main Bearing Seal: Service and Repair
Removal Procedure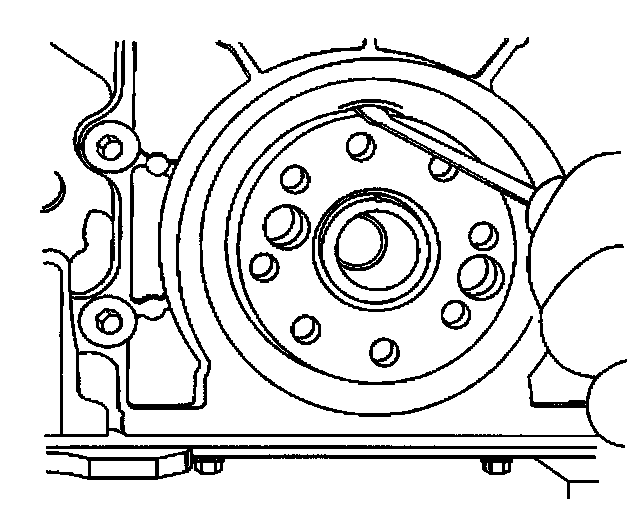
1. Remove the engine flywheel. Refer to Engine Flywheel Replacement.
2. Confirm the crankshaft rear oil seal leak.
Important: Make sure not to damage the crankshaft OD surface or chamfer with the pry tool.
3. Remove the crankshaft rear oil seal. Insert a flat-bladed tool through the dust lip at an angle. Pry out the crankshaft rear oil seal by moving the handle of the tool towards the end of the crankshaft. Repeat as necessary around the crankshaft rear oil seal.
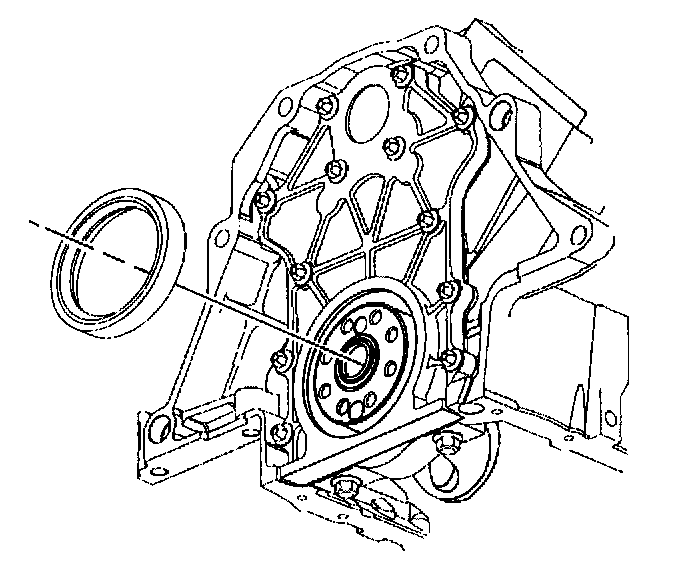
4. Inspect the ID of the bore. Correct or replace the crankshaft rear oil seal housing as required.
5. Inspect the crankshaft for nicks or burrs on the surface that contacts the crankshaft rear oil seal.
6. Repair or replace the crankshaft as required.
Installation Procedure
- Tools Required
- J 38196 Crankshaft Rear Oil Seal Installer
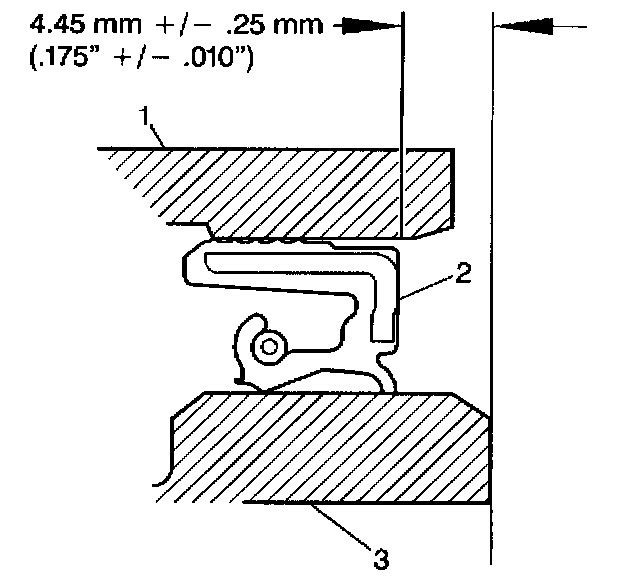
1. Apply engine oil to the inside and the outside diameter of the new crankshaft rear oil seal. Slide the new crankshaft rear oil seal over the mandrel until the back of the crankshaft rear oil seal bottoms squarely against the collar of the J 38196.
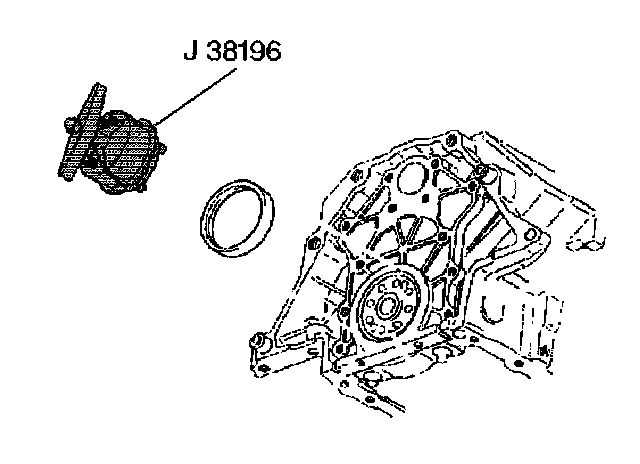
2. Install the crankshaft rear oil seal using the following steps:
2.1. Attach the J 38196 to the crankshaft by hand, or tighten the attaching screws.
Tighten
Tighten the screws to 5 Nm (54 inch lbs.).
2.2. Turn the T-handle of the J 38196 so that the collar pushes the seal into the bore. Turn the handle until the collar is tight against the case. This will ensure that the crankshaft rear oil seal is seated properly between the crankshaft and the crankshaft rear oil seal housing.
2.3. Loosen the T-handle of J 38196 until it comes to a stop. This will ensure that the collar will be in the proper position for installing another new crankshaft rear oil seal.
2.4. Remove the attaching screws.
3. Install the engine flywheel. Refer to Engine Flywheel Replacement.
4. Inspect for proper fluid levels.
5. Inspect for leaks.