Engine Accessory Bracket: Service and Repair
Removal Procedure- Tools Required
- J28467-B Engine Support Fixture
- J28467-90A Engine Support Fixture Adapters
- J 36462-A Engine Support Fixture Leg
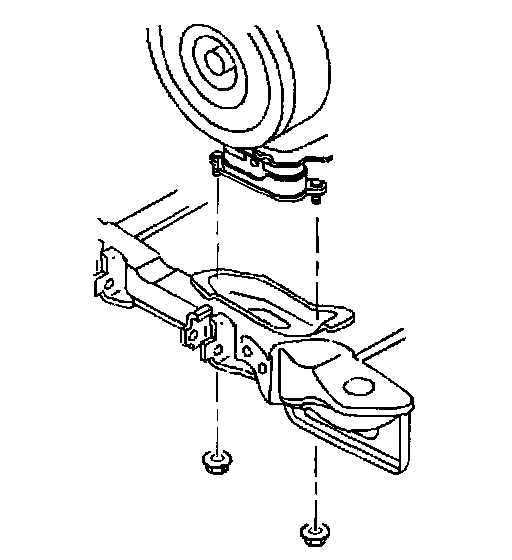
1. Remove the fuel injector sight shield. Refer to Fuel Injector Sight Shield Replacement.
2. Carefully disconnect the throttle body air inlet duct.
3. Remove the engine mount struts. Refer to Engine Mount Strut Replacement (Left) and Engine Mount Strut Replacement (Right).
4. Remove the drive belt. Refer to Drive Belt Replacement
5. Raise and suitably support the vehicle. Refer to Vehicle Lifting.
6. Disconnect the catalytic converter from the right exhaust manifold.
7. Remove the right front tire and wheel. Refer to Tire and Wheel Removal and Installation in Steering and Suspension.
8. Remove the right engine splash shield. Refer to Splash Shield Replacement - Engine (Right) or Splash Shield Replacement - Engine (Left) in Body and Frame.
9. Disconnect the power steering oil cooler pipe brackets from the frame.
10. Remove the A/C compressor bracket bolts. DO NOT discharge the system. Secure the compressor.
11. Remove the engine mount lower nuts from the frame.
12. Lower the vehicle.
13. Use the J 28467-B in order to raise the engine.
14. Raise and suitably support the vehicle. Refer to Vehicle Lifting.
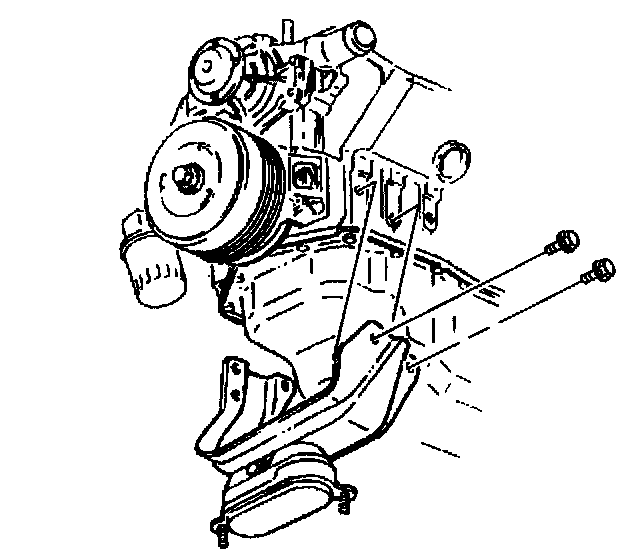
15. Remove the left engine mount bracket bolts from the engine.
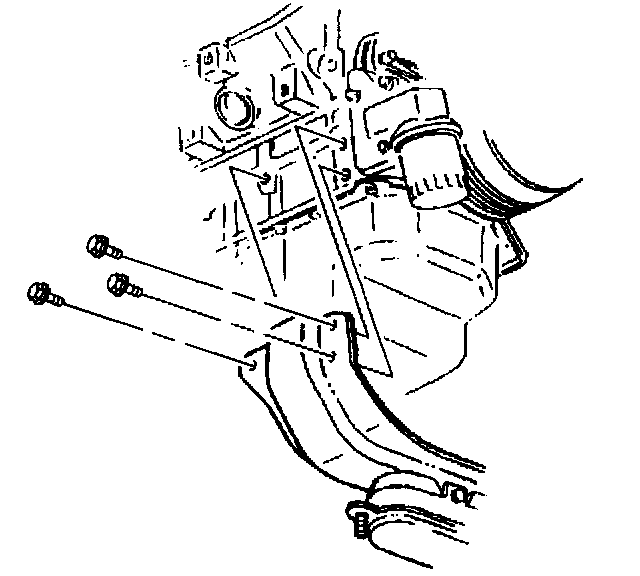
16. Remove the right engine mount bracket bolts from the engine.
17. Suitably support the frame. Loosen the left side frame bolts. Remove the right side frame bolts. Lower the frame for access. Refer to Frame Removal in Body and Frame.
18. Remove the engine mount with the engine mount bracket from the engine.
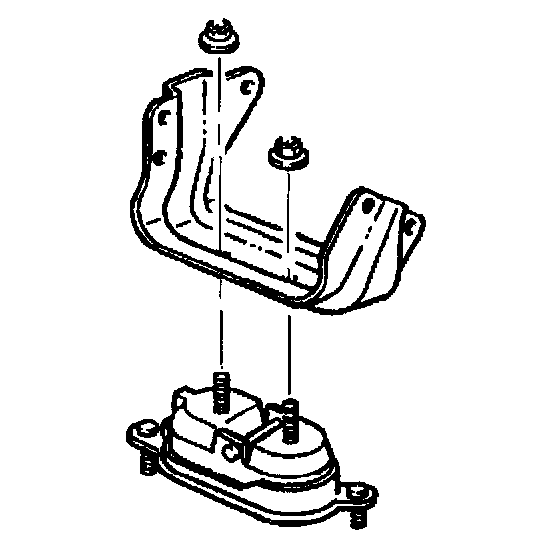
19. Remove the engine mount upper nuts.
20. Remove the engine mount from the engine mount bracket.
Installation Procedure
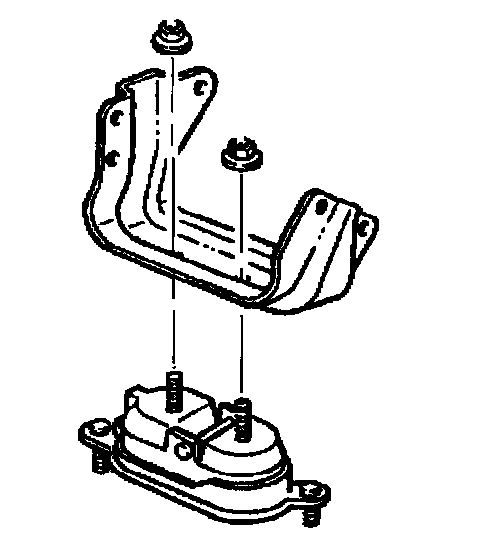
1. Install the engine mount to the engine mount bracket.
Notice: Refer to Fastener Notice in Service Precautions.
2. Install the engine mount upper nuts connecting the engine mount to the engine mount bracket.
Tighten the engine mount upper nuts to 47 Nm (35 ft. lbs.).
3. Install the engine mount bracket with the engine mount to the engine.
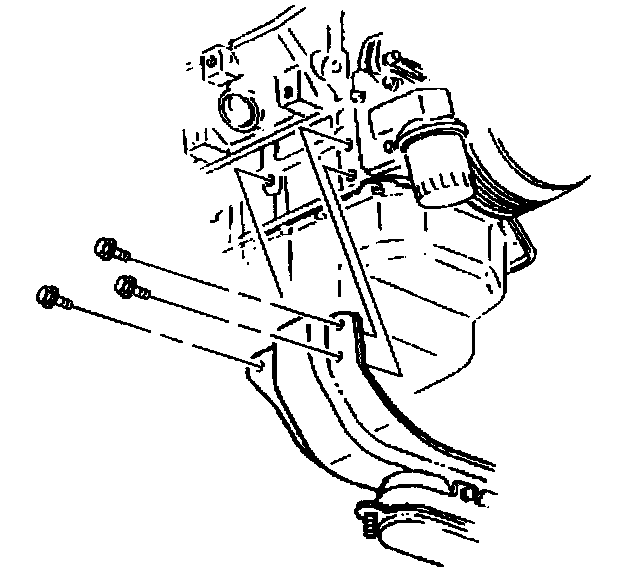
4. Loosely install the right engine mount bracket bolts to the engine.
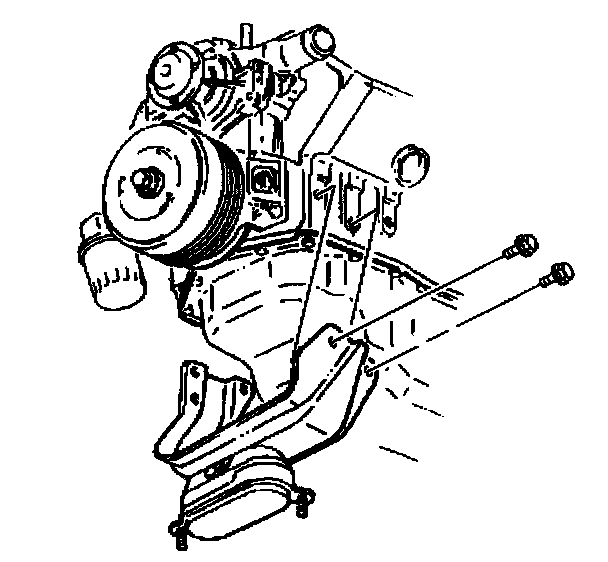
5. Loosely install the left engine mount bracket bolts to the engine.
6. Tighten the bolts connecting the engine mount bracket to the engine.
Tighten the engine mount bracket bolts to 102 Nm (75 ft. lbs.).
7. Install new right side frame bolts. Make sure the frame is suitably supported. Install new left side frame bolts. Refer to Frame Removal in Body and Frame.
8. Lower the vehicle.
9. Use the J 28467-B in order to lower the engine.
10. Raise and suitably support the vehicle. Refer to Vehicle Lifting.
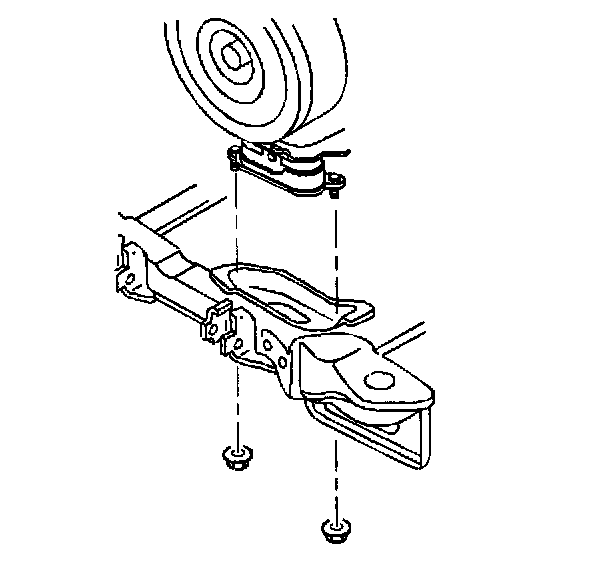
11. Install the engine mount lower nuts to the frame.
Tighten the engine mount lower nuts to 47 Nm (35 ft. lbs.).
12. Install the A/C compressor bracket bolts. Refer to Compressor Replacement in Heating and Air Conditioning.
13. Install the power steering oil cooler pipe brackets to the frame.
14. Install the right engine splash shield. Refer to Splash Shield Replacement - Engine (Right) or Splash Shield Replacement - Engine (Left) in Body and Frame.
15. Install the right front tire and wheel. Refer to Tire and Wheel Removal and Installation in Steering and Suspension.
16. Install the catalytic converter to the right exhaust manifold. Refer to Catalytic Converter Replacement in Powertrain Management.
17. Lower the vehicle.
18. Remove the J 28467-B, J 28467-90A and J36462-A.
19. Install the drive belt. Refer to Drive Belt Replacement.
20. Install the engine mount struts. Refer to Engine Mount Strut Replacement (Left) and Engine Mount Strut Replacement (Right).
21. Carefully install the throttle body air inlet duct.
22. Install the fuel injector sight shield. Refer to Fuel Injector Sight Shield Replacement.
23. Measure the wheel alignment. Refer to and Measuring Wheel Alignment in Steering and Suspension.