Harmonic Balancer - Crankshaft Pulley: Service and Repair
Removal Procedure- Tools Required
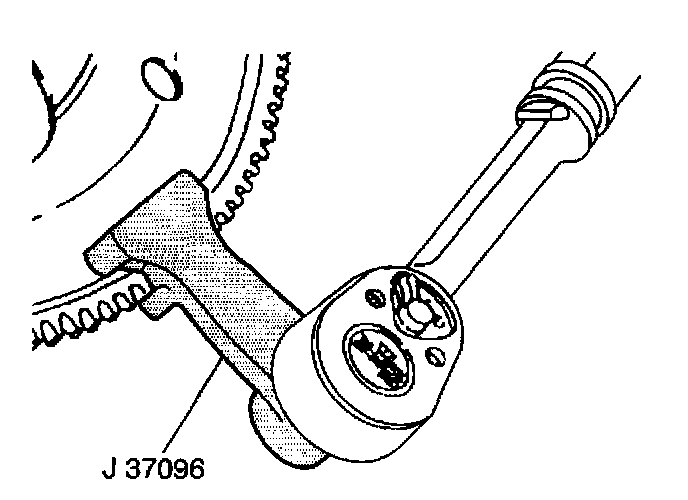
- J 37096 Flywheel Holder
- J 38197 Crankshaft Balancer Puller
- J 36660-A Torque Angle Meter
1. Remove the drive belt. Refer to Drive Belt Replacement.
2. Raise and suitably support the vehicle. Refer to Vehicle Lifting.
3. Remove the right front tire and wheel. Refer to Tire and Wheel Removal and Installation in Steering and Suspension.
4. Remove the right engine splash shield. Refer to Splash Shield Replacement - Engine (Right) or Splash Shield Replacement - Engine (Left) in Body and Frame.
5. Remove the torque converter cover. Refer to Torque Converter Cover Replacement in Transmission and Drivetrain.
6. Install the J 37096 to hold the flywheel.
7. Remove the crankshaft balancer retaining bolt.
Important: Do not separate the crankshaft pulley from the crankshaft balancer. Service the crankshaft pulley and the crankshaft balancer as an assembly.
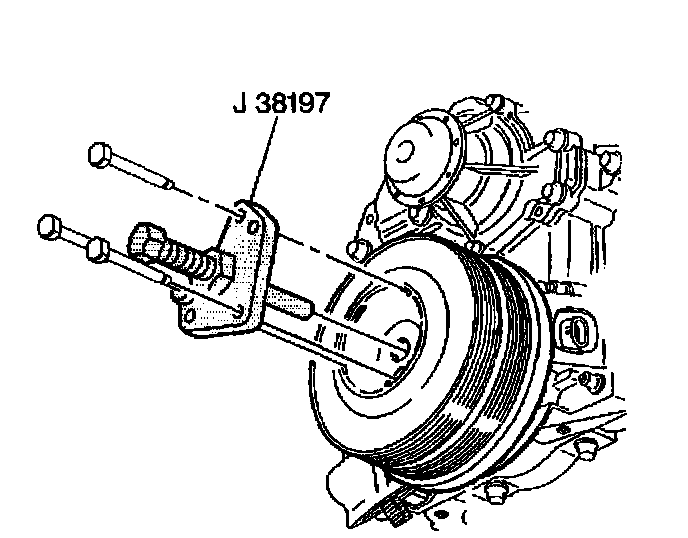
8. Install the J 38197.
9. Remove the crankshaft balancer. 10. Remove the J 38197.
Installation Procedure
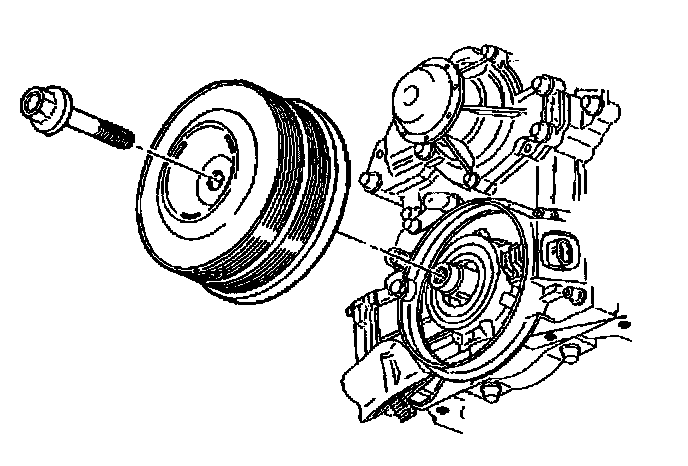
1. Coat the engine front cover seal contact area on the crankshaft balancer, and the seal surface with engine oil.
2. Install the crankshaft balancer.
Notice: Refer to Fastener Notice in Service Precautions.
3. Install the crankshaft balancer retaining bolt. Use the J 37096 to keep the flywheel from turning.
Tighten the crankshaft balancer bolt to 150 Nm (111 lb ft). Use the J 36660-A in order to rotate the bolt an additional 76 degrees.
4. Remove the J 37096.
5. Install the torque converter cover. Refer to Torque Converter Cover Replacement in Transmission and Drivetrain.
6. Install the right engine splash shield. Refer to Splash Shield Replacement - Engine (Right) or Splash Shield Replacement - Engine (Left) in Body and Frame.
7. Install the right front tire and wheel. Refer to Tire and Wheel Removal and Installation in Steering and Suspension.
8. Lower the vehicle.
9. Install the drive belt. Refer to Drive Belt Replacement.
10. Perform the CKP system variation learn procedure. Refer to CKP System Variation Learn Procedure in Computers and Controls.