Crankshaft Seal Retainer: Service and Repair
Removal Procedure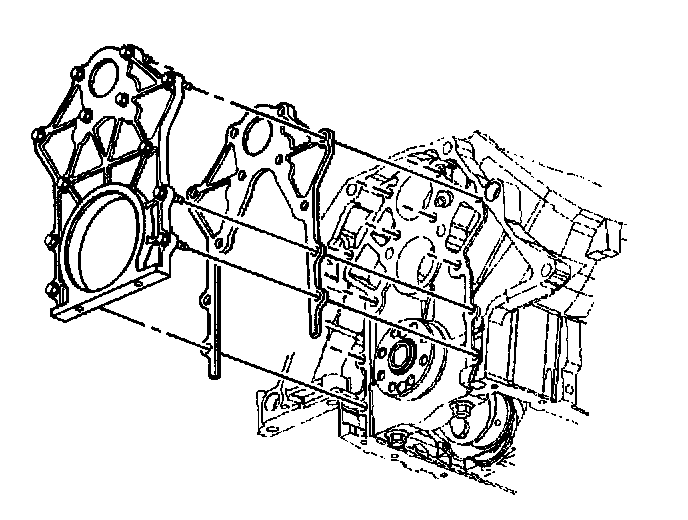
1. Drain the engine coolant from the cooling system. Refer to Draining and Filling Cooling System in Cooling System.
2. Drain the engine oil and remove the oil pan. Refer to Oil Pan Replacement.
3. Remove the engine flywheel. Refer to Engine Flywheel Replacement.
4. Remove the crankshaft rear oil seal housing bolts.
5. Remove the crankshaft rear oil seal housing.
6. Remove the crankshaft rear oil seal.
Important: Make sure not to damage the crankshaft OD surface with any tool.
7. Remove the gasket from the crankshaft rear oil seal housing and the cylinder block.
8. Inspect the ID of the bore. Correct or replace the crankshaft rear oil seal housing as required.
9. Inspect the crankshaft for nicks of burrs on the surface that contacts the seal.
10. Repair or replace the crankshaft as required.
Installation Procedure
- Tools Required
- J 36660-A Torque Angle Meter
- J 41349 Rear Cover Aligner
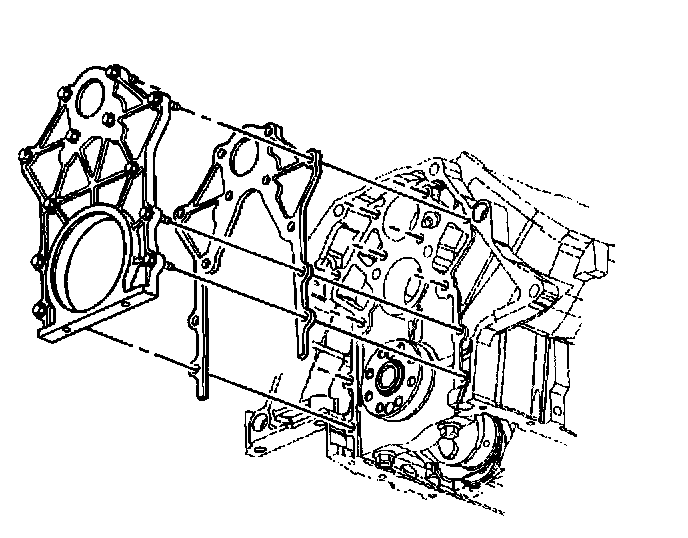
1. Make sure that the crankshaft rear oil seal is removed from the crankshaft rear oil seal housing.
2. Clean the old gasket from the crankshaft rear oil seal housing and the cylinder block.
3. Install the new gasket over the crankshaft rear oil seal housing bolt threads to aid in proper alignment of the gasket.
Notice: Correct alignment of the housing is crucial to sealing ability of the rear main and the oil pan. Take care when installing the housing to ensure that the housing is properly aligned. Failure to follow these procedures may result in oil leaks.
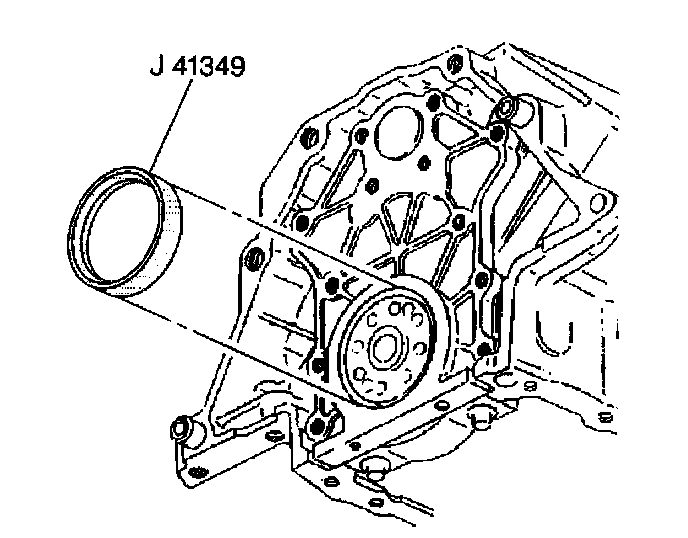
4. Install the crankshaft rear oil seal housing and finger tighten all the bolts (loose enough to adjust the crankshaft rear oil seal housing) to hold the crankshaft rear oil seal housing in place. Make sure the gasket is not higher than the crankshaft rear oil seal housing.
Plastic inserts in the crankshaft rear oil seal housing are only used as an assembly aid and are not required for service.
5. Wipe a thin film of oil on both sides of the J 41349 to aid in installation and removal from the crankshaft.
6. Install the J 41349 over the crankshaft. Twisting or turning the J 41349 aids in sliding it completely over the crankshaft.
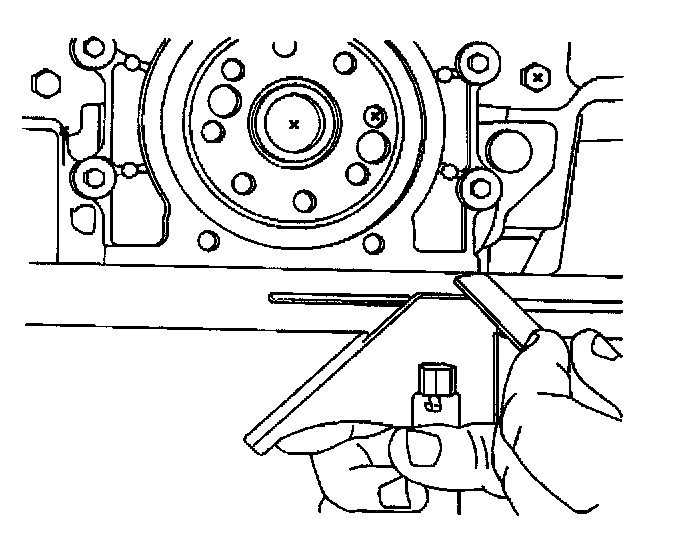
7. Place a straight edge on the cylinder block oil pan flange and the rear oil seal housing flange. Use a feeler gauge to make sure that there is no more than 0.004 inch step (high or low) on each side. Rotate the crankshaft rear oil seal housing to get the step equal on each side, if necessary. If the crankshaft rear oil seal housing can not be rotated to get the step within specification, replace the crankshaft rear oil seal housing.
Notice: Refer to Fastener Notice in Service Precautions.
8. Tighten the crankshaft rear oil seal housing bolts.
Tighten the crankshaft rear oil seal housing bolts to 15 Nm (11 ft. lbs.). Use the J 36660-A in order to rotate the crankshaft rear oil seal housing bolts an additional 50 degrees.
9. Remove the J 41349.
10. Recheck the step height on each side to make sure that the crankshaft rear oil seal housing did not move while tightening the bolts. If the step height is beyond specification, repeat steps 4 through 8 and measure again. If excessive clearance is still present, replace the crankshaft rear oil seal housing.
11. Install the new crankshaft rear oil seal. Refer to Crankshaft Rear Oil Seal Replacement.
12. Install the engine flywheel. Refer to Engine Flywheel Replacement.
13. Fill the cooling system with engine coolant. Refer to Draining and Filling Cooling System in Cooling System.