Height Sensor Link Ball Stud Replacement
REMOVAL PROCEDURE
Notice: When reconnecting the link, take care not to bend or break the height sensor arm, and make sure the height sensor arm and link are properly oriented. Improper orientation will prevent the ALC system from operating properly, and can result in damage to the height sensor.
CAUTION: Before removing or installing any electrical unit or when a tool or equipment could easily come in contact with "live" exposed electrical terminals, disconnect the negative battery cable to help prevent personal injury and/or damage to the vehicle or components. Unless instructed otherwise, the ignition switch must be in the "OFF" or "LOCK" position.
1. Disconnect the negative battery cable from the battery.
2. Raise and suitably support the vehicle.
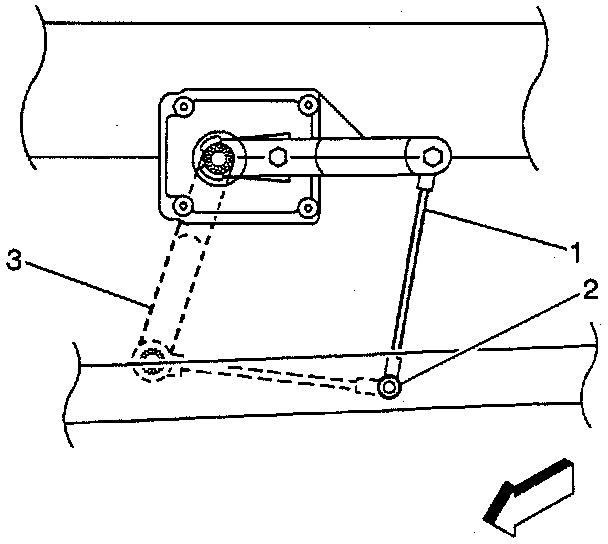
Important: When removing the link (1), do NOT bend or break the sensor arm (3).
3. Remove the automatic level control sensor link (1) from the tie rod ball stud.
4. Remove the ball stud from the rear axle tie rod. Refer to Height Sensor Description.
INSTALLATION PROCEDURE
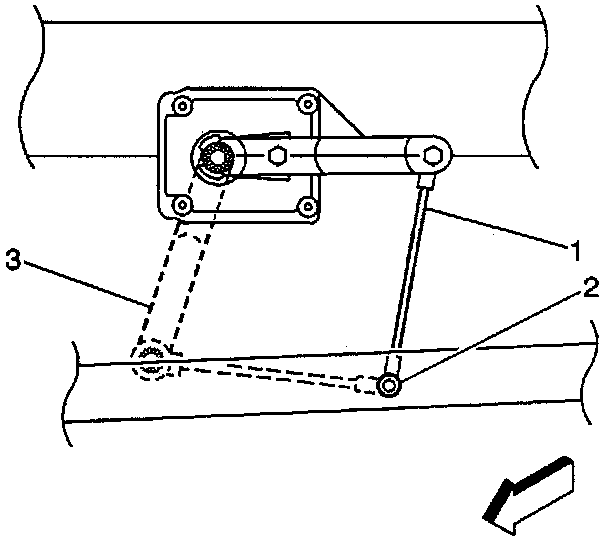
Important: When connecting the link, do NOT bend or break the sensor arm. Notice: Refer to Fastener Notice in Cautions and Notices.
1. Install the ball stud onto the rear axle tie rod. Refer to Height Sensor Description.
Tighten the ball stud to 4 Nm (35 inch lbs.).
2. Install the automatic level control sensor link (3) to the tie rod ball stud (1).
3. Lower the vehicle.
4. Reconnect the negative battery cable to the battery.