Air Line Tubing Repair
REMOVAL PROCEDURE
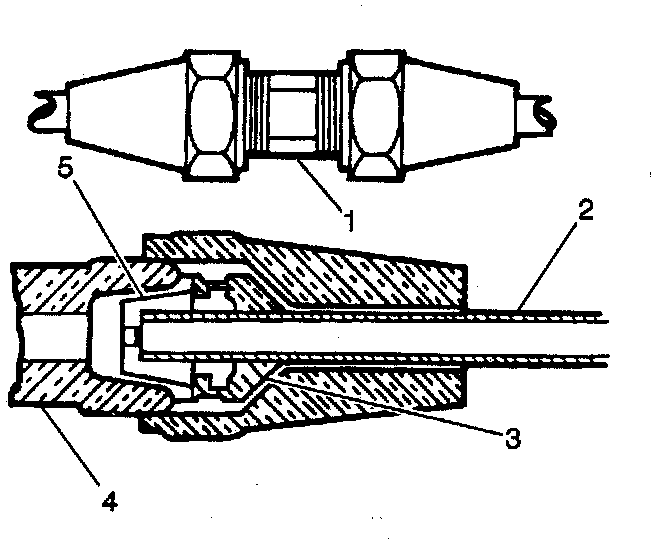
The ELC system air lines may be repaired by splicing in a coupling at the leaking area using the following procedure:
1. Raise and suitably support the vehicle.
2. Locate the leaking area with soap and water or a stethoscope.
3. Cut and remove the leaking line (2) section.
4. Perform the following steps in order to splice the replacement line to the existing line:
4.1. Remove the plastic retainer pin from one of the nuts and slide the replacement line into the nut until the new line bottoms in the rubber seal (5).
NOTICE: Always use the correct fastener in the proper location. When you replace a fastener, use ONLY the exact part number for that application. The manufacturer will call out those fasteners that require a replacement after removal. The manufacturer will also call out the fasteners that require thread lockers or thread sealant. UNLESS OTHERWISE SPECIFIED, do not use supplemental coatings (paints, greases, or other corrosion inhibitors) on threaded fasteners or fastener joint interfaces. Generally, such coatings adversely affect the fastener torque and joint clamping force, and may damage the fastener. When you install fasteners, use the correct tightening sequence and specifications. Following these instructions can help you avoid damage to parts and systems.
4.2. Hold the line in the position described in the above step.
Tighten the nut to 8 Nm (70 inch lbs.).
4.3. Attach the original line to the other end of the coupling as described in the previous steps.
4.4. Secure the air line to the vehicle in a location where the line is not pinched, or kinked, and will not contact the exhaust system. Use a tie strap.
5. Re-inflate the system and check for leaks.
6. Lower the vehicle.