Reverse Lockout Solenoid
REMOVAL PROCEDURE^ Tools Required
^ J 41099 Solenoid Socket
1. Raise and suitably support the vehicle.
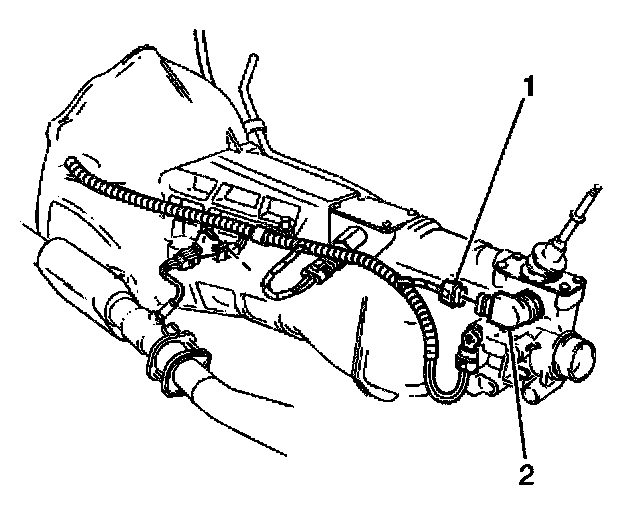
2. Disconnect the electrical connector (1) from the reverse lockout solenoid (2).
3. Place a drain pan under the transmission in case any fluid drips out.
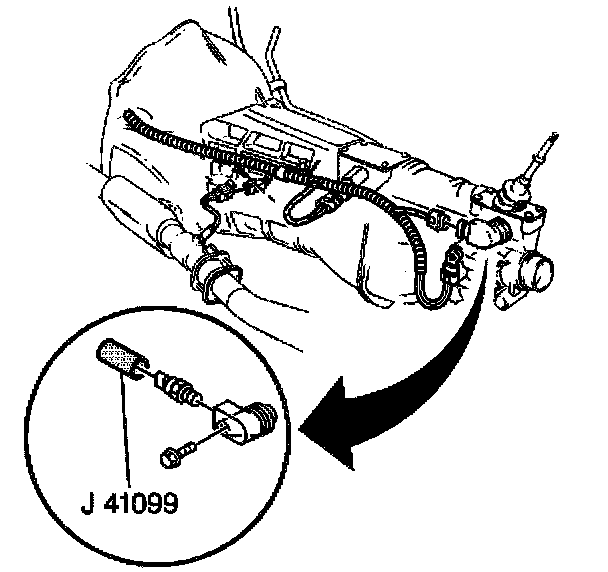
4. Remove the reverse lockout solenoid using J 41099.
5. Remove the reverse lockout assembly bolt.
6. Remove the reverse lockout assembly, if necessary.
INSTALLATION PROCEDURE
^ Tools Required
^ J 41099 Solenoid Socket
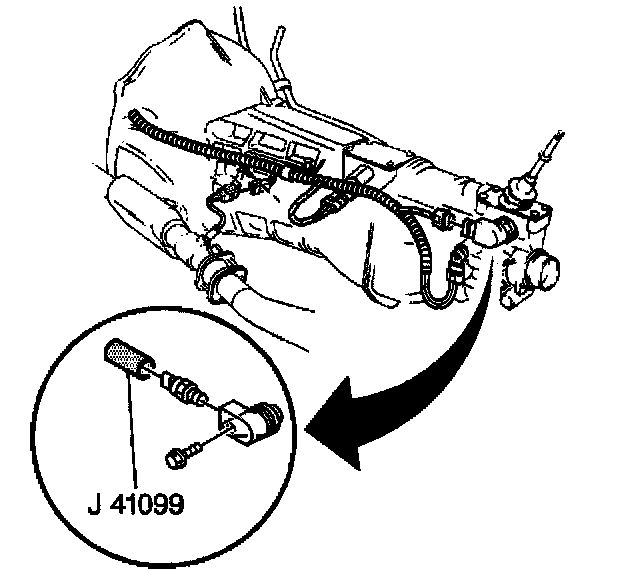
1. Install the reverse lockout assembly, if necessary.
2. Install the reverse lockout assembly bolt.
^ Tighten the reverse lockout assembly bolt to 18 Nm (13 ft. lbs.).
NOTICE: Refer to Fastener Notice in Service Precautions.
3. Install the reverse lockout solenoid using the J 41099.
^ Tighten the reverse lockout solenoid to 40 Nm (30 ft. lbs.).
4. Remove the drain pan.
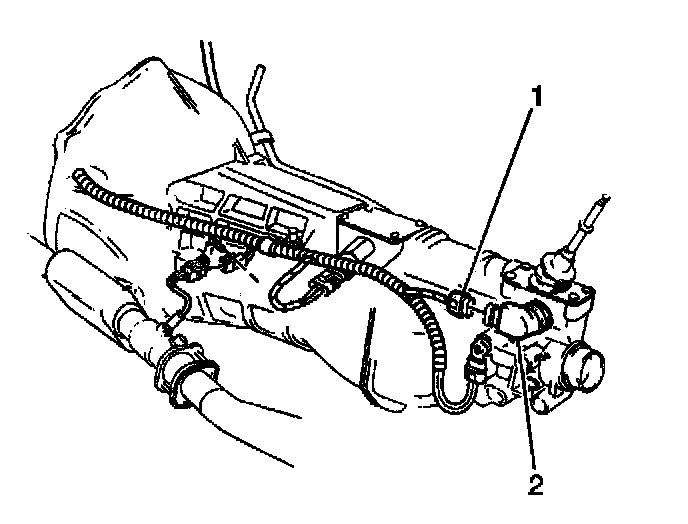
5. Connect the electrical connector (1) to the reverse lockout solenoid (2).
6. Check the transmission fluid level.
7. Lower the vehicle.