Lower Control Arm Bushings Replacement (Rear)
DISASSEMBLE PROCEDURE^ Tools Required:
- J 21474-3 Lower Control Arm Bushing Screw
- J 21474-4 Lower Control Arm Bushing Nut
- J 21474-5 Control Arm Bushing Receiver
- J 39874 Lower Control Arm Bushing Receiver
- J 39931 Lower Control Arm Bushing Receiver
1. Remove the lower control arm. Refer to LOWER CONTROL ARM REPLACEMENT.
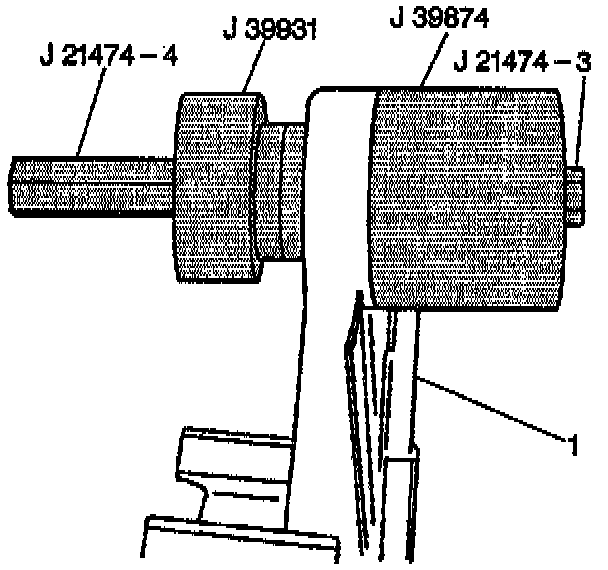
2. Perform the following steps in order to remove the lower control arm rear bushing from the lower control arm (1):
2.1. Install J 39874 onto J 21474-3 with the sealed end of J 39874 facing the head of the screw.
2.2. Run the J 21474-3 through the control arm bushing, the control arm and into the small end of J 39931.
2.3. Install the thrust washer onto J 21474-3 with the seam facing toward the control arm.
2.4. Install J 21474-4 onto J 21474-3 and ensure that all parts are lined up with the control arm bushing.
2.5. Tighten until you are able to remove the control arm bushing (the bushing may make a popping noise upon removal).
ASSEMBLE PROCEDURE
1. Perform the following steps in order to install the lower control arm rear bushing:
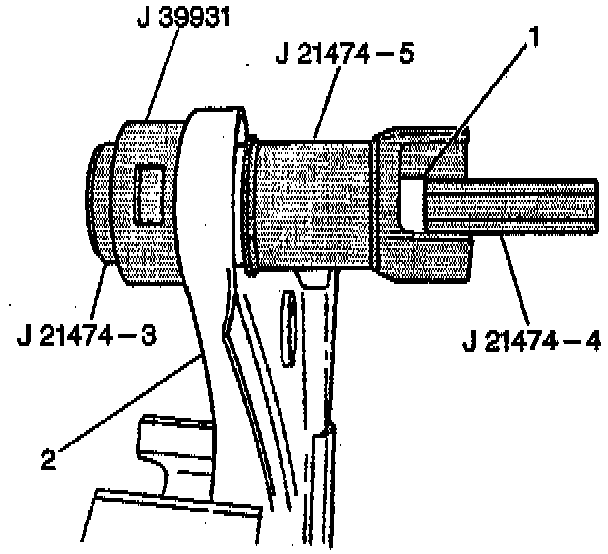
1.1. Secure the lower control arm (2) in a vise, then place J 21474-3 through the small end of J 39931.
1.2. Install J 21474-3 through the new rear bushing, then through the closed end of the rear lower control arm.
1.3. Place the small end of J 21474-5 onto J 21474-3.
1.4. Install the thrust washer (1) onto J 21474-3 with the seam of the washer facing toward the control arm.
1.5. Ensure that all the tools are lined up with the bushing and the control arm, and that the window is facing straight up and visible on J 39931.
1.6. Install J 21474-4 onto J 21474-3 and tighten until the rubber protrusion on the J 39931 side bottoms out against J 39931.
2. Install the lower control arm. Refer to LOWER CONTROL ARM REPLACEMENT.