Inner Tie Rod
Power Rack And Pinion - End Take Off - Part 1 Of 2:
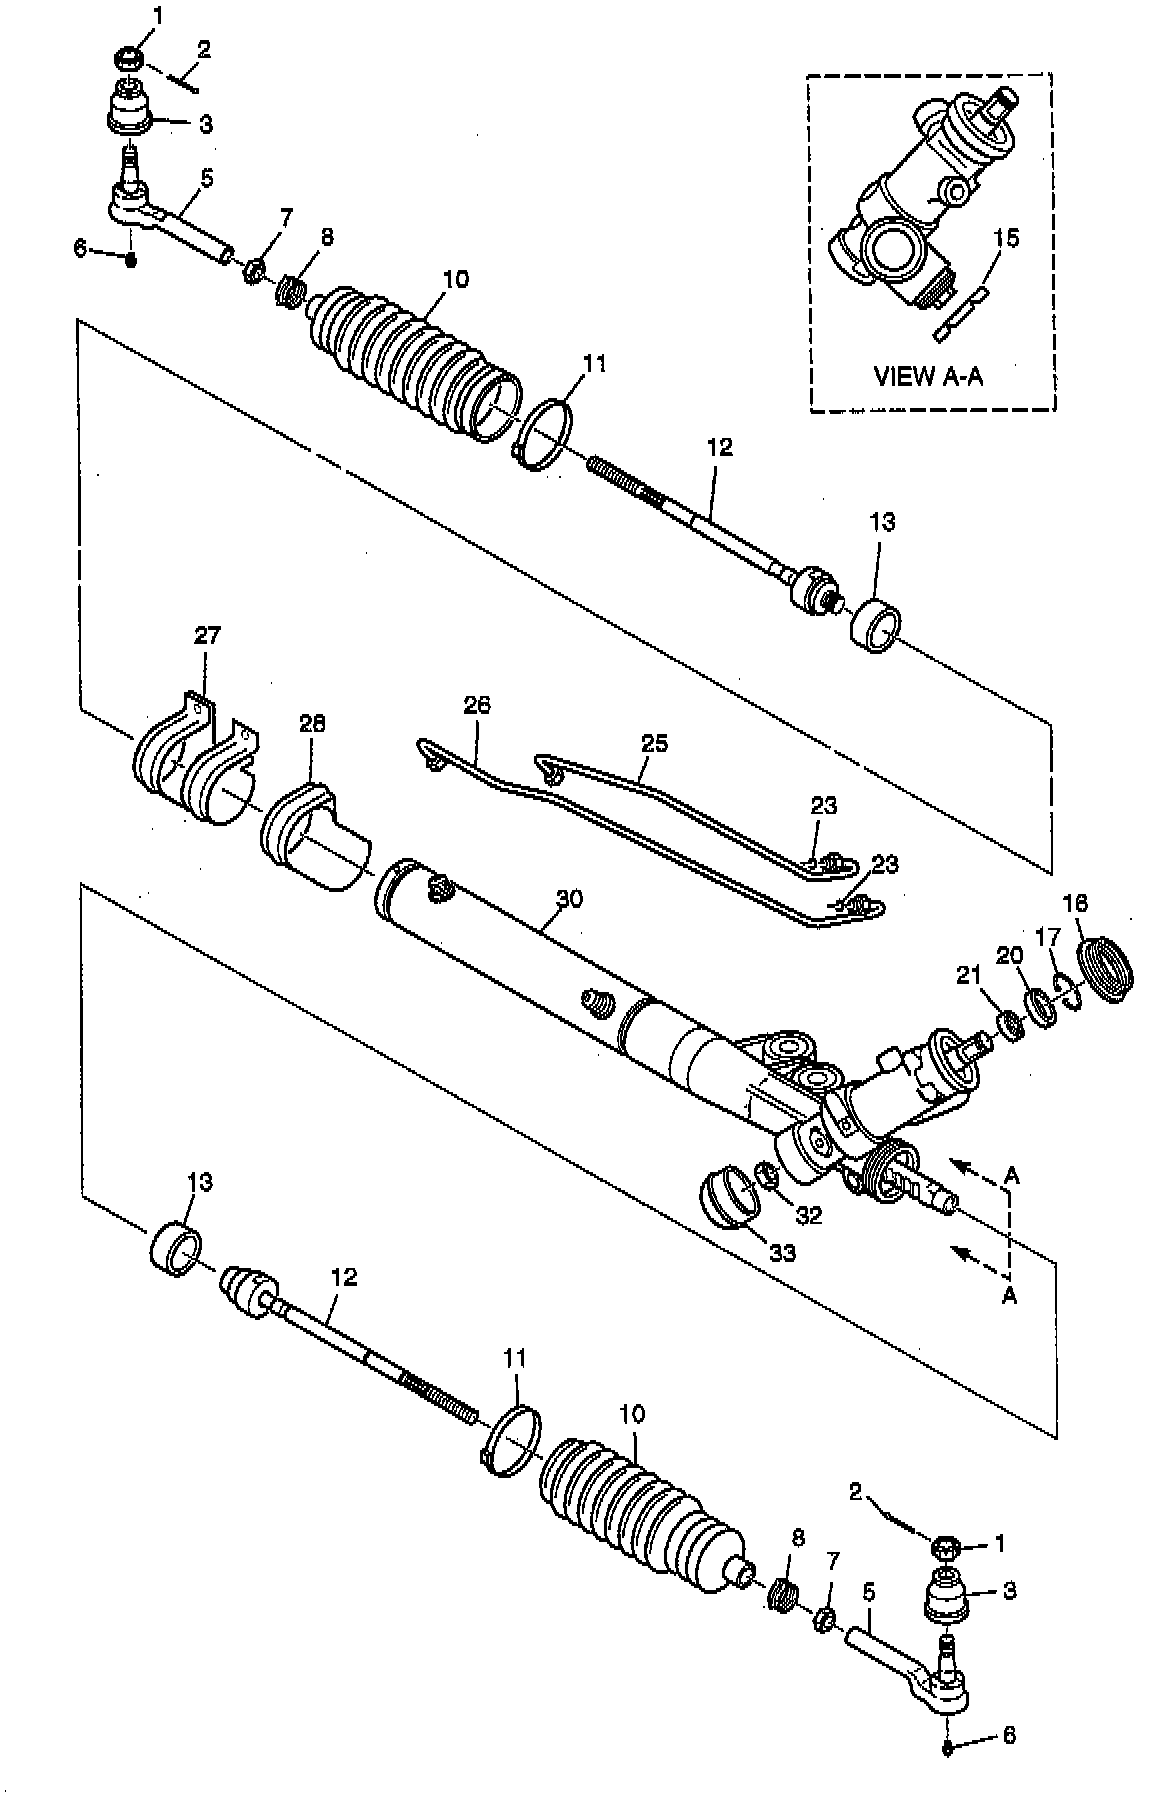
Power Rack And Pinion - End Take Off - Part 2 Of 2:
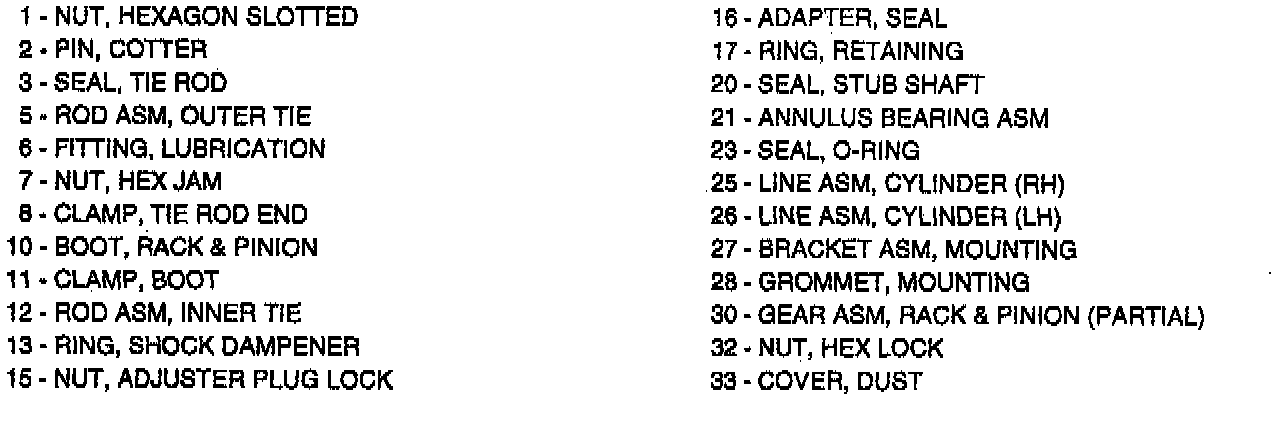
REMOVE OR DISCONNECT
1. Rack and pinion assembly from vehicle.
2. Do all steps of RACK & PINION BOOT under REMOVE OR DISCONNECT.
Inner Tie Rod Removal:
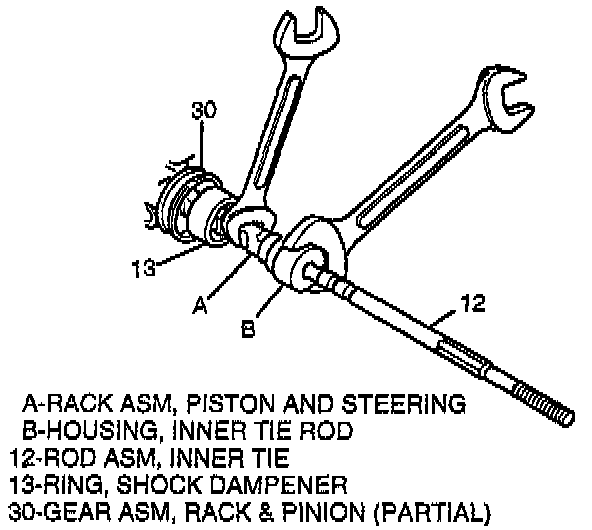
3. Shock dampener (13) from inner tie rod assembly (12) and slide back on rack.
NOTICE: Rack must be held during removal of inner tie rod (12) to prevent rack damage.
4. Inner tie rod assembly (12) from rack assembly as follows:
^ Place a wrench on flats of rack assembly.
^ Place another wrench on flats of inner tie rod housing.
^ Rotate inner tie rod housing counterclockwise until inner tie rod (12) separates from rack.
Loctite(R) Removal And Application:
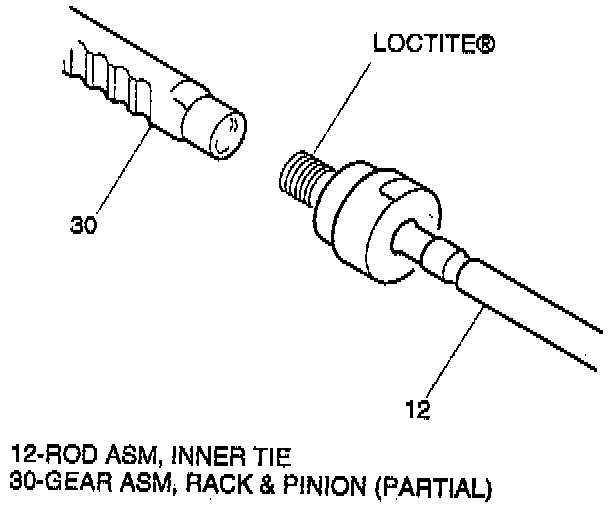
5. Old Loctite from threads of rack and inner tie rod.
Important: Threads must be clean prior to Loctite application. Make sure Loctite (or equivalent) container expiration date has not passed. Do not use too much Loctite (or equivalent). Use only enough to evenly coat threads. Apply Loctite 262 (or equivalent) to inner tie rod threads.
INSTALL OR CONNECT
NOTICE: Rack must be held during inner tie rod (12) installation to prevent internal gear damage.
1. Shock dampener (13) onto rack.
Inner Tie Rod Installation:
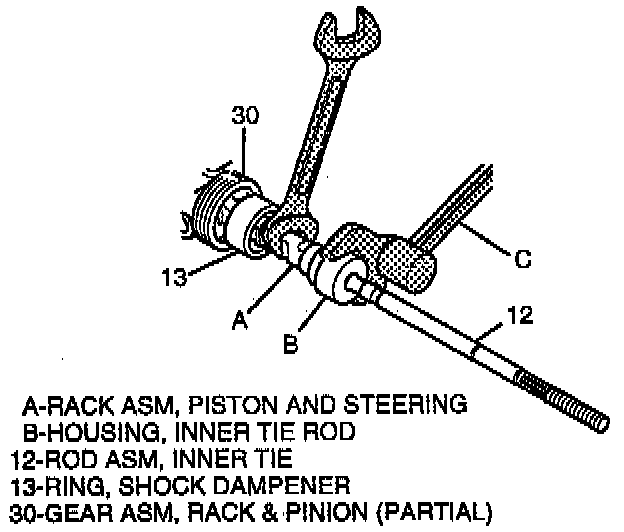
2. Inner tie rod (12) on rack.
^ Place a wrench on flats of rack assembly.
^ Place another wrench on flats of inner tie rod housing.
Tighten
^ Inner tie rod (12) to 100 Nm (74 ft. lbs.).
3. Slide shock dampener (13) over inner tie rod housing until it engages.
4. Do all steps of RACK & PINION BOOT under INSTALL OR CONNECT.
5. Rack and pinion assembly to vehicle.