Torque Converter Clutch Solenoid: Service and Repair
REMOVAL PROCEDURE^ Tools Required
^ J 28458 Power Piston Seal Protector and Diaphragm Retainer Installer
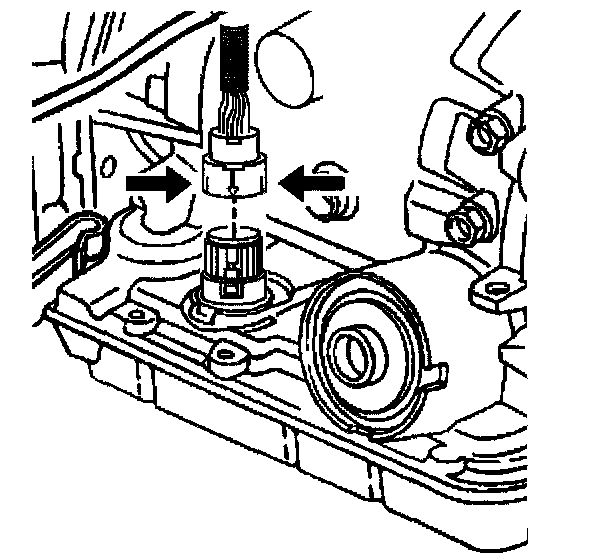
1. For the 5.7L remove the oxidation catalytic converter.
2. Remove the transmission oil pan and the filter.
3. Disconnect the transmission harness 20-way connector from the transmission internal harness pass-through connector.
Depress both tabs on the connector and pull straight up; do not pry the connector.
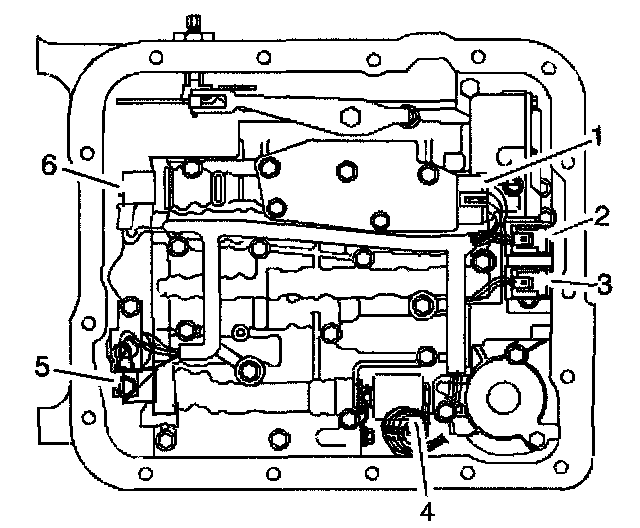
4. Disconnect the internal wiring harness electrical connectors from the following components:
^ Transmission pressure switch (1)
^ 1-2 shift control solenoid (2)
^ 2-3 shift control solenoid (3)
^ Pressure control solenoid (4)
^ TCC PWM solenoid (5)
^ 3-2 control solenoid (6)
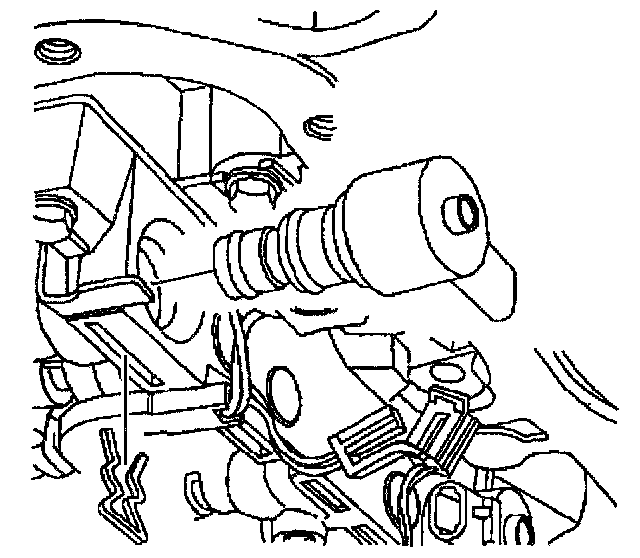
5. Remove the TCC PWM solenoid retainer.
6. Remove the TCC PWM solenoid in order to access one of the TCC solenoid retaining bolts.
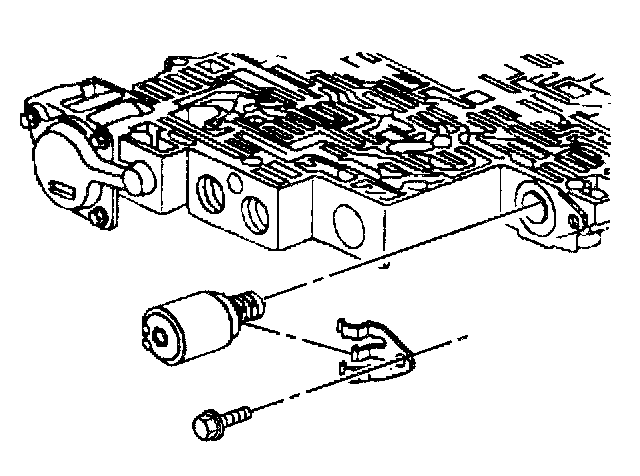
7. Remove the pressure control solenoid retainer.
8. Remove the pressure control solenoid.
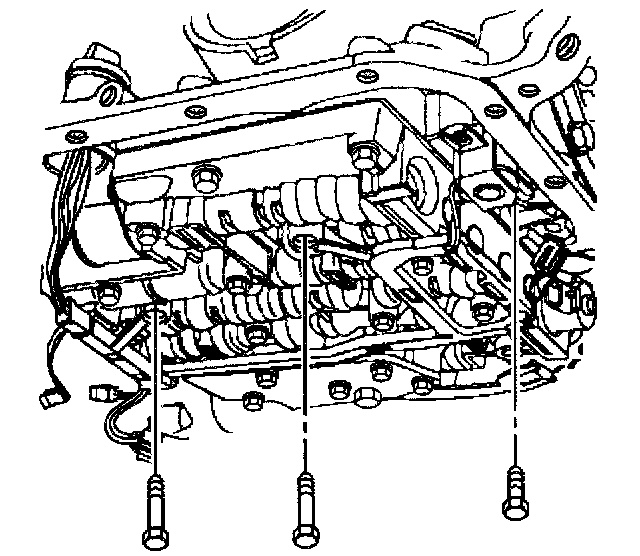
9. Remove the TCC solenoid retaining bolts and the valve body bolts which retain the internal wiring harness.
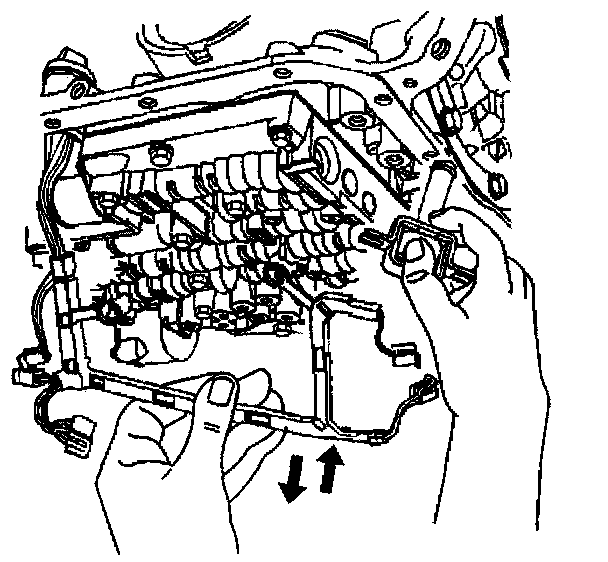
10. Using J 28458, release the pass-through electrical connector from the transmission case.
10.1. Use the small end of the J 28458 over the top of the connector.
10.2. Twist in order to release the four tabs retaining the connector.
10.3. Pull the harness connector down through the transmission case.
11. Remove the TCC solenoid (with O-ring seal) and wiring harness from the transmission case.
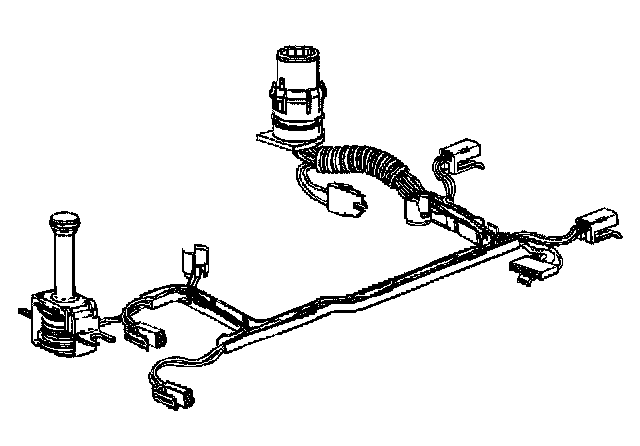
12. Inspect the TCC solenoid and wiring harness for the following defects:
^ Damage
^ Cracked connectors
^ Exposed wires
^ Loose pins
INSTALLATION PROCEDURE
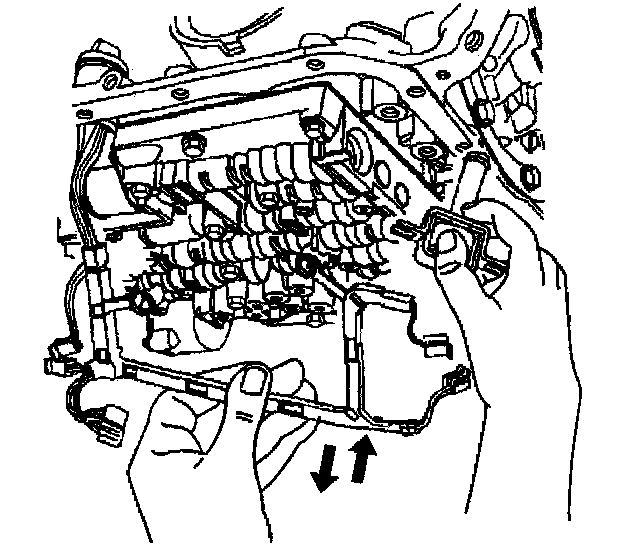
1. Install the wiring harness and TCC solenoid with a new O-ring seal to the valve body.
2. Install the pass-through electrical connector to the transmission case.
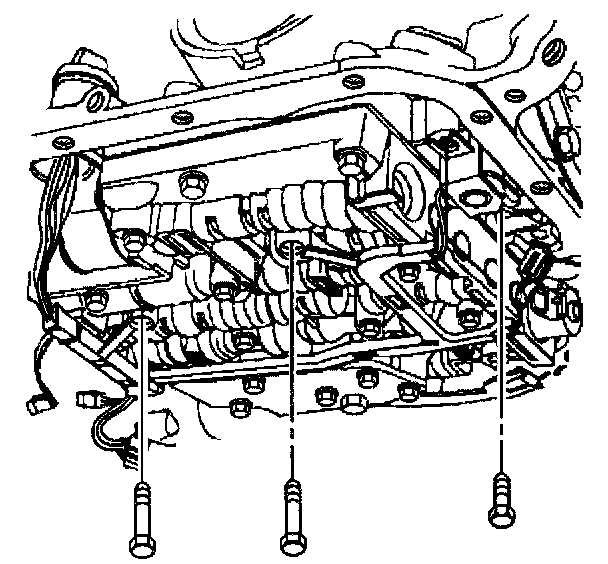
3. Install the valve body bolts which retain the internal wiring harness and install the TCC solenoid retaining bolts.
^ Tighten the control valve body retaining bolts to 11 Nm (97 inch lbs.).
^ Tighten the TCC solenoid retaining bolts to 11 Nm (97 inch lbs.).
NOTICE: Refer to Fastener Notice in Service Precautions.
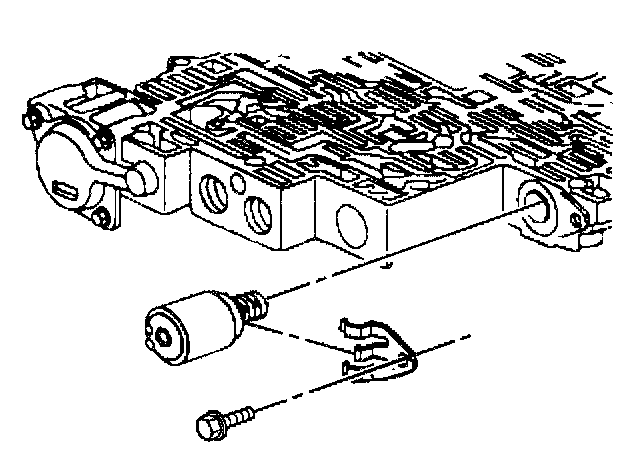
4. Install the pressure control solenoid.
Ensure that the electrical tabs are facing outboard.
5. Install the pressure control solenoid retainer and retaining bolt.
^ Tighten the pressure control solenoid retaining bolt to 11 Nm (97 inch lbs.).
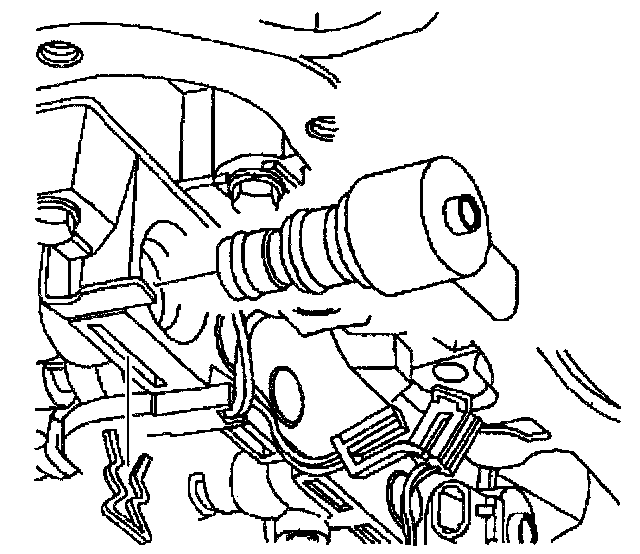
6. Install the TCC PWM solenoid to the control valve body.
7. Install the TCC PWM solenoid retainer.
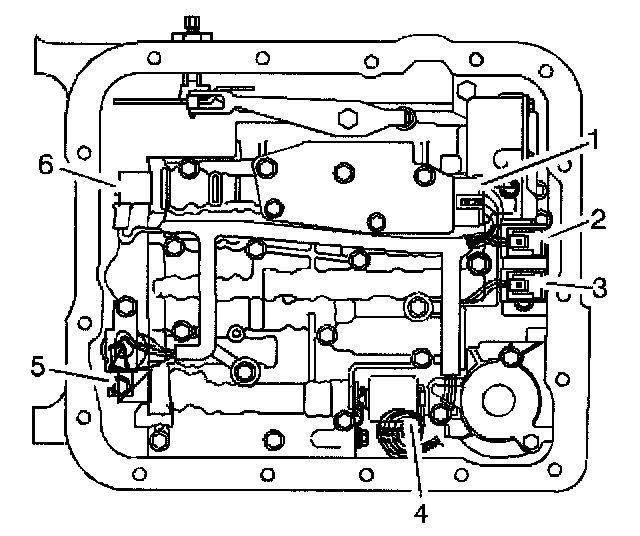
8. Connect the internal wiring harness electrical connectors to the following components:
^ Transmission pressure switch (1)
^ 1-2 shift control solenoid (2)
^ 2-3 shift control solenoid (3)
^ Pressure control solenoid (4)
^ TCC PWM solenoid (5)
^ 3-2 control solenoid (6)
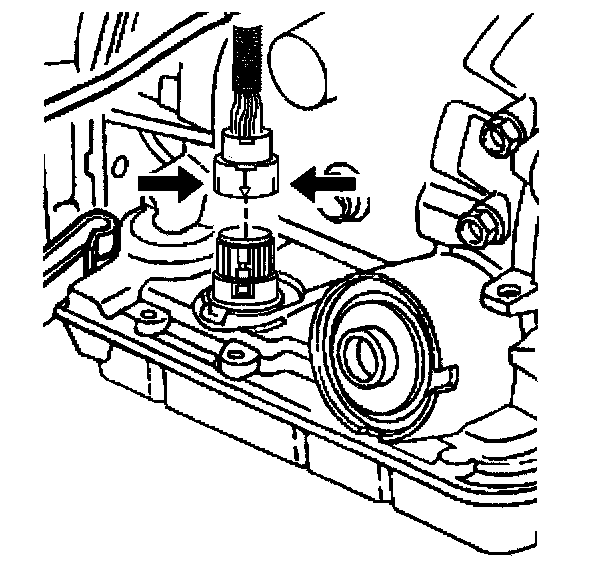
9. Connect the transmission harness 20-way connector to the transmission internal harness pass-through connector.
Align the arrows on each half of the connector and insert straight down.
10. Install the transmission oil pan and the filter.
11. Install the oxidation catalytic converter.