Exhaust Manifold Installation (Left Side)
EXHAUST MANIFOLD INSTALLATION (LEFT SIDE)IMPORTANT: Tighten the exhaust manifold bolts as specified in the service procedure. Improperly installed and/or leaking exhaust manifold gaskets may effect vehicle emissions and/or On-Board Diagnostic (OBD II) system performance.
The cylinder head exhaust manifold bolt hole threads must be clean and free of debris or threadlocking material.
1. Apply a 5 mm (0.20 inch) wide band of threadlock GM P/N 12345493 or equivalent to the threads of the exhaust manifold bolts.
Refer to Sealers, Adhesives, and Lubricants.
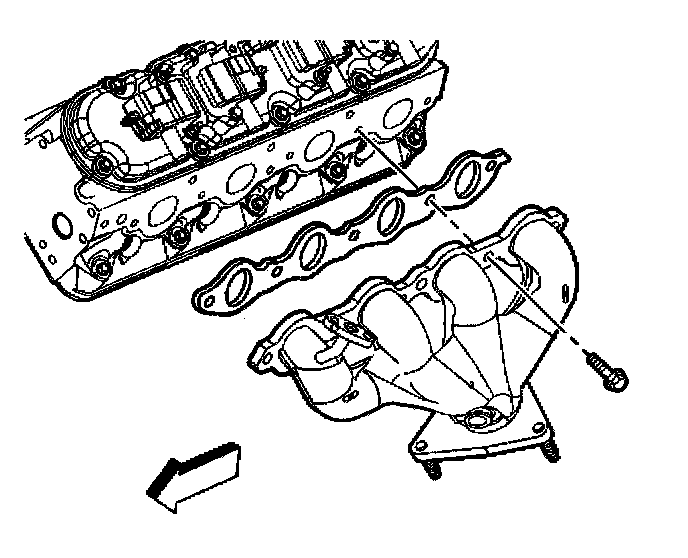
2. Install the exhaust manifold and NEW exhaust manifold gasket.
NOTICE: Refer to Fastener Notice in Service Precautions.
3. Install the exhaust manifold bolts.
3.1. Tighten the exhaust manifold bolts a first pass to 15 Nm (111 ft. lbs.). Tighten the exhaust manifold bolts beginning with the center two bolts. Alternate from side-to-side, and work toward the outside bolts.
3.2. Tighten the exhaust manifold bolts a final pass to 25 Nm (18 ft. lbs.). Tighten the exhaust manifold bolts beginning with the center two bolts. Alternate from side-to-side, and work toward the outside bolts.
4. Using a flat punch, bend over the exposed edge of the exhaust manifold gasket at the rear of the left cylinder head.
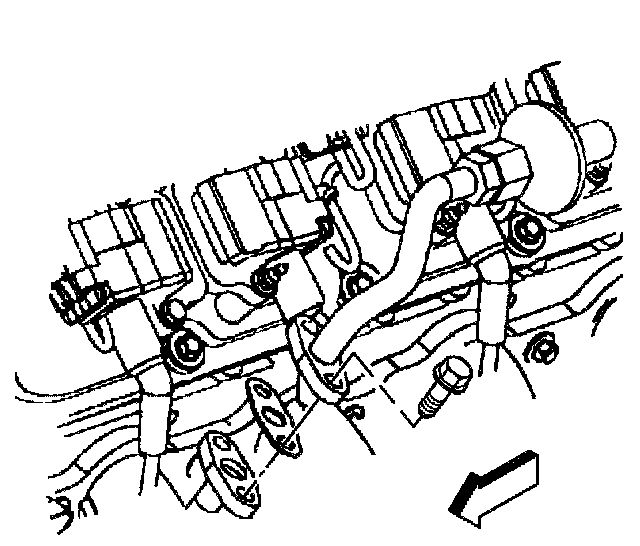
5. Install the Air Injection Reaction (AIR) pipe (with check valve), NEW gasket and bolts.
^ Tighten the AIR pipe to exhaust manifold bolts to 20 Nm (15 inch lbs.).
6. Install the oxygen sensor into the intake manifold.
^ Tighten the oxygen sensor to 41 Nm (30 ft. lbs.).