Harmonic Balancer - Crankshaft Pulley: Service and Repair
REMOVAL PROCEDURE^ Tools Required
- J41816 Crankshaft Balancer Remover
- J42386-A Flywheel Holding Tool
IMPORTANT: The crankshaft balancer is balanced as an individual component. It is not necessary to mark the balancer position prior to removal. Do not reuse the crankshaft balancer bolt. Install a NEW crankshaft balancer bolt during final assembly.
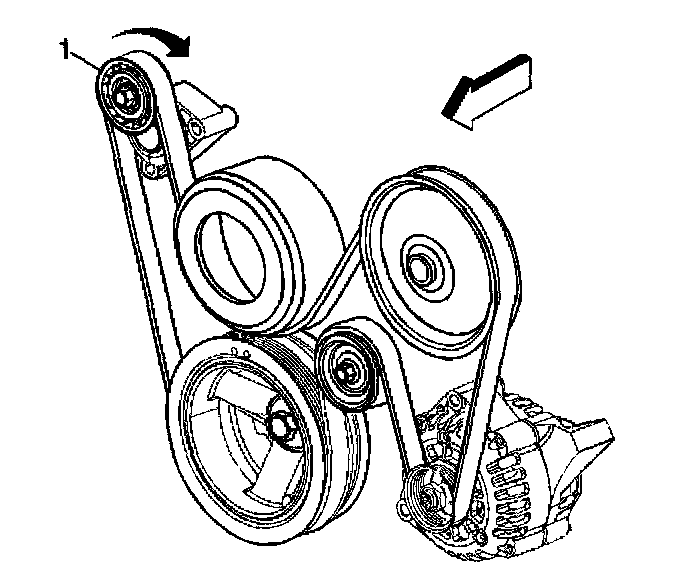
1. Remove the drive belt.
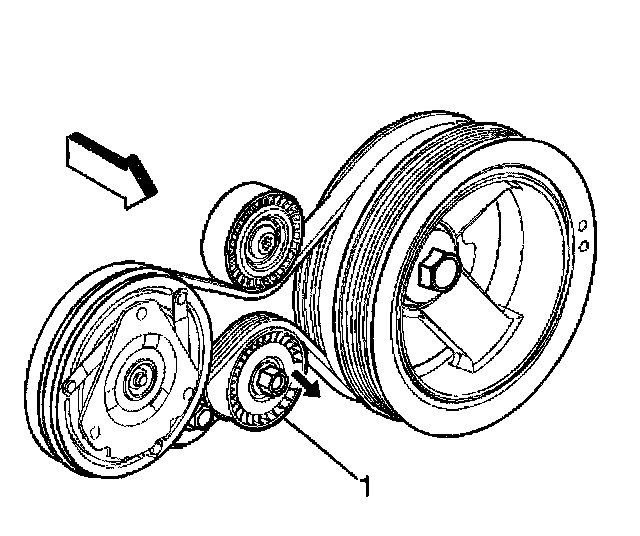
2. Remove the A/C drive belt.
3. Raise and suitably support the vehicle.
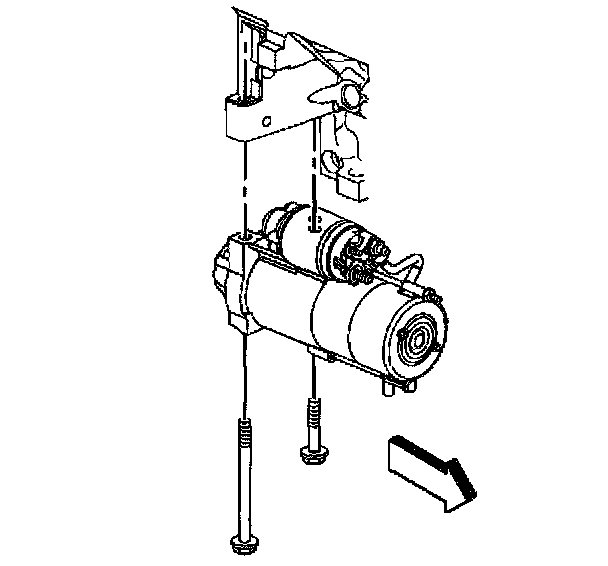
4. Remove the starter motor.
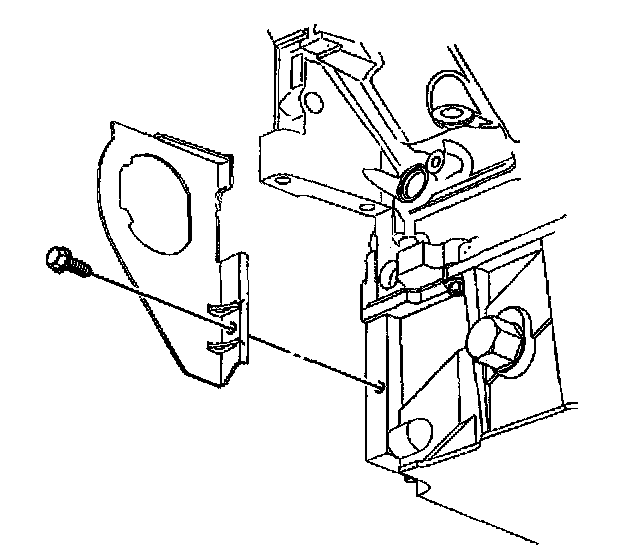
5. Remove the right closeout cover and bolt.
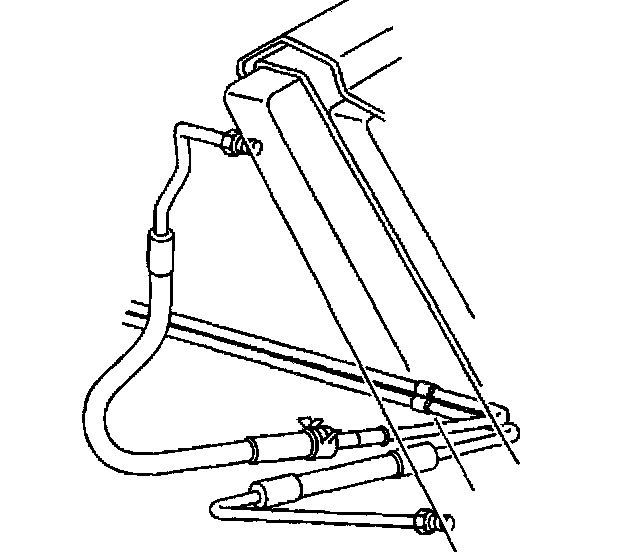
6. Remove the transmission oil cooler lines from the radiator.
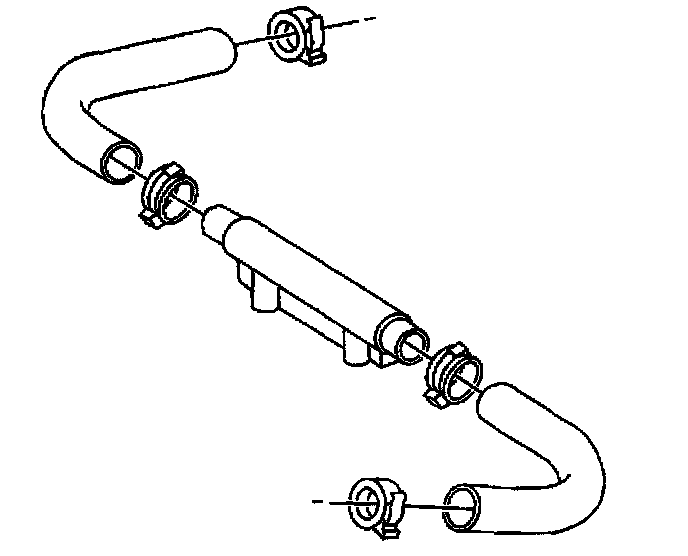
7. Remove the power steering cooler, if equipped from the plastic support, if more room is needed.
IMPORTANT: Make sure that the teeth of the flywheel holding tool mesh with the teeth of the engine flywheel.
NOTICE: Refer to Fastener Notice in Service Precautions.
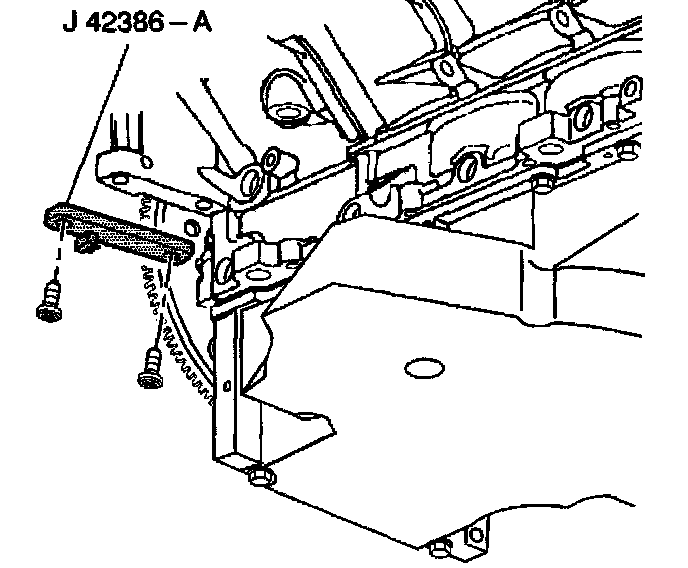
8. Install the J42386-A and bolts.
^ Tighten the J42386-A bolts to 50 Nm (37 ft. lbs.).
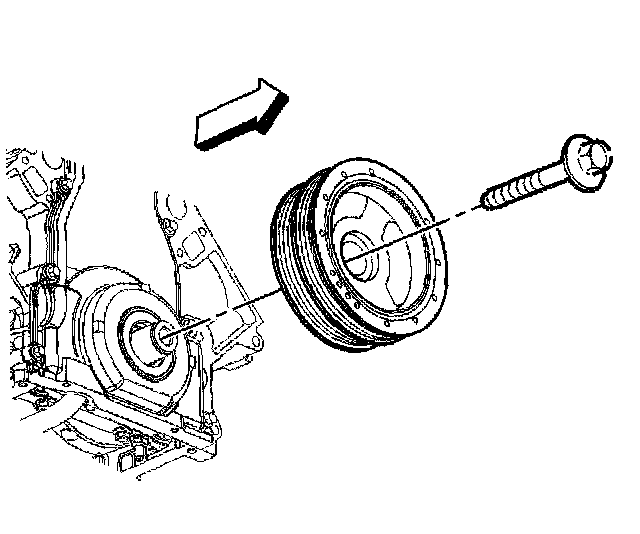
9. Remove the crankshaft balancer bolt.
Do not discard the crankshaft balancer bolt. The balancer bolt will be used during the balancer installation.
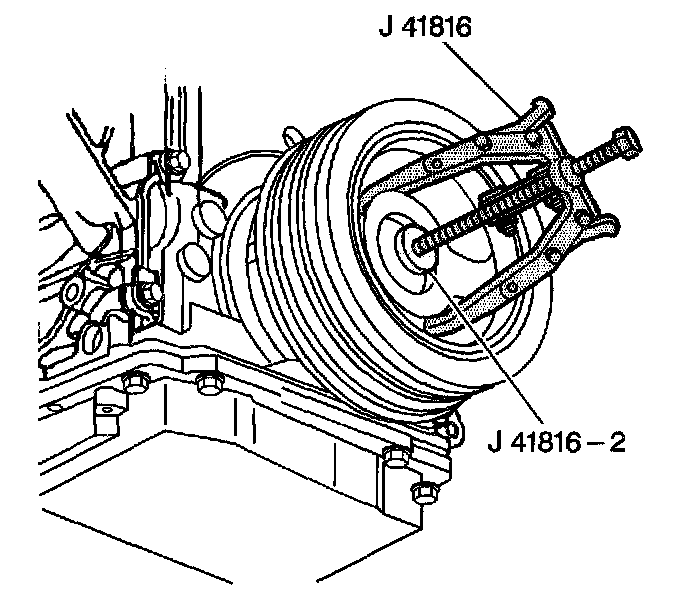
10. Using the J41816 and the J41816 in order to remove the crankshaft balancer.
11. Remove the J42386-A and bolts.
INSTALLATION PROCEDURE
^ Tools Required
- J41665 Crankshaft Balancer and Sprocket Installer
- J36660 Torque Angle Meter
- J42386-A Flywheel Holding Tool
IMPORTANT: The crankshaft balancer installation and bolt tightening involves a four stage tightening process. The first pass ensures that the balancer is installed completely onto the crankshaft. The second, third and forth passes tighten the NEW bolt to the proper torque.
The used crankshaft balancer bolt will be used only during the first pass of the balancer installation procedure. Install a NEW crankshaft balancer bolt and tighten as described in the second, third and forth passes of the balancer bolt tightening procedure.
1. Install the J42386-A and bolts.
Use one M1-1.5 x 120 mm and one M10-1.5 x 45 mm for proper tool operation.
^ Tighten the J42386-A bolts to 50 Nm (37 ft. lbs.).
IMPORTANT: The balancer should be positioned onto the end of the crankshaft as straight as possible prior to tool installation.
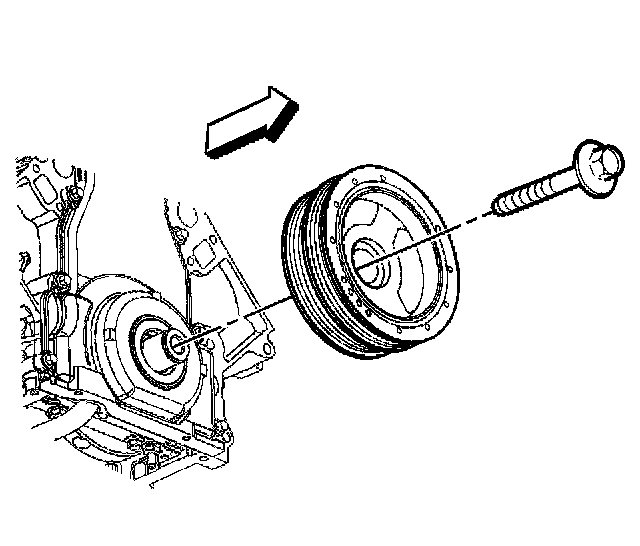
2. Install the crankshaft balancer onto the end of the crankshaft.
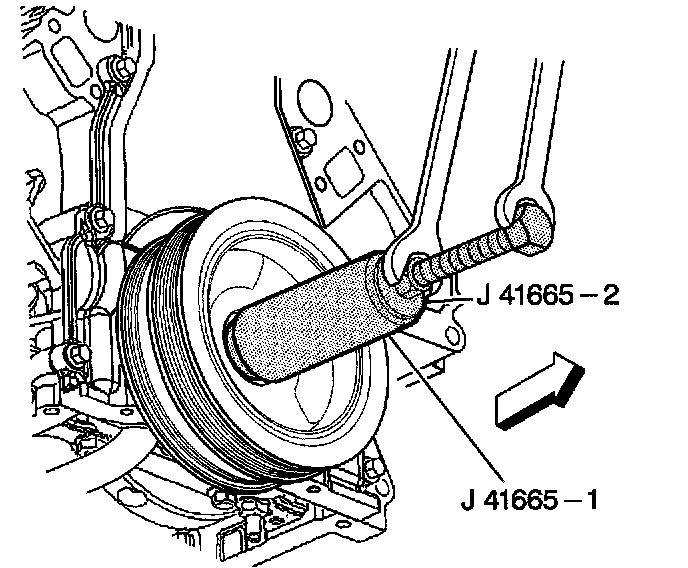
3. Using J41665 perform the following in order to install the balancer:
3.1. Assemble the threaded rod, nut, washer and installer.
Insert the smaller end of the installer into the front of the balancer.
3.2. Use a wrench and hold the hex end of the threaded rod.
3.3. Use a second wrench and rotate the installation tool nut clockwise until the balancer is started onto the crankshaft.
3.4. Remove the tool and reverse the installation tool.
Position the larger end of the installer against the front of the balancer.
3.5. Use a wrench and hold the hex end of the threaded rod.
3.6. Use a second wrench and rotate the installation tool nut clockwise until the balancer is installed onto the crankshaft.
3.7. Remove the J41665.
4. Install the USED crankshaft balancer bolt.
^ Tighten the USED crankshaft balancer bolt to 330 Nm (240 ft. lbs.).
5. Remove the USED crankshaft balancer bolt.
IMPORTANT: The nose of the crankshaft should be recessed 2.40 - 4.48 mm (0.094 - 0.176 inch)
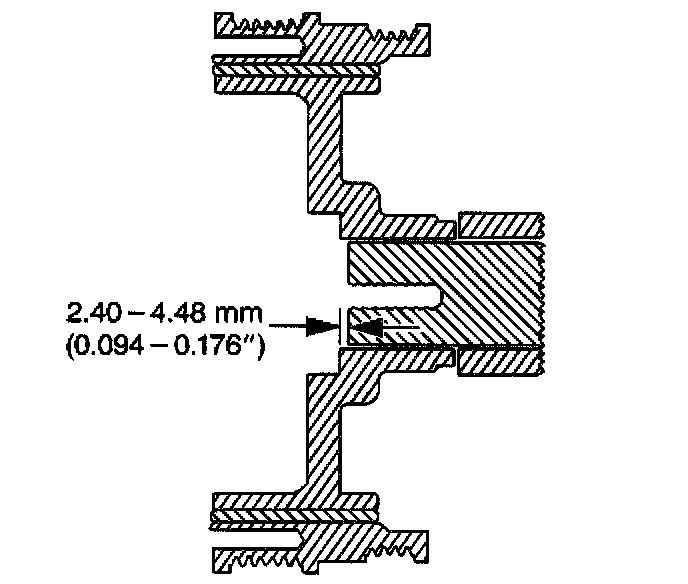
6. Measure for a correctly installed balancer.
If the balancer is not installed to the proper dimensions, install the J41665 and repeat the installation procedure.
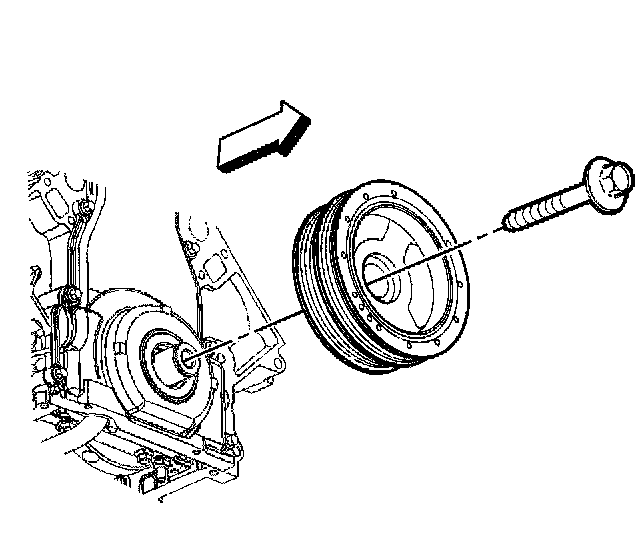
7. Install the NEW crankshaft balancer bolt.
7.1. Tighten the crankshaft balancer bolt a first pass to 50 Nm (37 ft. lbs.).
7.2. Tighten the crankshaft balancer bolt a second pass to 140 degrees using the J36660.
8. Remove the J42386-A.
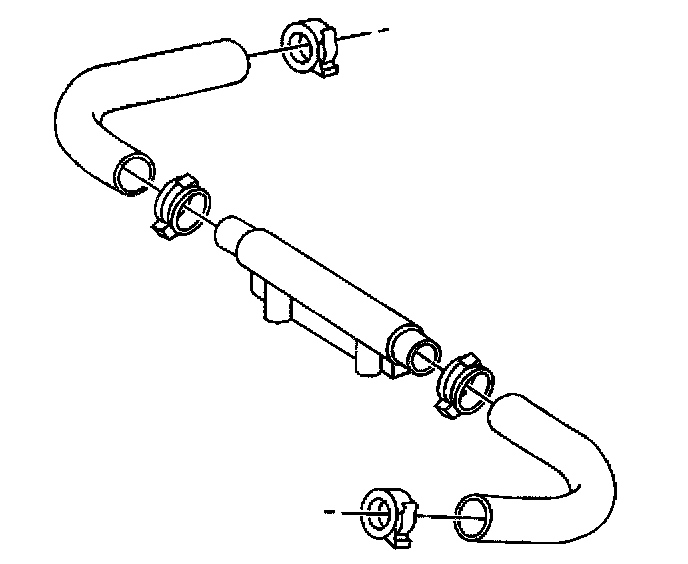
9. Install the power steering cooler, if removed, to the plastic support.
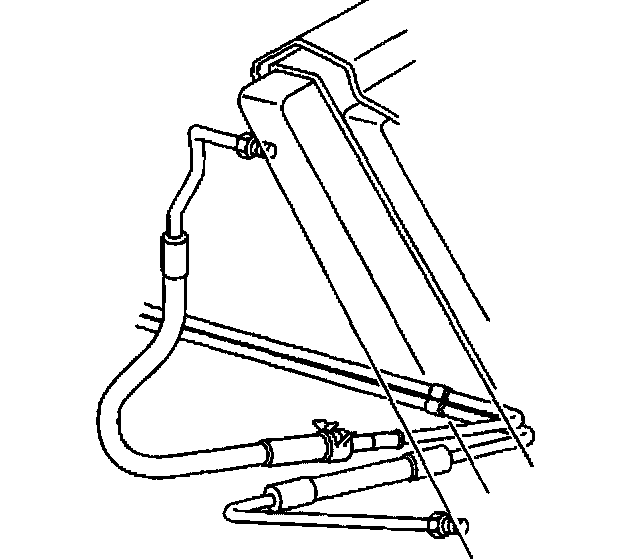
10. Install the transmission oil cooler lines to the radiator.
^ Tighten the oil cooler line connections to 27 Nm (20 ft. lbs.).
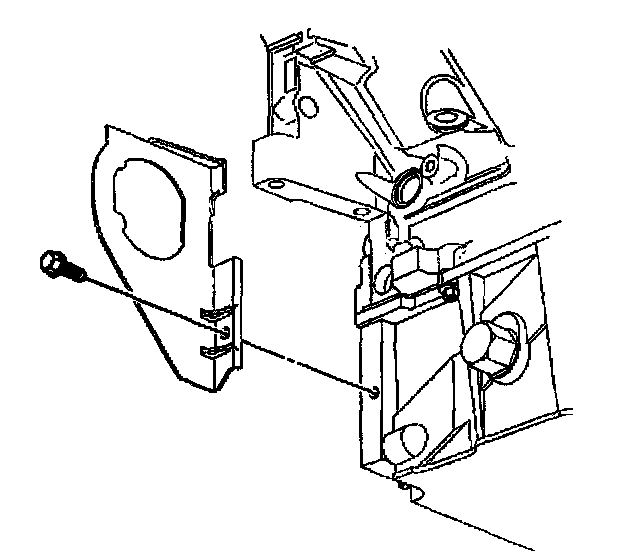
11. Install the right closeout cover and bolt.
^ Tighten the closeout cover bolt to 12 Nm (106 inch lbs.).
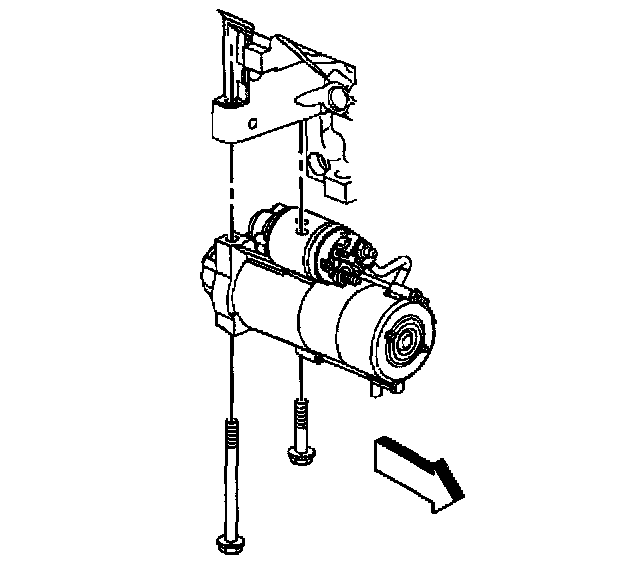
12. Install the starter motor.
13. Lower the vehicle.
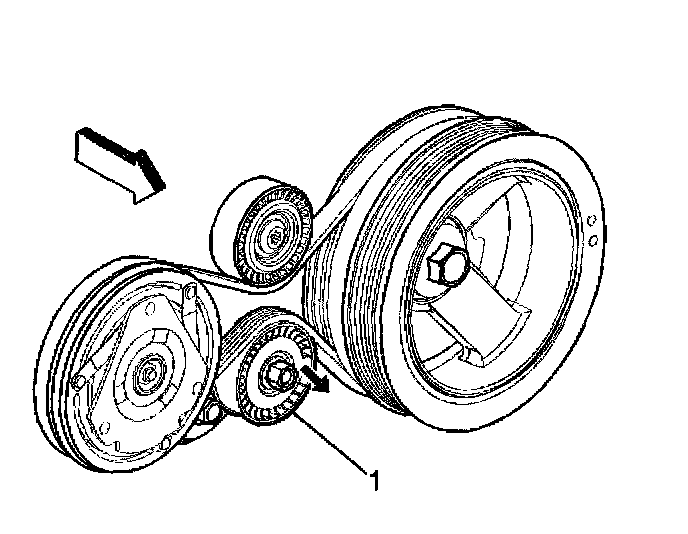
14. Install the A/C drive belt.
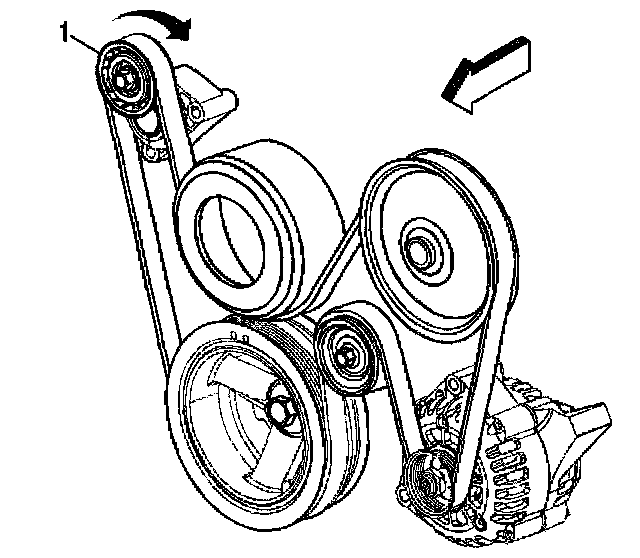
15. Install the drive belt.