Brake Caliper Replacement (Rear)
REMOVAL PROCEDURE1. Raise and suitably the vehicle. .
2. Remove the tire and wheel.
3. Reinstall the wheel nuts in order to secure the rotor.
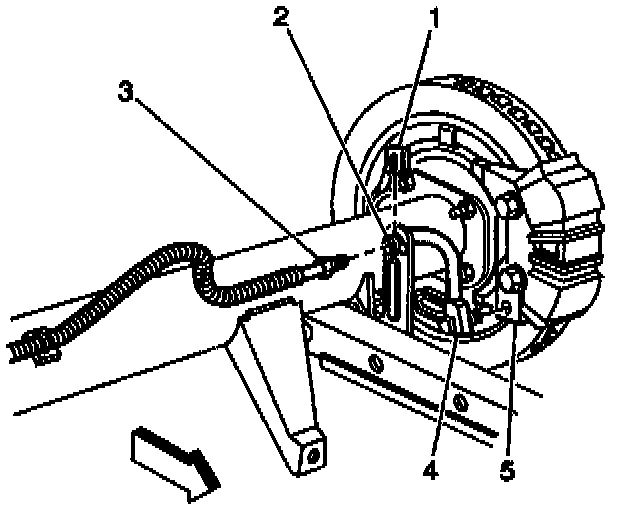
4. Complete the following steps if you are removing the caliper (5) from the vehicle:
4.1. Remove the brake hose bolt attaching the brake hose fitting (4).
4.2. Remove the following items:
^ The brake hose fitting (4)
^ The copper gaskets
Discard the copper gaskets.
^ The brake hose from the caliper
4.3. Plug the openings in the caliper housing and the hose in order to prevent loss or contamination of the brake fluid.
5. Remove the brake caliper guide pin bolts and discard.
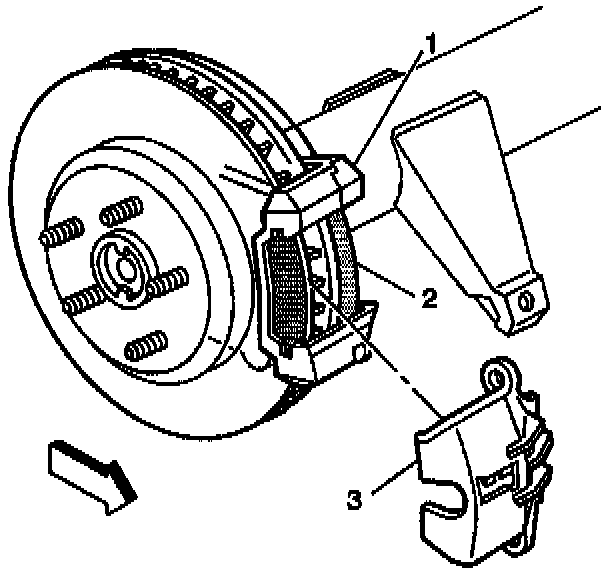
6. Remove the rear brake caliper (3) from the inner and outer pads (2) and mounting plate (1).
If the caliper is not being removed from the vehicle for unit repair, suspend the caliper from the rear suspension using a fabricated wire hook.
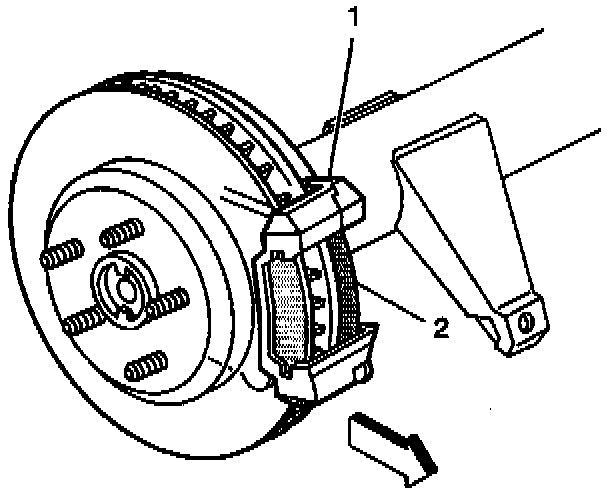
7. Remove the inner and outer brake pads (2) from the mounting plate (1) if the following conditions exist:
^ The brake pads are also being replaced.
^ The brake caliper mounting plate is also being removed.
8. Inspect the caliper guide pins for free movement in the caliper mounting plate.
9. Inspect the caliper guide pin boot for proper seating in the retaining groove of the caliper guide pin and the rear caliper mounting plate.
10. Replace the guide pins or guide pin boots if the following conditions exist:
^ Excessive Corrosion
^ Significant Wear
^ Visible Damage
11. Lubricate the inner diameters of the caliper bolt bushings with silicone grease. Also lubricate the caliper bolts with silicone grease.
12. Inspect the inner and outer pads for wear.
13. Inspect the inner and outer pads for maximum taper.
^ Maximum taper of the rear brake pads is 0.15 mm (0.006 inch).
^ If the pads are tapered beyond the maximum specification, replace the inner and outer pads in complete set only.
INSTALLATION PROCEDURE
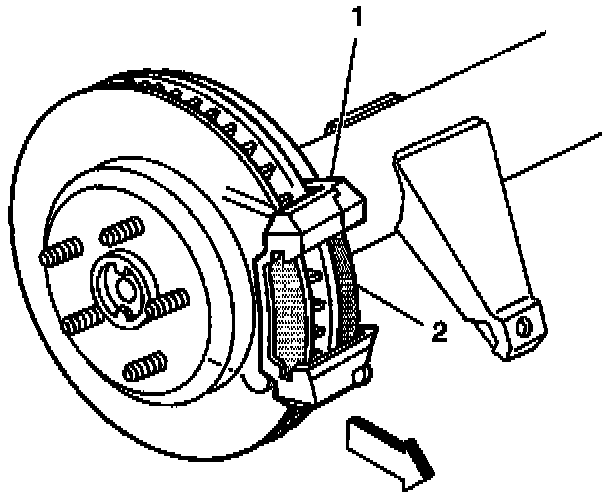
1. Install the inner and outer pads (2) into the mounting plate (1).
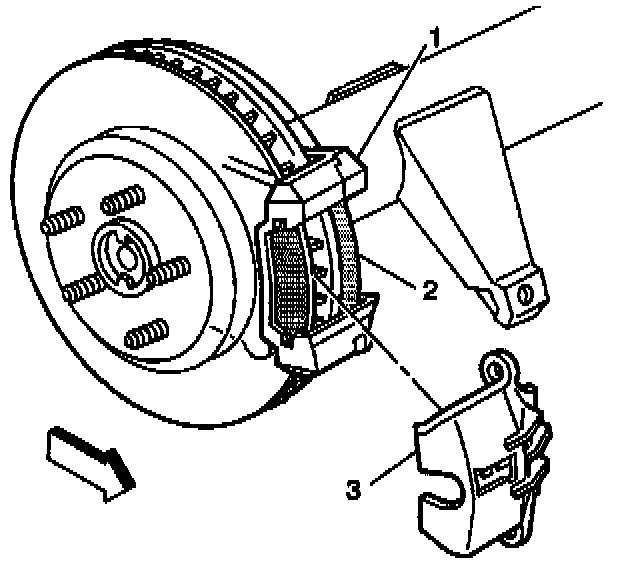
2. Install the rear brake caliper (3) over the brake pads (2) and into the caliper mounting plate (1).
NOTICE: Always use the correct fastener in the proper location. When you replace a fastener, use ONLY the exact part number for that application. The manufacturer will call out those fasteners that require a replacement after removal. The manufacturer will also call out the fasteners that require thread lockers or thread sealant. UNLESS OTHERWISE SPECIFIED, do not use supplemental coatings (paints, greases, or other corrosion inhibitors) on threaded fasteners or fastener joint interfaces. Generally, such coatings adversely affect the fastener torque and joint clamping force, and may damage the fastener. When you install fasteners, use the correct tightening sequence and specifications. Following these instructions can help you avoid damage to parts and systems.
3. Install new brake caliper guide pin bolts.
Tighten the brake caliper guide pin bolts to 37 Nm (72 ft. lbs.).
4. Install the following components, if removed:
^ The brake hose
^ The new brake hose fitting gaskets
5. Install the brake hose fitting bolt.
Tighten the brake hose fitting bolt to 30 Nm (22 ft. lbs.).
6. Bleed the brake hydraulic system, if the brake hose fitting was removed. Refer to Hydraulic Brake System Bleeding
7. Lower the vehicle.
8. While the engine is running, pump the brake pedal slowly and firmly three times in order to seat the inner and outer pads.
9. Check the brake hydraulic system for leaks.