Brake Pedal Bracket Replacement
REMOVAL PROCEDURECAUTION: Before removing or installing any electrical unit or when a tool or equipment could easily come in contact with "live" exposed electrical terminals, disconnect the negative battery cable to help prevent personal injury and/or damage to the vehicle or components. Unless instructed otherwise, the ignition switch must be in the "OFF" or "LOCK" position.
1. Disconnect the negative battery cable.
2. Remove the left side instrument panel insulator. Refer to Instrument Panel, Gauges, and Warning Indicators.
3. Remove the Electronic Brake Control Module (EBCM). Refer to Antilock Brakes.
4. Remove the following components from the pedal with the bracket. Refer to Stoplamp Switch Replacement.
^ Cruise control release switch
^ Stoplamp and Torque Converter Clutch (TCC) switch
^ Cruise control clutch switch or cruise control clutch anticipate switch
5. Remove the clutch start switch from the brake pedal with the bracket, if equipped with a manual transmission.
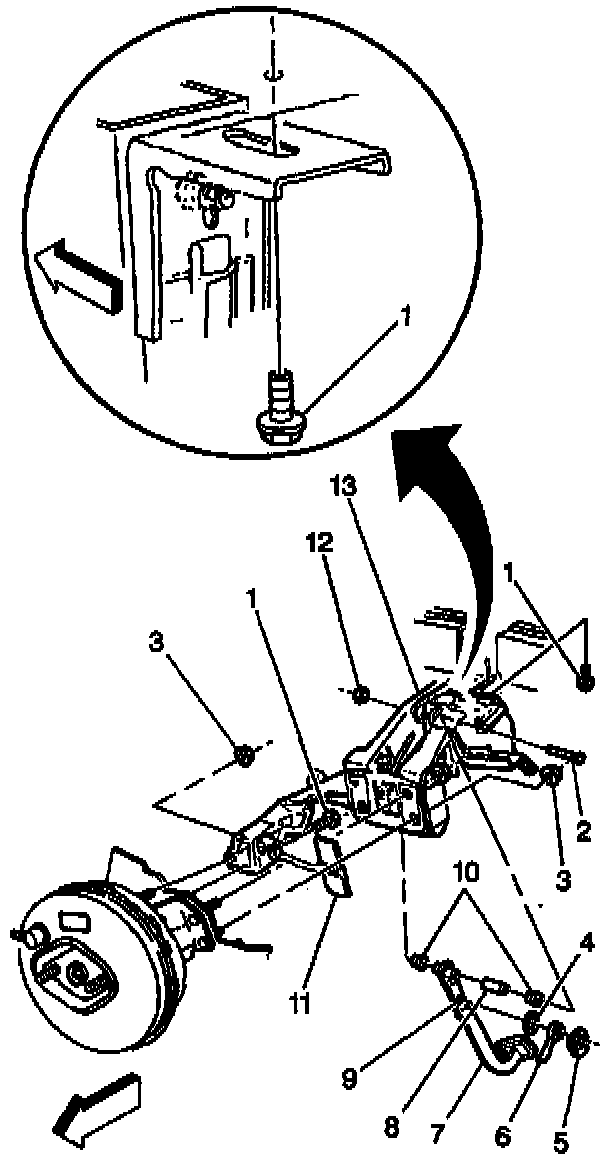
6. Remove the accelerator pedal (11).
7. Remove the following components from the brake pedal pin (9):
^ The brake pedal pushrod pin retainer (5)
^ The brake pedal pushrod (6)
^ The brake pedal pushrod washer (4)
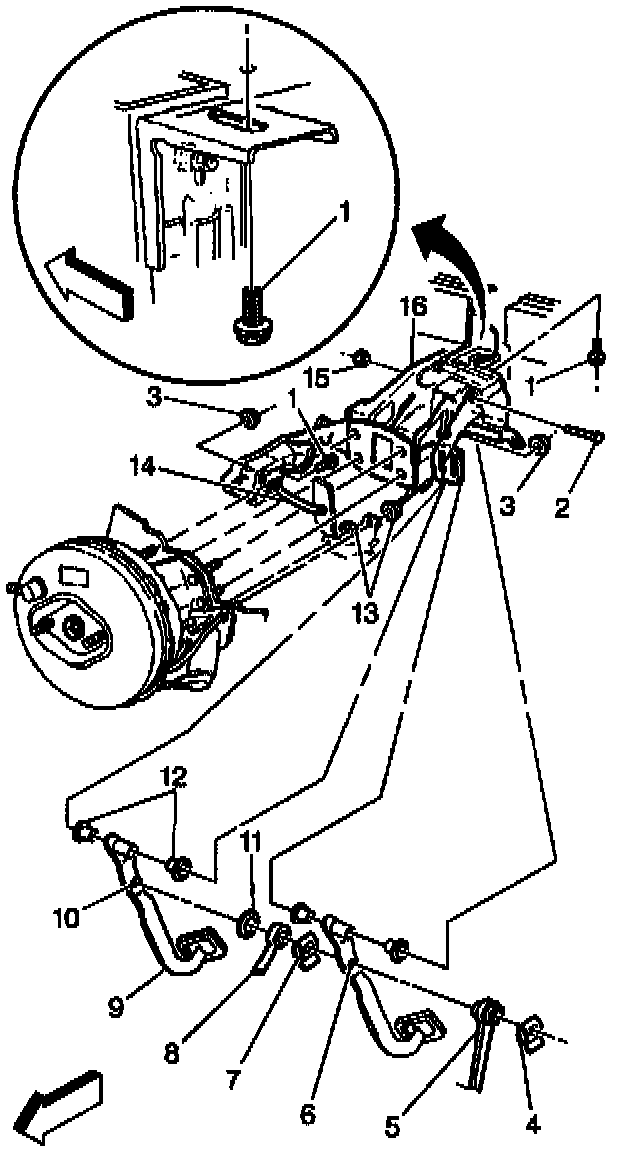
8. Remove the clutch pedal lever pin retainer (4) and the clutch pushrod (5) from the clutch pedal pin (6), if equipped with a manual transmission.
9. Remove the brake pedal nuts (3) and the brake pedal bracket bolts/screws (1).
10. Remove the clutch master cylinder nuts (13), if equipped with a manual transmission.
11. Remove the brake pedal with the bracket (16).
INSTALLATION PROCEDURE
Important: When installing the brake pedal with the bracket, ensure that the dash panel insulator material does not get pinched between the brake pedal and the dash panel.
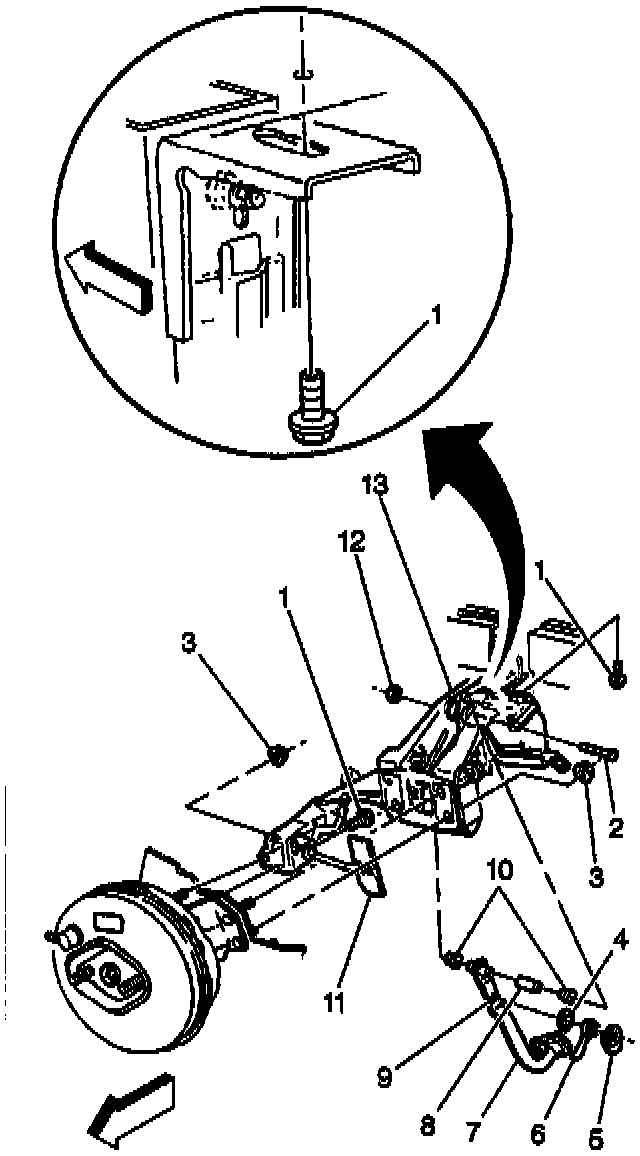
1. Install the brake pedal with the bracket (13).
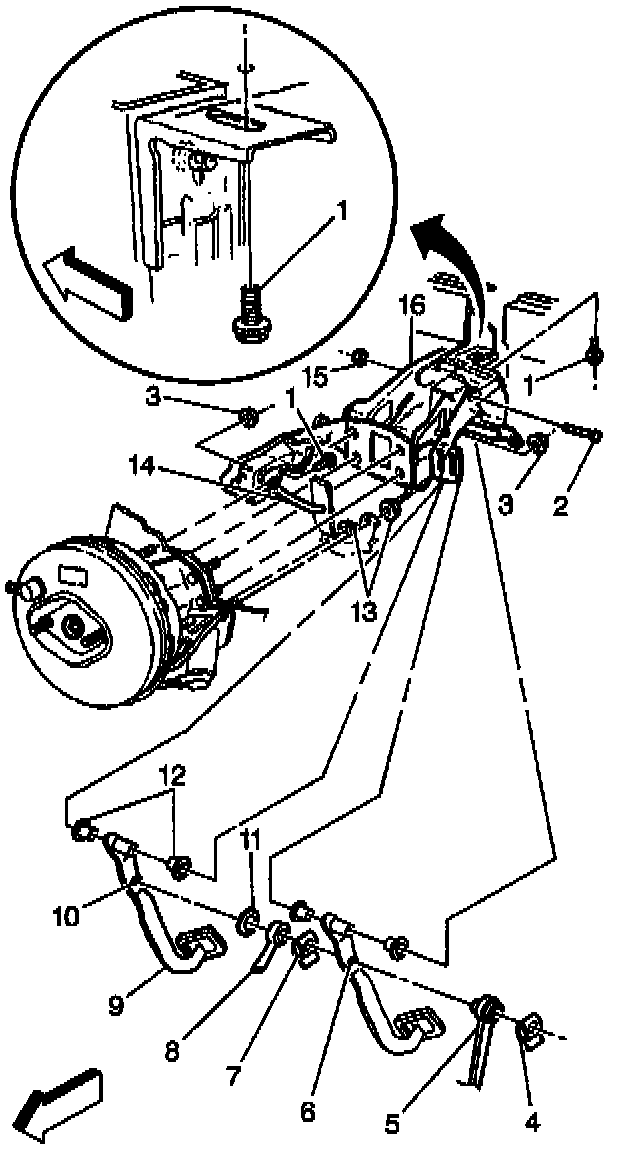
2. Install the clutch master cylinder nuts (13), if equipped with a manual transmission.
NOTICE: Always use the correct fastener in the proper location. When you replace a fastener, use ONLY the exact part number for that application. The manufacturer will call out those fasteners that require a replacement after removal. The manufacturer will also call out the fasteners that require thread lockers or thread sealant. UNLESS OTHERWISE SPECIFIED, do not use supplemental coatings (paints, greases, or other corrosion inhibitors) on threaded fasteners or fastener joint interfaces. Generally, such coatings adversely affect the fastener torque and joint clamping force, and may damage the fastener. When you install fasteners, use the correct tightening sequence and specifications. Following these instructions can help you avoid damage to parts and systems.
3. Install the brake pedal nuts (3) and brake pedal bracket bolts/screws (1).
Tighten:
^ Tighten the clutch master cylinder nuts (13) to 27 Nm (20 ft. lbs.), if equipped with a manual transmission.
^ Tighten the brake pedal nuts (3) to 20 Nm (15 ft. lbs.). Use the following sequence: Inboard upper, Outboard lower, Outboard upper, Inboard lower.
^ Tighten the brake pedal bracket bolts/screws (1) to 25 Nm (18 ft. lbs.).
4. Install the accelerator pedal (14).
5. Lubricate the clutch pedal pin (6) with chassis lubricant.
6. Install the clutch pedal lever pin retainer (4) and the clutch master cylinder pushrod (5) to the clutch pedal pin (6), if equipped with a manual transmission.
7. Lubricate the brake pedal pin (10) with chassis lubricant.
8. Install the following components to the brake pedal pin:
^ The brake pedal pushrod pin retainer
^ The brake pedal pushrod
^ The brake pedal pushrod washer
9. Install the following components to the pedal with the bracket (16). Refer to Stoplamp Switch Replacement.
^ Cruise control release switch
^ Stoplamp and TCC switch
^ Cruise control clutch switch or cruise control clutch anticipate switch
10. Install the EBCM. Refer to Antilock Brakes.
11. Install the clutch start switch to the brake pedal with the bracket, if equipped with a manual transmission.
12. Install the left side instrument panel insulator. Refer to Instrument Panel, Gauges, and Warning Indicators.
13. Connect the negative battery cable.
Tighten the negative battery cable to 15 Nm (11 ft. lbs.).
14. Adjust the following components. Refer to Stoplamp Switch Adjustment.
^ Cruise control release switch
^ Stoplamp and TCC switch
^ Cruise control clutch switch or cruise control clutch anticipate switch