Right Cylinder Head
RIGHT CYLINDER HEAD AND GASKETTOOL REQUIRED: J 36660 Torque Angle Meter
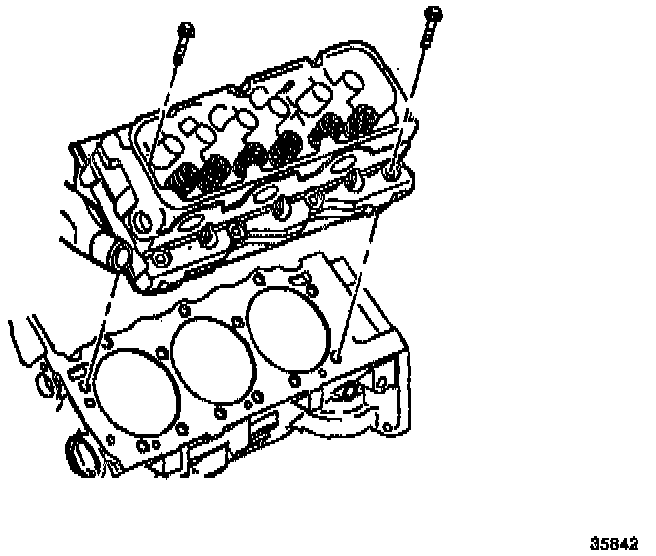
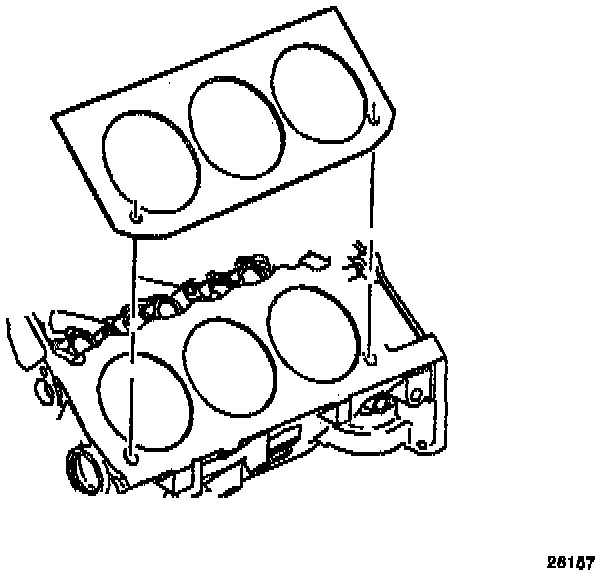
Cylinder Head Bolt Tightening Sequence:
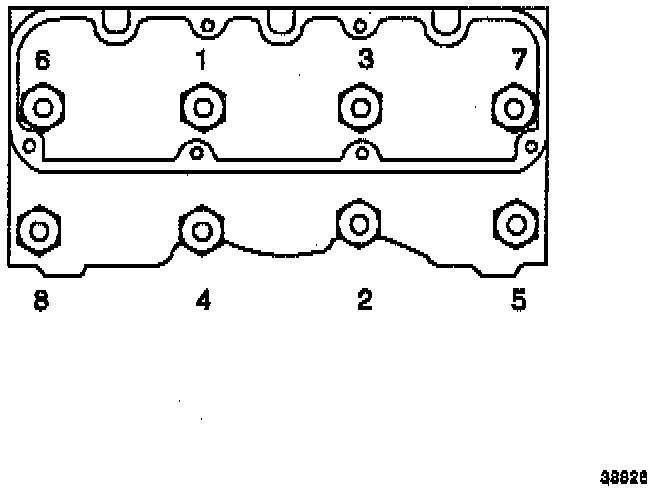
REMOVAL
1. Relieve the fuel pressure.
2. Disconnect the fuel lines at the fuel rail.
3. Drain the coolant. See Cooling System.
4. Remove the upper intake manifold.
5. Remove the lower intake manifold.
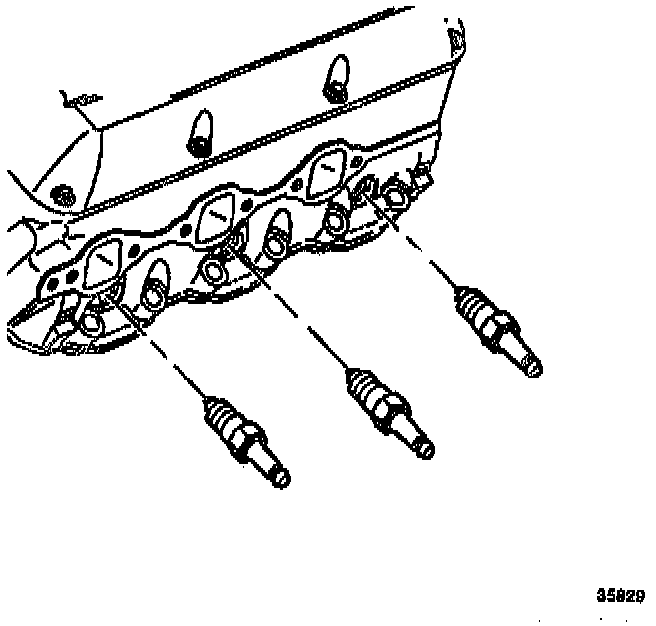
6. Remove the spark plugs.
7. Remove the right exhaust manifold. See Exhaust System.
8. Remove the valve rocker arm cover.
9. Remove the valve rocker arms and the pushrods.
10. Remove the drive belt tensioner.
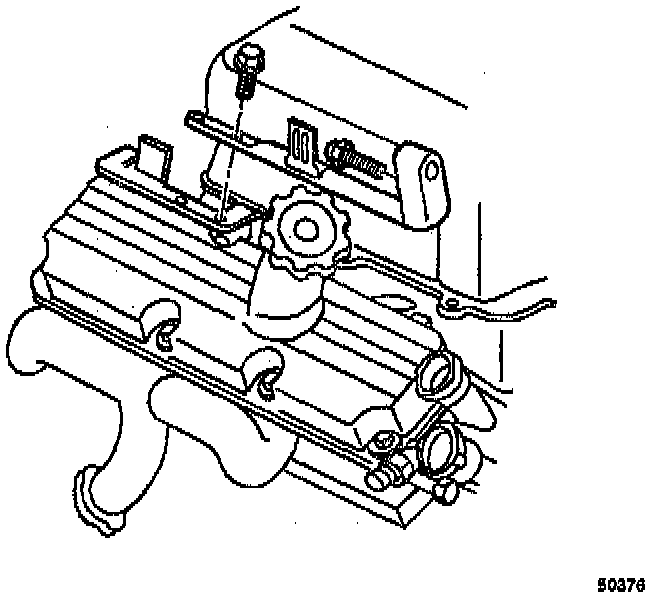
11. Remove the rear generator brace.
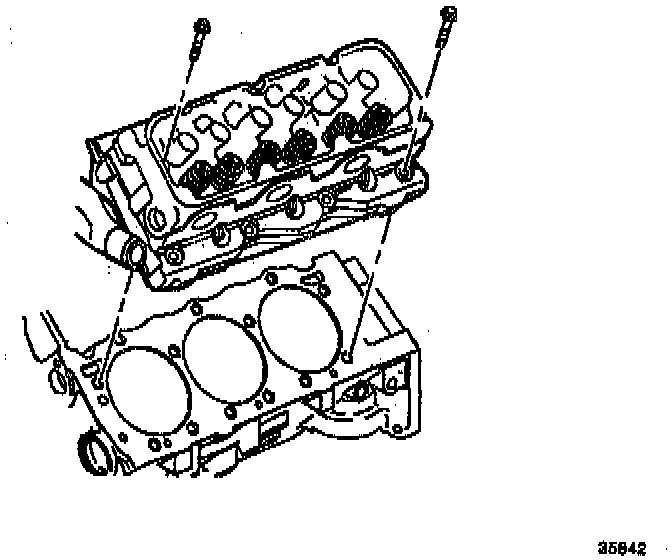
12. Remove the cylinder head bolts.
13. Remove the cylinder head.
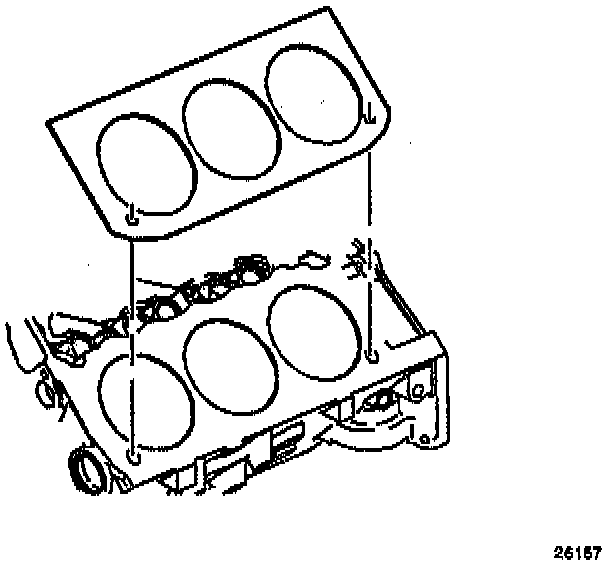
14. Remove the cylinder head gasket.
15. Clean the engine back threads using 7/16-14 tap.
INSTALLATION
CAUTION: The arrow on the gasket must point to the front of the engine. Failure to install the gasket properly will cause gasket failure and possible engine damage.
1. Install the new cylinder head gasket.
2. Install the cylinder head.
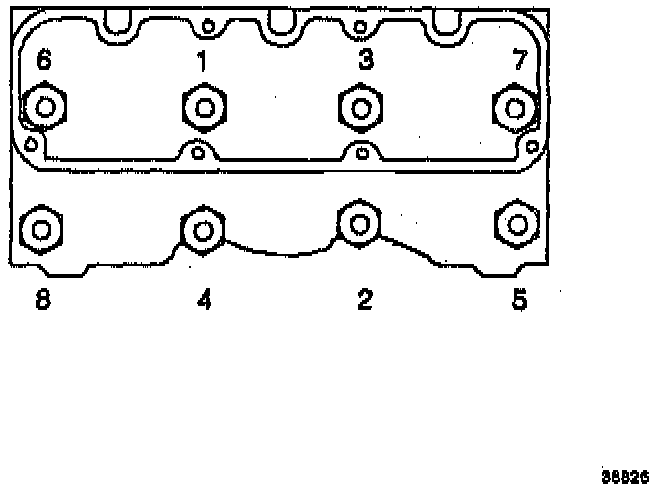
3. Install the new cylinder head bolts.
a. Tighten the cylinder head bolts to 50 Nm (37 ft. lbs.) in sequence.
b. Rotate the bolts to 130 degrees in sequence using the Torque Angle Meter.
c. Rotate the center four bolts an additional 30 degrees in sequence using the Torque Angle Meter.
4. Install the rear generator brace.
5. Install the drive belt tensioner.
6. Install the pushrods and the valve rocker arms.
7. Install the valve rocker arm cover.
8. Install the right exhaust manifold. See Exhaust System.
9. Install the spark plugs. Tighten the spark plugs to 27 Nm (20 ft. lbs.).
10. Install the lower intake manifold.
11. Install the upper intake manifold.
12. Refill the engine coolant. See Cooling System.